Proofing bakery packaging looks simple until the mockup is approved and the real bag arrives with a barcode too close to a seam, a logo trimmed by the weld, or a flavor panel that reads cleanly on screen but disappears in production. That is why the bakery Printed Poly Mailers digital proof checklist matters: it treats the proof as a manufacturing decision, not a decorative preview.
Bakery buyers live with tighter margins for error than many packaging categories. Designs are often crowded with flavor names, ingredients, social handles, promotional copy, and shipping marks. Orders also tend to be time-sensitive. A seasonal launch, a wholesale reset, or a menu update can leave little room for a revision round. One small placement error can create a reprint, stall a shipment, or leave a stack of unusable mailers in storage.
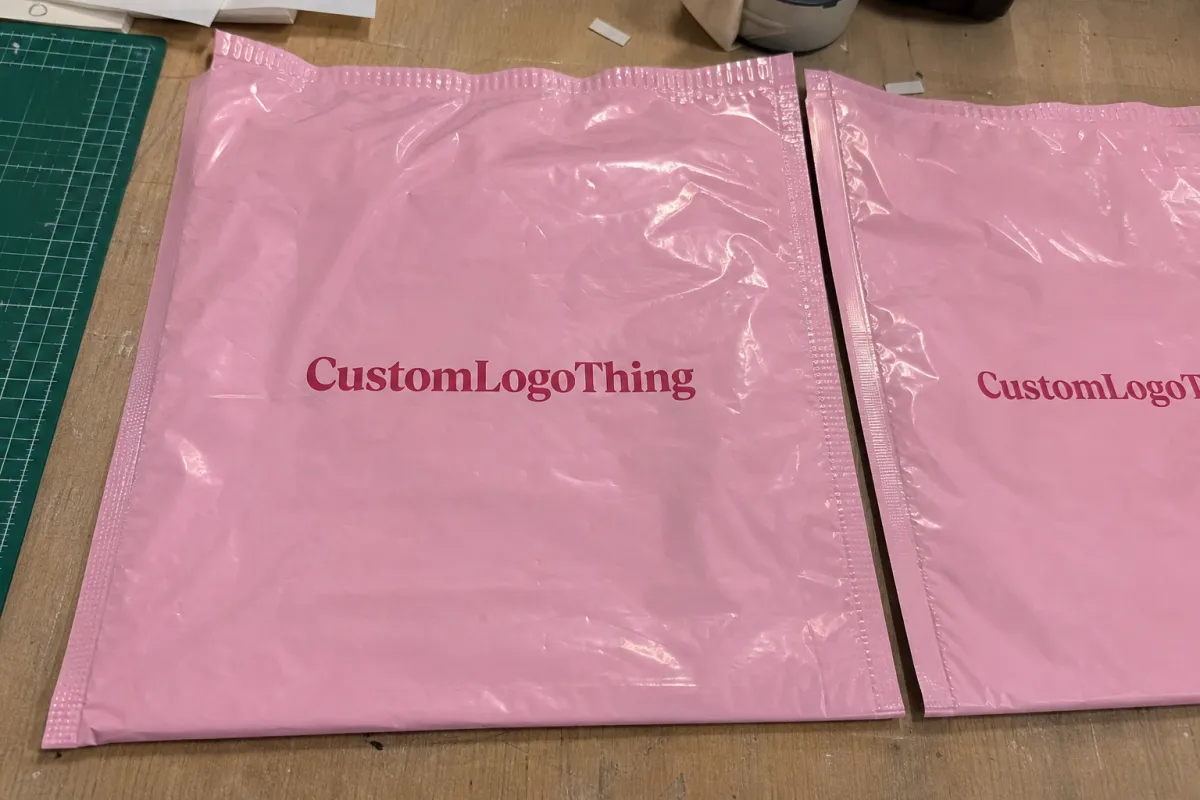
If you are comparing mailer formats, the Custom Poly Mailers page is a useful reference for how size, structure, and print coverage change the final job. It is also a reminder that a proof is only useful when it reflects the actual construction being quoted.
Bakery printed poly mailers digital proof checklist: the hidden failure points
A digital proof is not the finished bag. It is a planning document that helps the buyer and the production team catch problems before film, ink, and heat seal lock the job in. The failures that cause the most damage are rarely dramatic. They are small, quiet, and easy to miss during a quick review.
The usual trouble spots are seam placement, barcode readability, and trim-line drift. A logo can look centered in the PDF and still land too close to a weld once the mailer is formed. A barcode can appear crisp on screen and still lose its quiet zone after folding and printing. A headline can sit comfortably in the proof and still press too near the cut line on the actual bag.
“A proof is a map, not the package.”
That distinction matters more for bakery brands than for many other buyers because the content on the mailer is often dense. A small package may need the product name, brand mark, barcode, QR code, ingredients, and shipping details all on one panel. If the review only checks color, the job can still fail at the press or on the packing line.
A practical checklist starts with the parts that can break the job mechanically. Text and codes need distance from folds. Artwork needs enough breathing room around the trim. Small type should be readable at actual size, not just enlarged in a presentation file. Glossy poly can make fine copy feel tighter than it did on a monitor, and that difference grows when the layout is crowded.
- Seam zones: keep critical text and codes away from welds and fold lines.
- Trim margins: leave enough safe space so nothing important rides the cut line.
- Scan areas: review barcodes and QR codes at their real printed size.
- Material behavior: glossy or matte poly changes how small type and color read in hand.
For a broader packaging program, the Custom Packaging Products catalog makes it easier to compare mailers with labels, cartons, and inserts so the print system fits the way the bakery actually ships orders.
Material choice matters too. A 2.5 mil mailer may work for lighter cookies, single pastries, or slim promotional orders. A 3 mil construction usually gives a better margin for heavier contents, sharper corners, or shipments that will be handled more roughly in transit. That extra thickness can cost a little more, but it often reduces split seams and complaints later. Buyers sometimes focus on print quality first and bag strength second; in practice, the bag has to survive the journey before the artwork matters.
How the proof process and turnaround actually works
Most suppliers follow a familiar sequence. Artwork comes in, the file is preflighted, a digital mockup is built, corrections are requested if needed, and the final proof is approved before production enters the queue. The order sounds routine, but each step can add time if the file is incomplete or the instructions are vague.
- Artwork upload: the buyer sends print-ready files, logos, copy, and notes about size or finish.
- Preflight review: the team checks image resolution, font outlines, bleed, and panel placement.
- Digital mockup: a layout is created to show how the graphics sit on the actual bag.
- Revision round: the buyer marks changes, usually for copy, placement, or color correction.
- Final approval: the approved proof becomes the production reference.
- Queue and print: the order enters production scheduling, which can shift with shop load and ship date.
For clean artwork, a proof may come back in 24 to 48 hours. If the design needs white ink, multiple revisions, or a custom bag size, the window stretches. Add another business day or two for each revision cycle if the changes are substantial. Production lead time usually starts after final approval, not after the first upload, so the proof stage needs its own place in the calendar.
The biggest delays are usually ordinary ones: low-resolution logos pulled from a website, missing source files, vague print instructions, or a late request to move copy after the proof has already been built. Rush work is possible, but it is priced that way because the job jumps the queue and compresses the review cycle. If a launch is tied to a store opening or a holiday drop, say so early. That gives the supplier a real chance to quote the actual turnaround instead of guessing.
There is also a useful distinction between proof time and print time. Buyers sometimes assume the moment they approve the proof, the order is already in motion. In reality, final approval is only one checkpoint. Materials still need to be staged, print settings confirmed, and the job inserted into the schedule. If a supplier promises a fast proof but a slow run, or the reverse, ask which part of the process is being timed. That question saves more frustration than most people expect.
Cost, MOQ, and quote drivers that change unit pricing
Bakery mailer pricing is shaped by a few hard variables, and most of them are visible before the proof is approved. Quantity is the biggest one. Bag size matters too. So do print coverage, the number of colors, and whether the artwork needs a white underbase to keep bright color alive on dark film. The bakery Printed Poly Mailers digital proof checklist should sit next to the quote sheet, because the proof and the price are tied together.
MOQ exists because setup costs do not scale line by line. Plates, screens, file prep, press setup, and spoilage all get spread across the run. A small test order can be the right move for a new menu or a limited promotion, but the unit price rises because the fixed costs are carried by fewer pieces. Larger runs usually lower the per-bag price, although heavy coverage, special effects, or multiple revisions can push it back up.
| Order profile | Typical MOQ | Typical unit price | Main quote drivers |
|---|---|---|---|
| Test run | 1,000-2,000 pieces | $0.42-$0.65 | One-color art, standard size, minimal coverage |
| Seasonal launch | 3,000-5,000 pieces | $0.18-$0.32 | Two-color print, revised proof round, moderate ink coverage |
| Repeat volume | 10,000+ pieces | $0.10-$0.22 | Stable artwork, efficient press time, simpler layout |
Those ranges are typical, not fixed promises. A wider bag, a custom gusset, metallic ink, or dense background coverage can move the quote quickly. White ink on dark poly often costs more because it needs another pass or a heavier laydown. Even the delivery location matters, because freight can change the landed price more than the print spec itself.
For accurate quoting, send exact dimensions, quantity, artwork format, print colors, and the delivery zip code. If the proof round is included, ask how many revisions are covered. If a sample is needed before the full order, confirm whether it changes the unit cost. If you want to compare production methods or see what else the shop can build, the Manufacturing Capabilities page helps you line up options before you commit.
One buyer observation that comes up often: the cheapest quote is not always the least expensive order. A slightly higher unit price on a bag that prints cleanly and avoids a second proof round can beat a bargain quote that keeps changing. The hidden cost in packaging is rarely the line item itself. It is the delay, the rework, and the staff time spent chasing corrections.
Artwork, color, and barcode checks that protect the brand
This is the part many buyers skim, and it is usually where the expensive errors hide. Start with the layout, not the color. Check the safe margins, bleed, logo placement, and seam proximity first. If branding or text is too close to the weld, the proof should be corrected before anyone debates shade.
Then inspect the barcode and any QR code. A code that prints beautifully but fails to scan is not a design issue; it is a packaging failure. Keep the quiet zone clear, avoid placing codes over busy backgrounds, and confirm the size at actual output dimensions. Small retail marks often need more contrast than a presentation mockup suggests, especially on glossy film.
Color deserves attention, but not the kind buyers sometimes expect from a monitor. Digital color can drift from the final bag because screens are backlit and poly film reflects light differently. Brand-critical shades should be compared against Pantone references or a previously approved sample whenever possible. If your bakery has a signature red, green, or warm brown, ask for a note in the proof that identifies how the shop is matching it. If the file uses white ink, ask how the underbase will behave on the chosen film color.
The printed substrate changes the result as much as the artwork does. A matte finish softens reflections and can make text feel steadier under store lighting. Glossy film often reads brighter, but it also shows fingerprints and light glare more readily. Transparent or frosted stock can look premium, yet it demands stricter contrast control. None of that is visible in a flat proof unless the buyer asks the right questions.
Two standards are worth keeping in mind. For transit performance, the testing ideas behind ISTA are useful because they focus attention on shipping stress, not just appearance. For any paper insert or carton that rides with the mailer, FSC certification is a clear benchmark to check if sustainability claims matter to your buyer base. Those references do not replace a proof review, but they sharpen it.
- Safe zone: keep critical art several millimeters away from cut lines and welds.
- Barcode contrast: avoid busy backgrounds and thin reversed-out lines.
- Minimum text: small copy often needs to be 6 to 8 pt to stay readable on film.
- Color reference: use Pantone targets or prior approved samples for brand-critical tones.
Step-by-step proof review before you approve the file
If you want a cleaner approval process, review the proof in the same order every time. A repeatable system catches more mistakes than a casual visual scan, and it keeps people from assuming someone else already checked the details. That matters on bakery packaging, where a small copy edit can ripple into a scheduling problem.
- Confirm the job basics: quantity, SKU, bag size, print colors, and ship-to address.
- Match the panel layout: front, back, seam side, and seal area should all be correct.
- Read the copy line by line: flavor names, phone numbers, web addresses, and promo language should match the source file.
- Check production marks: bleed, trim, registration, and barcode quiet zones need to stay clear.
- Verify brand color intent: compare the proof against Pantone notes or prior approvals.
- Save the version: archive the approved PDF with date, version number, and approver name.
A two-person sign-off system helps on higher-volume bakery orders. One person should focus on brand accuracy, while the other focuses on production detail. They will not catch the same things, and that is the point. A marketing lead may spot a stale tagline immediately, while an operations lead may notice that the bag size does not match the pallet plan.
If a revision is not documented, it does not exist for production.
That is why version history matters. Mark changes directly on the proof or in one clean notes file, then request a corrected proof only after every change is recorded. Avoid sending scattered comments across email, chat, and screenshots. One source of truth keeps the approval trail readable if there is ever a question after the job ships.
It also helps to check the proof with the real packing workflow in mind. A mailer that looks elegant on a screen may be awkward to fill by hand if the opening is too narrow or the seal area crowds the product. Likewise, a design that reads well at arm’s length may become hard to scan once tape, labels, or outer cartons are added. Packaging is a system, not a single file.
Common mistakes that create reprints, delays, and chargebacks
The most expensive mistake is approving based on screen appearance alone. Monitors vary, color settings vary, and neither one tells you how the ink will behave on poly film. A bag can look polished on a laptop and still print with a line too close to the fold or a barcode too dense to scan.
Another common miss is forgetting to update a date, phone number, flavor callout, or artwork version after the quote is already locked. That sounds small. It is not. If the wrong copy goes to press, the job can be delayed, or the bakery may need a partial reprint if the bags are already in circulation.
- File drift: using an old logo or stale SKU after the first proof round.
- Size confusion: approving a bag that does not match the quoted dimensions.
- Layout blindness: missing seam overlap, fold placement, or trimmed text.
- Timeline assumptions: treating the proof as production-ready before revision time is done.
- Hidden cost creep: adding changes after approval and expecting the original unit price to hold.
Chargebacks usually show up when the product was shipped with the wrong artwork, the wrong quantity, or a spec that does not match the purchase order. Retail buyers and distributors are less forgiving than many small brands expect. If a barcode does not scan or the packaging looks inconsistent across a seasonal run, that mistake can cost more than the print invoice.
Lead time is another trap. Buyers often assume proof approval equals production start. It does not. Setup, queue position, and material availability all affect the calendar. If a job needs a revision round, the schedule can move even if the artwork changes are minor. The proof is the checkpoint. It is not the finish line.
One more practical risk: overdesigning a mailer for a format that is already constrained. Heavy photo backgrounds, multiple callouts, and extra compliance copy can crowd a small panel until the whole thing becomes hard to read. In bakery packaging, clarity usually beats decoration. A cleaner hierarchy does more for the brand than a dense layout trying to say everything at once.
Expert approval tips and next steps before production
The cleanest approval process has one final owner, one archive folder, and one written note that confirms the exact version being printed. That sounds simple because it is. The less scattered the approval trail, the less likely the job is to drift between departments or get re-opened after sign-off. On a Bakery Printed Poly Mailers Digital Proof Checklist, simple discipline saves real money.
Here is the practical sequence to use before production:
- Assign one approver: this person owns the final yes or no.
- Lock the archive: save the signed proof, quote, and spec sheet in one place.
- Ask for a checkpoint: request a sample, press-time confirmation, or ship-date update if the launch matters.
- Match every document: the proof, quote, and purchase order should describe the same bag.
For bakery launches tied to a store opening, a holiday drop, or a wholesale reset, a sample can be worth the extra time. It gives you one more chance to judge seal performance, handle feel, and real-world color before the full run is committed. If the design is simple, you may not need that extra round. If the campaign is high visibility, the sample is cheap insurance.
One more detail: confirm who owns the final file after approval. If the designer, marketer, and operations team all hold different versions, confusion follows. The approved proof should be the only version anyone can print from. If a fresh audit of materials is needed, the Custom Packaging Products page and the Manufacturing Capabilities page are useful reference points before you lock the order.
Use the bakery printed poly mailers Digital Proof Checklist one last time against the quote, the bag dimensions, and the artwork file. If those three things match, approval is usually straightforward. If one of them does not, stop and correct it first; the cost of a careful revision is almost always lower than the cost of a reprint.
What should I check first on a bakery printed poly mailers proof?
Start with dimensions, panel layout, and seam placement before reviewing colors or graphics. Confirm the logo, copy, and barcode sit far enough from cut lines and folds. Then check that the proof matches the quoted quantity and bag style so the job does not shift after approval.
How long does the digital proof process usually take?
Simple, ready-to-print files can move quickly, while incomplete artwork or special print effects add review time. Expect extra time if the design needs revisions, color correction, or a second internal approval. A tight launch date should be shared early so turnaround can be estimated against the production queue.
Does changing the proof affect MOQ or unit cost?
Yes, changes to size, print colors, or finish can alter setup complexity and raise the unit price. MOQ usually matters because smaller runs spread setup costs across fewer bags. If the order changes after the quote, ask for a refreshed estimate before approving the final proof.
Can I trust color accuracy from a bakery mailer digital proof?
Use the proof to judge layout and relative color direction, not exact on-screen color matching. For brand-critical shades, ask for Pantone references or an approved sample whenever possible. Review white ink, dark backgrounds, and fine text carefully because those elements can shift most on poly film.
What details should I send for an accurate quote and proof?
Provide bag dimensions, quantity, artwork files, print colors, and any special finishing requirements. Include the deadline, delivery location, and whether you need revisions or a sample before production. Add brand notes such as logo rules, barcode specs, or copy that must remain unchanged.


