Jewelry Printed Poly Mailers Physical Sample Checklist starts with a simple fact: a mockup is not a mailer. A flat proof can hide color shift, weak seals, thin film, and closures that look fine on screen but misbehave in the hand. For jewelry orders, that gap matters more than it does for ordinary shipping because the branding is smaller, the presentation is cleaner, and the customer notices flaws faster.
If a printed poly mailer is carrying rings, earrings, bracelets, or small boxed sets, the sample has to survive more than a glance. It should be packed, sealed, stacked, labeled, and handled the way the real order will move through fulfillment. That is the practical value of this jewelry Printed Poly Mailers physical sample checklist: one physical sample should tell you whether the run is safe or whether you are buying a problem.
The sample is where mailer problems show up first
Screen proofs are useful, but they do not tell the full story. A supplier can send a clean digital mockup and still miss the issues buyers complain about most: color drift, fuzzy small text, a film that feels too soft, or a seal that peels when it should stay shut. Physical samples expose those problems quickly.
Jewelry packaging is unforgiving for a boring reason: the products are small and the branding is usually tiny. A 6 mm logo, a thin metallic line, or a pale blush background can look polished on a monitor and muddy on plastic film. That is why a jewelry Printed Poly Mailers physical sample checklist has to focus on material behavior, not just artwork approval.
The other reality is shipping stress. A mailer that looks fine on a desk can fail after packing, stack pressure, sorting belts, and a few days in transit. If you are sourcing for a jewelry brand, a subscription box, or a small e-commerce store, you are not buying pretty packaging. You are buying a bag that survives handling without making the brand look cheap.
For teams comparing packaging formats, it helps to review the broader assortment in Custom Packaging Products and then narrow down to Custom Poly Mailers once the mailer format is clearly the right fit.
There is a second reason samples matter: once production starts, the cost of a mistake rises fast. A print that is off by a shade, a flap that seals unevenly, or a bag that runs short by a few millimeters can affect every unit in the order. You can adjust a proof in minutes. You cannot quietly rescue a full run that was approved on assumptions.
For brands that need a shared vocabulary with suppliers, the Packaging School / packaging education resources are a useful reference point, especially when discussing film properties, print methods, and transit expectations.
What a sample should match before you approve anything
A true sample is not just close enough. It should match the final run on the details that affect price, appearance, and performance. That means film thickness, bag dimensions, closure type, seal strength, print coverage, and finish. If the sample uses 60 micron film and production is quoted at 50 micron, you are not evaluating the same product. You are comparing a promise to a different bag.
Jewelry packaging often needs tighter tolerances than general shipping mailers because the contents are small. A pouch, insert card, tissue wrap, or rigid box can reveal a size mismatch immediately. A bag that is 5 mm too short may still work, but it can stretch the seal, distort the print area, or slow packing enough to matter at scale.
Color is another place where buyers get sloppy. Do not approve from a flat PDF and hope for the best. Check logo placement, white ink opacity, edge registration, and background tone on the actual film. White ink on plastic is rarely as opaque as people expect, and metallic colors can shift depending on substrate and print method. A soft gold that looks elegant in a mockup can read as dull beige on the real bag. That is not a tiny detail. That is the brand.
There is also a difference between a production-like sample and a sales sample. A sales sample is often built to look appealing. A production-like sample is built to prove the factory can repeat the spec without hand-holding. Ask which one you are holding. If the supplier hedges, that tells you something.
For buyers who want a more technical way to frame quality requirements, asking for common test references such as ASTM D882 for tensile properties or ASTM D1894 for coefficient of friction can help keep the conversation grounded. You do not need to become a lab technician, but you do need enough shared language to prevent the order from drifting.
Materials matter here too. Most Printed Poly Mailers for jewelry use polyethylene films in the 50-60 micron range, though some brands choose thicker constructions for added stiffness or better puncture resistance. Thicker is not automatically better. A heavier film can improve feel and protection, but it may also raise cost, reduce flexibility, and change how the bag folds on automated packing lines.
Jewelry Printed Poly Mailers Physical Sample Checklist
Use this jewelry printed poly mailers physical sample checklist point by point. It is much easier to catch defects in a structured pass than to rely on a general impression that the sample looks fine.
- Print clarity: Check small text, thin lines, gradients, and any metallic or pastel tones. If the logo has hairline detail, view it at arm's length and under bright light.
- Film feel: Fold and flex the bag. It should feel dense enough for the job, not papery or overly stretchy. A premium mailer should not feel like a grocery sack with branding.
- Thickness and puncture resistance: Compare the sample to the spec sheet, and press at corners and seams. Jewelry boxes can have sharp edges, especially with rigid insert cards.
- Closure and seal: Open, reseal, and tug the flap or zipper area several times. Weak adhesive, poor alignment, or a sloppy closure line usually shows up fast.
- Size fit: Pack the real item, not an empty bag. Include the pouch, tissue, thank-you card, or box you plan to ship, because a close fit on paper can become annoying in production.
- Finish: Decide whether the surface should be glossy, matte, or soft-touch. Then verify that the finish is even and free of scuffs, haze, or patchy spots.
- Label area: If you apply shipping labels or barcode stickers, make sure the print area leaves enough clean space and the surface accepts adhesion properly.
- Packaging consistency: Review how the sample was packed and labeled. A factory that sends organized, clearly identified samples is usually more disciplined in production, though not always.
- Transit behavior: Shake the packed sample, stack a few units on top, and inspect the corners again. A bag can pass a desk test and still wrinkle badly under pressure.
- Seal integrity after handling: Leave the packed sample closed for a day, then reopen and check whether the adhesive edge lifted or collected dust.
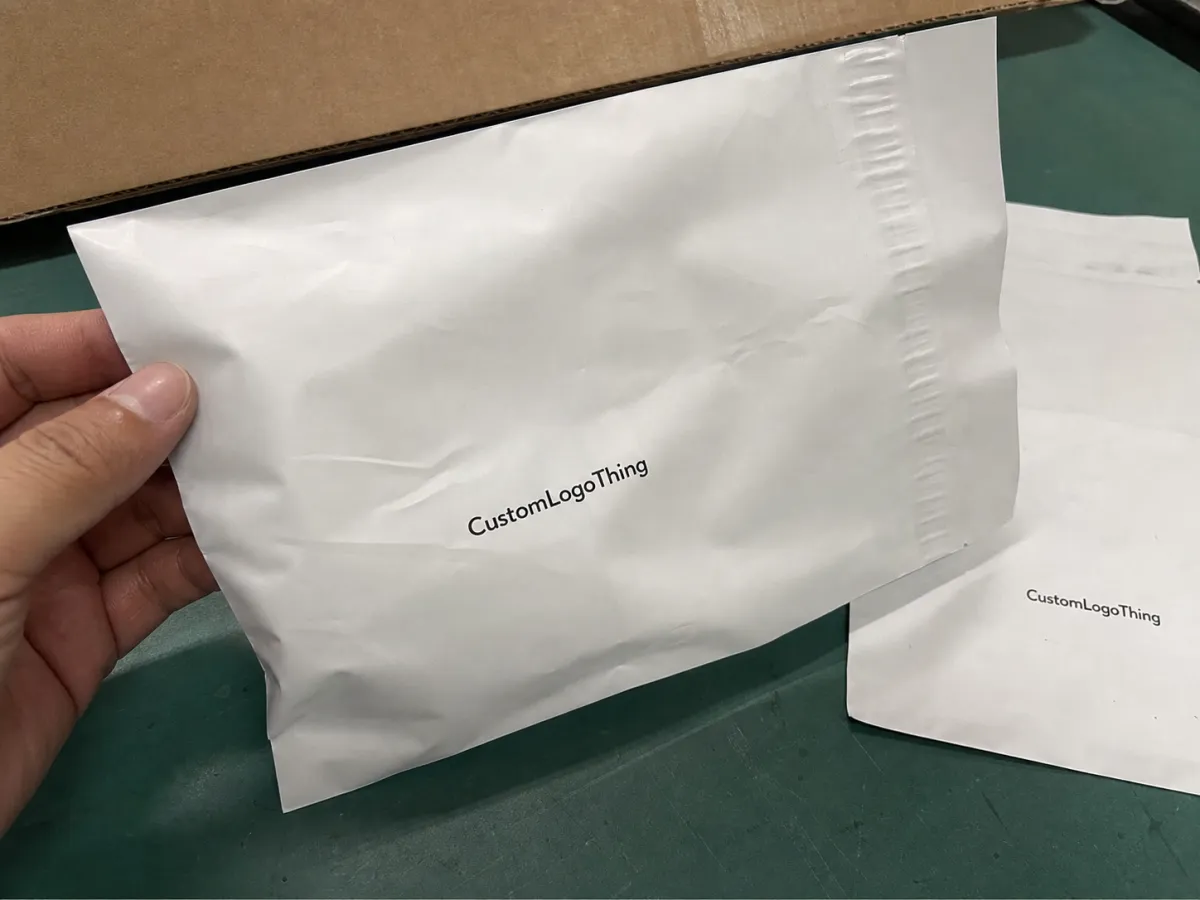
The sample looked good in photos, but the first packed bag told the real story. That is the sort of outcome that shows up after a rushed approval. Photos are not enough. The bag has to pass a hands-on test.
For sustainability claims or recycled-content language, do not guess. If any paper component is involved, ask for documentation from FSC. For packaging buyers, paperwork is part of the product, not a bonus.
One practical habit: weigh the packed sample and note the exact dimensions with a ruler, not a phone app. That sounds fussy until the final run is slightly different and every box on the packing table starts feeling off. The same applies to print position. A logo that is centered by eye can still be 2-3 mm off, which may not matter on a billboard but does matter on a small mailer.
If the design includes matte lamination, soft-touch coating, or metallic ink, inspect the surface under different light. Some defects only appear when the bag is tilted. Fingerprint marking, scuffing, and uneven sheen are common on premium finishes, especially if the protective layer is thin or the curing time was rushed.
Cost, MOQ, and quote variables that change unit price
Printed poly mailer pricing moves for a few predictable reasons. Material thickness is one. Bag size is another. Then you have ink coverage, number of print colors, finish, closure style, and extras like tear strips, dual seals, or custom perforations. More complexity almost always means more cost.
MOQ matters just as much. Lower quantities usually carry higher unit pricing because setup, plate work, color matching, and sample handling get spread across fewer bags. A small run might land around $0.25-$0.55 per unit for a printed jewelry mailer depending on size and coverage, while larger runs can move lower if the spec is simple and the order quantity is high enough. Samples themselves often fall in the $35-$120 range before shipping, and more detailed prototype work can cost more.
| Option | Typical sample cost | What you are really paying for | Best for |
|---|---|---|---|
| Basic production-like sample | $35-$70 | Standard materials, basic print check, simple closure review | Simple artwork and straightforward sizes |
| Detailed pre-production sample | $70-$120 | Closer color matching, tighter size checks, more careful finishing | Brand-sensitive jewelry packaging |
| Multiple revision samples | $120-$250+ | Rework time, reproofing, remakes, and extra shipping | Complex logos, premium finishes, or new suppliers |
Cheaper quotes deserve extra skepticism, not applause. A low number can hide thinner film, looser tolerances, or surprise charges for revisions and shipping. That does not make the supplier bad. It just means the quote is incomplete. Ask what is included, what is not, and whether the sample reflects the same spec as the final run.
For buyers comparing suppliers, use the sample phase to pressure-test the real economics. If one supplier charges a little more but gives you a stable sample, clear proof notes, and fewer revision cycles, that often costs less overall than a bargain quote that burns two extra rounds of remake time.
It also helps to confirm whether the quoted price assumes one-side printing or both sides. Some suppliers quietly price a simple front print and then add cost for back printing, spot varnish, or special finishes later. The same applies to custom bag dimensions. If a supplier says a standard size is available, verify whether the size was actually chosen from stock or whether it still requires a custom die and a new setup fee.
Process and lead time from artwork proof to sample approval
The cleanest path is usually straightforward: artwork submission, digital proof, sample production, shipping, physical review, revisions if needed, and final approval. The trouble starts when any step gets vague. Missing dimensions, unclear color targets, or incomplete logo files are the fastest way to lose days.
A realistic sample timeline often looks like this:
- Proofing: 1-3 business days if artwork is complete.
- Sample production: 3-7 business days for a standard setup, longer if the finish or print is complex.
- Shipping: 2-5 days domestically, 4-10 days or more internationally depending on route and customs.
- Revision cycle: add another 5-10 business days if you request changes after the first sample.
That means a fast domestic path can land in about 1-2 weeks if the design is simple and the supplier is responsive. An overseas sample path can easily stretch to 2-4 weeks once shipping and revision time are included. Neither is unusual. Buyers get in trouble when they expect the faster number and forget the correction cycle.
If the order will eventually need a full production release, keep the sample approval file tight. Send exact dimensions, print-ready files, color references, closure preferences, and a signed spec sheet with the first request. That cuts down on the annoying back-and-forth where everyone claims they thought the other side understood the size.
For a broader packaging view, transit testing references from ISTA are worth a look. Their standards are useful when a mailer will ship in bulk or move through multiple handling steps before it reaches the customer: ista.org.
Lead time also depends on the printing method. Digital printing can be faster for short runs and revisions, while gravure or flexographic setups may take longer to prepare but can be more efficient on larger orders. If the supplier does not explain the method, ask. Print method affects color behavior, minimum line thickness, and how expensive a revision becomes.
And yes, the artwork matters, but the workflow matters more. A supplier can only match what you define. A vague approval is just a polite way to invite rework.
Common sample mistakes that create expensive reorders
The most expensive mistake is approving from photos alone. Phone cameras flatten color, soften edges, and hide surface texture. A blush pink can read warmer on a screen. A matte finish can look glossier. A small logo can appear sharper than it actually is. If you never touch the sample, you are guessing.
Another common miss is checking only the artwork and ignoring performance. The print can be perfect and the bag can still fail because the seal is weak or the film punctures too easily. In a jewelry order, that is a bad trade. The bag is there to protect the product, not just advertise it.
Buyers also get burned when they do not test with the real insert setup. A mailer that fits an empty ring box may not fit the box plus tissue plus insert card plus shipping label. Then the packer has to squeeze, the seal shifts, and the final appearance gets sloppy. It is a small difference that creates a daily nuisance on the packing line.
Then there is the classic revision problem: the first sample shows a defect, the buyer writes a note, and nobody confirms that the change was actually made before approving production. Three weeks later, the final run has the same issue. That is not bad luck. That is missing paperwork.
Here is the blunt version:
- Do not approve based on a single photo.
- Do not test the bag empty and assume the job is done.
- Do not rely on memory for color, size, or finish.
- Do write down the exact approved spec.
- Do keep the sample with the order file so later disputes are easier to resolve.
Another easy mistake is forgetting about machine compatibility. If the mailers are packed by hand, a slightly softer film may be fine. If the line uses semi-automated packing or label application, the same film may wrinkle, stick, or slide in ways that slow production. A sample should tell you how the bag behaves in your actual process, not an idealized one.
If the sample is for a premium jewelry brand, keep the bar higher than good enough. Customers notice the difference between a deliberate package and a bag that just happened to pass inspection.
Next steps: turn the sample into a production-ready order
Once the sample passes, do three things immediately. First, mark every pass/fail item on the bag itself or on a printed sheet. Second, record exact dimensions, color notes, finish details, and any special observations about seal feel or film stiffness. Third, ask the supplier to confirm those specs in writing before the purchase order goes out.
If the order is large, brand-sensitive, or tied to a launch, ask for a small pre-production quantity or keep a signed master sample for comparison. That gives you a physical reference if questions come up later. It also makes quality disputes much easier to settle, which is useful when everyone is suddenly sure they approved something else.
Compare the sample against your actual packing workflow, not your ideal one. Use the real packing table, real inserts, and real labels. If the bag works there, you have a much stronger signal that production will be safe. If it only works in theory, keep testing.
That is the practical value of a jewelry printed poly mailers physical sample checklist: it turns a vague packaging decision into something you can inspect, measure, and approve with less risk. A good sample does not just look right. It earns its place in production.
One final caution: if you expect retail-level presentation, do not let the finish, print, and closure all compete for attention. Strong packaging usually has one clear focal point. For jewelry mailers, that might be the logo, the color field, or the tactile feel of the surface. Too many decorative effects can make a small mailer look busy instead of premium.
What should I check first on a jewelry printed poly mailer sample?
Start with print clarity, bag size, and closure strength, because those three issues usually trigger the fastest complaints. Then test the sample with the actual jewelry item or insert you plan to ship, not an empty bag on a desk.
How many physical samples should I request before approving a poly mailer order?
Request at least one production-like sample, and ask for a second version if you need to compare color, thickness, or finish. If the design is high value or the print is detailed, multiple samples are cheaper than one bad full run.
Does sample approval guarantee the final jewelry mailers will match?
No. It reduces risk only if the factory follows the same specs and materials in production. Keep a signed master sample and written spec sheet so the final run has a real reference, not a memory.
What affects the cost of a jewelry printed poly mailer sample the most?
Material thickness, number of print colors, bag size, finish, and special features like tear strips or custom closures usually drive pricing. Lower quantities and repeated revisions can also raise the total sample cost quickly.
How do I compare turnaround times between suppliers for printed poly mailer samples?
Ask each supplier to separate proof time, sample production time, and shipping time so you can compare the real schedule. The fastest quote is not always the fastest delivery if artwork corrections or remake cycles are likely.


