A cap can look perfect on a screen and still fail the moment embroidery starts pulling on a curved front panel. Thread has weight. Fabric has memory. A mockup does not show either one. That gap is why the Embroidered Baseball Caps sample checklist matters: it catches stitch distortion, fit issues, and quote surprises before they become a bulk-order problem.
For buyers, the sample is not decoration. It is the proof point for workmanship, comfort, and production discipline. If the sample is vague, rushed, or approved from screenshots alone, the finished run usually inherits the same problems, only at a larger quantity and a much less forgiving price.
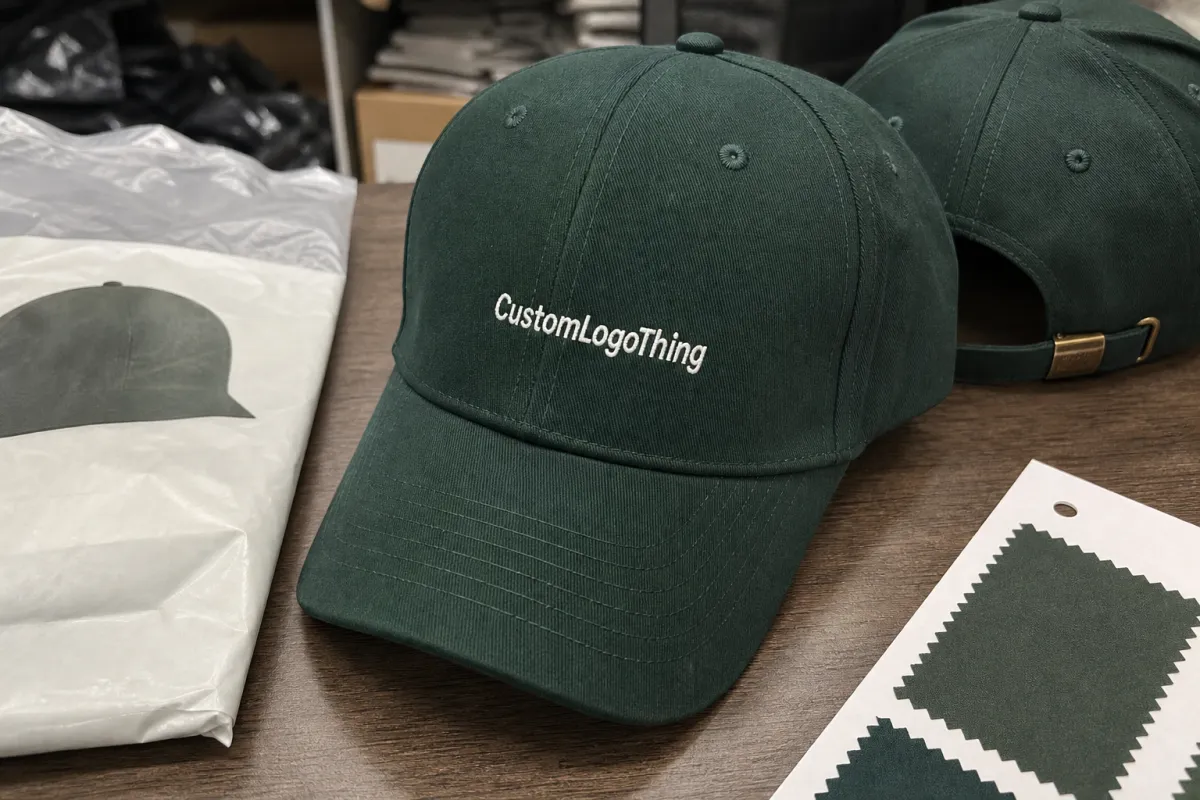
Why the embroidered baseball caps sample checklist matters before approval
Mockups lie by omission. A clean logo sitting on a flat render does not show how thread behaves on a six-panel crown, how a curved brim changes the visual balance, or how the front panel pulls once dense stitches start packing into the fabric. That disconnect is where many cap orders drift off course.
The embroidered baseball Caps Sample Checklist keeps the review anchored in a physical object instead of hope. You are checking quality, fit, and construction before bulk production locks in the same decisions across hundreds or thousands of units. That means logo scale, placement, thread color, panel shape, and closure hardware can still be corrected without scrapping inventory.
- Puckering around dense embroidery zones
- Distorted logos that lose legibility on a curved front
- Off-color thread that looks fine online and wrong in daylight
- Weak or crooked closures that feel cheap in hand
- Poor crown shape that sits awkwardly on the head
From a buyer’s point of view, the sample is the easiest place to be exact. That is not nitpicking. It is risk control. I have seen orders approved because the logo looked “close enough,” only for the final shipment to arrive with slanted stitching, a boxy crown, or a closure that irritated wearers after ten minutes.
A digital proof is not a cap. It is a promise, and promises are cheap until thread hits fabric.
Good suppliers usually welcome close review. The better ones prefer it, because the sample gives them a clear target before they reserve machine time or cut bulk fabric. A precise buyer and a precise sample process save each other from unnecessary rework.
How the sample approval workflow moves from artwork to stitched cap
The cleanest sampling process starts before a single stitch is made. Send vector artwork, Pantone references if you have them, exact placement notes, cap style, panel count, closure preference, and any required label or packaging details. If you send a fuzzy PNG and call it final, expect a lot of interpretation later. That is how logo size disputes happen.
A typical workflow looks like this:
- Artwork cleanup - the supplier removes noise and prepares the file for digitizing.
- Digitizing - the logo is translated into stitch commands, not just resized.
- Stitch simulation - you review density, direction, and edge quality before sewing.
- Sample sewing - the cap is built and embroidered.
- Buyer review - you inspect the physical sample, not just photos.
- Revisions - placement, color, or construction changes are made if needed.
- Final signoff - only then should bulk production start.
The most common misunderstanding is simple: the supplier may think you approved a broad placement range, while you assumed the logo would be centered to the millimeter. That is why the Embroidered Baseball Caps sample checklist should include exact measurements for logo width, distance from center seam, and height from the brim.
If you cannot inspect the sample in person, ask for close-up photos in natural light and a short video showing the front, side, back, and underside of the crown. Packaging also matters in transit; crushed brims and bent crowns can make a good sample look bad. For basic packaging references, Packaging.org is a useful starting point. For shipment abuse testing and transit standards, ISTA is the better reference.
Pricing, sample fees, and cost variables that change the quote
Sample pricing is rarely random, but it is not as simple as one cap, one price. The fee usually reflects digitizing work, machine setup, material waste, thread consumption, and whether revisions are included. A simple logo with two thread colors and limited fill is one kind of job. A large crest with fine text, small spacing, and a custom closure is another. The quote moves fast between those two extremes.
MOQ changes the math too. A first sample often carries more setup cost than repeat production because the supplier has not spread digitizing and sampling over a larger run yet. Some vendors credit the sample fee back against the first bulk order; others do not. Ask before you assume. That small assumption is how a quote looks cheap right up until the invoice lands.
| Sample option | Typical cost | Usually includes | Watch-outs |
|---|---|---|---|
| Basic sew-out on standard cap | $25-$60 | Digitizing, one physical sample, standard thread | Often excludes shipping and revisions |
| Custom embroidered sample | $45-$120 | Artwork cleanup, setup, sample build, one revision round | May charge extra for specialty closures or thread |
| Complex or rush sample | $80-$180 | Priority handling, advanced stitch planning, faster turnaround | Less time for corrections, higher freight risk |
Hidden costs show up quickly: shipping, rush fees, special thread, extra revisions, custom labels, and packaging inserts. If you are comparing suppliers, compare landed cost, not just the sample fee. A $35 sample with $28 shipping and two paid revisions is not a bargain. It is a lesson.
One more practical point: ask whether the sample is built from the same cap body you plan to bulk order. A cheap sample on a random blank can look acceptable and still tell you nothing about the real production cap. In sampling, the frame matters as much as the logo.
Fabric, thread, and stitch choices that shape the finished look
Cap fabric changes the result more than many buyers expect. Brushed cotton twill gives embroidery a softer hand feel and hides small irregularities better than slick synthetics. Structured six-panel caps hold shape better and usually support cleaner front-panel logos. Foam-front trucker caps create a bold look, but they behave differently under dense stitches because the foam compresses and can show more texture around the edges.
Thread choice matters too. Polyester thread is usually the safer default for wear, sun exposure, and wash resistance. Rayon has a softer sheen and can look richer under indoor lighting, but it is not always the toughest option for outdoor use. If color accuracy is critical, compare thread swatches in daylight and under indoor LEDs; the same navy can look almost black in one setting and visibly lighter in another.
Stitch structure is where design becomes engineering. On caps, underlay, stitch density, and satin width matter more than on flat garments because the front panel curves and the fabric keeps trying to spring back. A good digitizer opens the spacing enough to prevent puckering, then reinforces areas that need edge definition. If the logo crosses a seam, expect more test work. Caps are not forgiving about bad file prep.
- Crown height - low profile, mid profile, or tall front panels change logo positioning
- Brim curve - more curve changes how the logo reads from the front
- Sweatband feel - rough binding can ruin an otherwise good cap
- Closure hardware - metal sliders, snapbacks, and Velcro each feel different in use
- Panel construction - six-panel and five-panel caps do not stitch the same way
Fit checks are not a side note. A cap that looks sharp on a hanger but sits too shallow, pinches at the temple, or has a scratchy closure becomes dead stock faster than anyone likes to admit. The sample should tell you how the cap behaves on a head, not just how it photographs. That distinction matters in retail, events, and uniform programs alike.
Lead time, turnaround, and delivery steps before bulk production
Turnaround time is a chain, not a single number. Artwork cleanup and digitizing often take 1-2 business days for a straightforward logo. A physical sample can take another 3-7 business days depending on machine load, cap availability, and whether the design needs test stitching. If revisions are required, add another 2-4 business days per round.
Bulk production after approval commonly runs 12-18 business days for a standard order, excluding freight. Complex logos, special closures, or custom thread matching can stretch that window. Rush orders shorten the schedule, but they also reduce revision room. That tradeoff is fine if you understand it. It is a bad idea if the calendar only works by assuming nothing goes wrong.
Good schedules also include the non-production steps buyers forget: internal review, legal or brand approval, holiday closures, freight delays, and sample transit time. If the event date matters, build in a buffer of at least one week for domestic shipments and more for international moves. If the sample arrives bent, the packaging may need a rethink before bulk ships. Transit standards from ISTA are a more useful guide than hoping tape will solve the problem.
That extra buffer protects the approval process. It keeps you from accepting a weak sample just to hit a deadline, which is usually how production problems get signed off by accident. Time pressure does not improve stitching.
If the schedule only works when nobody revises anything, the schedule is fantasy, not planning.
Common sample mistakes that cause embroidered cap orders to fail
The biggest mistake is approving from a photo. A picture can hide puckering, uneven stitch tension, weak backing, and a crown that fits badly. Handle the sample in person if you can. If you cannot, request multiple angles, a hand-held video, and a measurement sheet. A supplier that resists that request is not making your life easier; it is making the problem smaller until it ships.
Another classic failure is overcomplicated artwork. A logo with thin type, tiny subtext, gradients, and tight curves may look clean in Illustrator and still turn muddy when stitched onto a curved front panel. Embroidery has limits. Pretending otherwise just makes the sample more expensive and the final cap less readable from six feet away.
Vague feedback is just as damaging. Saying “it feels off” is not useful. Say whether the issue is logo size, placement, thread color, stitch density, crown depth, or closure feel. The more precise the note, the faster the revision. The more vague the note, the more the supplier has to guess. Guessing is a terrible production method.
Comfort is the one thing buyers often forget because it does not show up in a product photo. A cap can look finished and still wear badly because the sweatband scratches, the crown stands too tall, or the closure catches hair. That is how a launch item becomes a drawer item.
Here is the blunt version: if the same issue appears on sample two and sample three, the problem is probably in the spec, not the machine. Reset the brief before you burn more time and more sample fees.
Final buyer checks before you release production
Before you approve bulk, compare the sample against the tech pack line by line. Measure logo width, logo height, and placement from center seam and brim edge. Confirm thread colors against your reference, not memory. Inspect the inside seams, backing, sweatband, and closure hardware. Those hidden details tell you whether the supplier actually followed the spec or just got the front panel to look acceptable.
- Match the sample to the approved artwork - no silent size changes.
- Check front-panel symmetry - the logo should not drift left or right.
- Inspect stitch edges - crisp, even borders matter more than people admit.
- Review fit - crown depth, brim curve, and closure comfort should all feel right.
- Document approval in writing - every change needs a paper trail.
If you cannot inspect in person, ask for close-up photos in daylight and a short video that shows the cap on a head, not just on a table. Flat-lay photos hide fit problems. Heads do not.
Keep the approved sample, tag it, and use it as the reference for the full run. Then rerun the embroidered baseball Caps Sample Checklist after any revision. That sounds repetitive because it is repetitive, and that is the point. Repetition is cheaper than rework.
For retail programs, event gear, and staff uniforms, the embroidered baseball Caps Sample Checklist is the cheapest place to be demanding. Be exact once, then let production follow the standard you already paid to define.
What should I check first on an embroidered baseball cap sample?
Start with logo placement, stitch clarity, and crown shape. Those three checks tell you fast whether the sample is on track. After that, inspect thread color, backing, brim curve, and closure quality before you think about packaging or price.
How many revisions are normal before approving cap samples?
One or two revisions is common when the artwork is clear and the supplier handles digitizing well. If the same issue shows up on a third sample, stop and reset the spec or artwork instead of grinding through more guesswork.
What does a sample fee usually cover for embroidered caps?
It often covers digitizing, setup, one physical sample, and basic sew-out time. Shipping, rush work, specialty thread, and extra revisions are often separate, so ask for the scope in writing before you approve the first quote.
How do I judge embroidery quality on a curved cap front?
Look for puckering, flat stitch edges, and distortion where the logo crosses seams or curves. Hold the cap at arm's length and up close; good embroidery should read cleanly at both distances without turning mushy.
When should I rerun the embroidered baseball caps sample checklist?
Rerun it after any design change, thread change, cap style change, or supplier revision. Use it again before bulk approval if the sample has been sitting for a while, because details are easy to forget once people start relying on memory.
What details should I include when requesting a sample?
Send vector artwork, color references, placement instructions, cap style, panel count, and closure preference. The more complete the brief, the fewer avoidable corrections you will chase later.


