On a screen, a patch can look perfectly balanced. On a knit beanie, that same patch can end up too small, too busy, or sitting awkwardly high on the cuff. That is exactly why the cosmetics Logo Patch Beanies digital proof checklist matters before anyone signs off. Cosmetics brands care about polished shelf presence, giftable presentation, and clean color matching, so the proof is not just an approval image. It is the first real test of proportion, placement, and legibility before production starts.
Cosmetics Logo Patch Beanies: Why Proofs Catch Costly Errors
A logo file can be perfectly built and still fail visually once it is translated into a patch on a beanie. The knit has stretch, the cuff changes the viewing angle, and the patch itself has limits that a flat brand asset never had to deal with. That is the real reason the cosmetics Logo Patch Beanies Digital Proof Checklist matters: it catches scale issues, color mismatches, and placement problems before material is cut or stitched.
For cosmetics buyers, the stakes are a little different from a standard promo order. A beanie might live inside a seasonal gift set, a retail launch kit, a salon counter display, or an influencer drop. That means the accessory has to feel intentional, not just decorated. A patch that lands a fraction too high can make the whole piece feel off-balance, and a thread color that shifts warm or cool can break the premium look a brand is trying to build.
In practical terms, the checklist is a structured review of the artwork, patch type, size, placement, color references, and production notes. It helps the buyer confirm what the supplier intends to make before the order moves forward. That is far cheaper than finding out the patch looked fine in a mockup but reads wrong on a stretched cuff in real life.
If the proof is treated like a formality, it usually creates rework. If it is treated like a production tool, it saves time, money, and a lot of friction.
The best teams use the proof stage to protect both brand image and budget. That matters even more when the order includes embroidered patches, woven patches, multiple thread colors, or a tight launch date. If you need to see how a supplier supports the decoration side of an order, the Manufacturing Capabilities page is a useful place to understand the production path behind the mockup.
There is also a quieter benefit: a good proof keeps internal teams aligned. Marketing, merchandising, and operations can all make decisions from the same file instead of trading screenshots in email. Less confusion. Fewer revisions. Better odds of hitting the launch date without drama.
How the Digital Proof Review Is Built
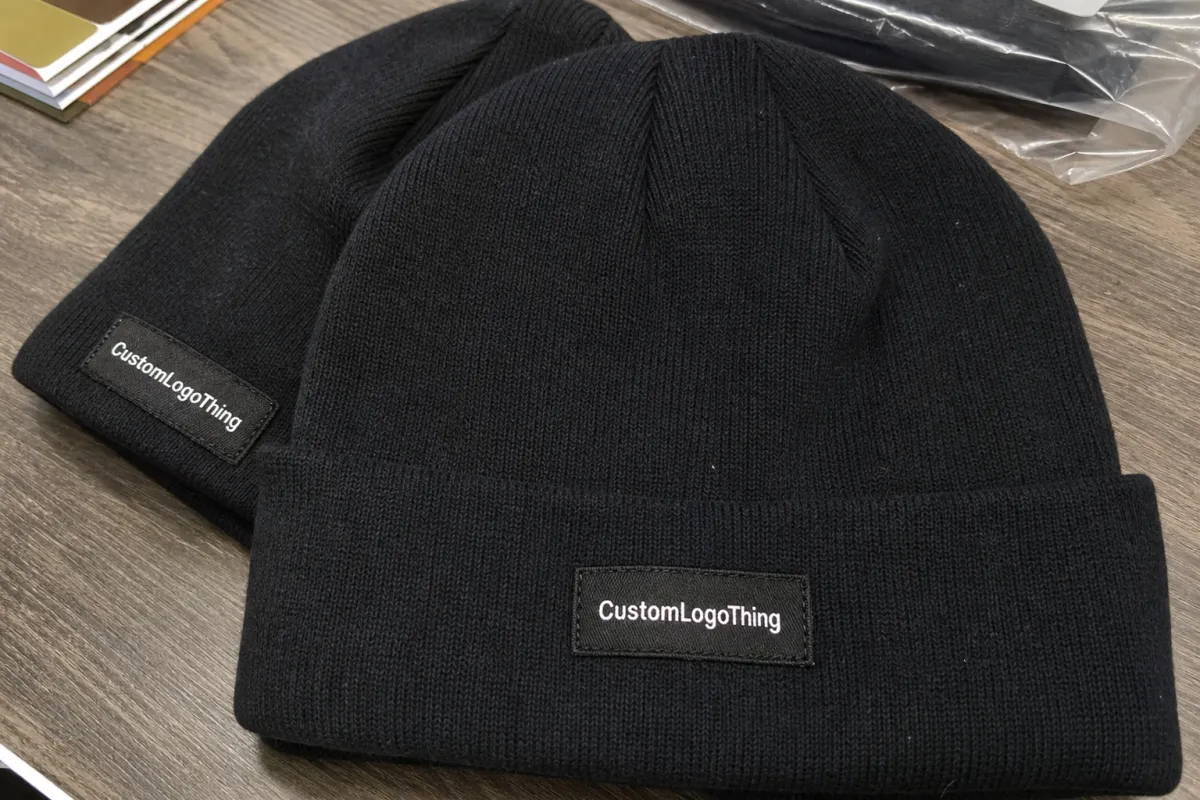
A proper proof starts with real artwork, not a generic template. The supplier takes the submitted logo, checks the file quality, and translates it into a mockup that shows the patch on the chosen beanie style. That usually includes a front view, the approximate patch size, the color placement, and any notes about backing, border style, or embroidery direction. A strong proof mirrors the actual manufacturing method, whether the patch is woven, embroidered, leatherette, PVC, or another construction.
The buyer should expect the proof to answer a few core questions clearly: Does the logo read at size? Is the patch centered where the brand wants it? Are the colors called out correctly? Does the artwork need simplification so it can be produced cleanly? Those are the practical checks that matter most. What the proof cannot fully show is tactile feel, knit stretch, or the exact softness of a finished patch edge, so those expectations need to be managed separately.
Here is the part many buyers miss: the proof is not a rendering exercise. It is a spec document with pictures. If the art is going to be sewn into a woven patch, the proof should not behave like a printed decal. If the order is using a leatherette patch, the proof should show that texture path as clearly as possible. You can see how a supplier organizes that kind of work through the lens of custom decoration and production support, which is where proof accuracy usually begins.
Digital proofs also help define what is not happening. A cosmetics logo with a thin gradient, tiny legal text, or a multi-layered emblem may need simplification before it can be built cleanly at beanie scale. Approving a proof without that discussion is how a clean-looking mockup turns into a muddy sample. Nobody enjoys explaining why the approved logo no longer reads from three feet away.
For an actual review, the checklist should include:
- Artwork legibility at finished size, not just in the source file.
- Patch material, such as woven, embroidered, leatherette, or PVC.
- Backing choice, including sew-on, heat seal, hook-and-loop, or adhesive if applicable.
- Color callouts for thread, patch base, beanie blank, and any contrast border.
- Placement reference tied to center front, seam, cuff fold, or stitch point.
- Special notes for packaging, retail presentation, or multi-colorway programs.
When a proof includes those details, it becomes easier to compare revisions and spot mistakes before they turn into a production problem.
Patch, Knit, and Placement Specs That Change the Look
The visual result on a beanie depends on more than artwork. Patch size, border style, thread count, backing choice, and the knit structure of the beanie all change how the final piece reads. Most front patches sit somewhere around 1.75 to 2.5 inches wide on a cuffed beanie, but the right size depends on the logo shape, the amount of negative space, and how much of the cuff the patch has to occupy without crowding the knit.
Rib-knit cuffs are forgiving in one sense and tricky in another. They hold patches well, but the texture can make small elements look busier than they do on screen. Smoother knits give you a cleaner canvas, yet they may show the patch edges more prominently. An uncuffed beanie creates a different visual field again, since the logo sits on the body rather than on a folded cuff, which changes both placement and perceived scale.
Material choice matters too. Most basic promo beanies use acrylic or acrylic-blend yarns because they are consistent, easy to decorate, and cost-effective. A thicker 12-gauge or 7-gauge knit feels more substantial than a loose, lightweight beanie, and that weight changes the way the patch lies on the fabric. Wool blends can look more premium, but they also raise cost and can be less forgiving in colder handling conditions during sewing and finishing. If the line is meant to feel a little more fashion-led, a denser knit usually looks cleaner under a patch.
Logo complexity matters more on accessories than many buyers expect. Thin letters, tiny icons, and gradients can work beautifully in digital files and then lose clarity at patch size. Honestly, this is where many proof approvals go wrong: people approve the idea of the logo instead of checking whether the logo can actually live on a 2-inch decoration. If the artwork needs simplification, the proof should show that clearly before the order is released.
A useful checklist for the visual spec review looks like this:
- Patch width and height should fit the logo without forcing tiny detail into unreadable space.
- Border style should match the brand tone, whether clean merrowed edges or a softer stitched edge is better.
- Thread count or print detail should be realistic for the decoration method.
- Negative space should keep the mark from looking crowded at beanie scale.
- Placement references should measure from seams, center points, or cuff folds, not from a vague eye-ball estimate.
When a cosmetics brand orders multiple colorways, the placement check becomes even more important. Black, cream, blush, oatmeal, and heathered blanks all change how the same patch reads. A proof that only shows one color can miss the way the logo interacts with the other beanie shades in the range. It is boring work. It also prevents dumb mistakes.
There is one more practical issue: the edge finish of the patch can change the tone of the whole piece. A merrowed border feels traditional and holds shape well. A heat-cut edge can look cleaner on some modern marks. A debossed leatherette patch reads quieter and more upscale, while PVC can look bold but sometimes feels too sporty for a cosmetics line. The proof should make that finish visible, not hide it behind a flattering angle.
Proof Process, Timeline, and Turnaround
The proof process is usually straightforward, but delays happen when instructions are incomplete. The normal flow is submission, artwork review, digital proof creation, internal review, revision notes if needed, final approval, and then release to production. That sounds simple because it is simple; the challenge is that each step depends on the previous one being clear.
Clean vector artwork speeds things up. So do exact PMS references, a written placement target, and one named person who can make decisions. If the file is fuzzy, the colors are unspecified, or three different stakeholders are sending comments separately, the first proof will almost always need extra rounds. That is not a supplier problem so much as a spec problem.
A practical turnaround for the first proof is often 2 to 4 business days, though it depends on order volume, the decoration method, and how much interpretation the art requires. Revisions can move quickly if the requested changes are limited to size, spacing, or placement. More complicated redraws take longer, especially if the logo contains fine text or layered artwork that needs to be reworked for stitchability or patch construction.
Samples are a different story. A digital proof is fast; a physical sample takes longer because it has to be made, inspected, and shipped. For patch beanies, a sample might land in 7 to 14 business days if the decoration is straightforward, and longer if the patch requires custom tooling or a special material. That timeline matters when the project is tied to a seasonal launch. You do not want to discover a proportion problem after the retail calendar has already moved on.
For brands that are planning retail packaging or gift sets, the proof stage can also be tied to outer-pack considerations. If hang tags, belly bands, or folding cartons are part of the order, ask whether the secondary packaging aligns with current packaging guidance from organizations like Packaging Institute resources. The beanie is only one piece of the presentation, and the rest of the kit should feel as consistent as the decoration itself.
Speed comes from precision, not from skipping steps. If the goal is a tight launch window, the smartest move is to send the cleanest possible art, answer proof questions quickly, and keep the approval path narrow. That is how rushed projects stay controlled.
Cost, MOQ, and Quote Drivers
Pricing for patch beanies is shaped by several levers at once: patch size, stitch complexity, number of thread colors, patch material, backing type, and the blank beanie itself. Add in packaging, hang tags, and freight, and the quote can move quickly. A simple woven patch on a standard cuffed acrylic beanie usually sits at the lower end of the range, while a more detailed embroidered patch, a specialty blank, or a retail-ready packout can push the cost upward.
For planning purposes, many buyers see the most useful pricing discussions at quantities around 300 to 1,000 pieces, because that is where setup costs and material choices begin to show clearly. Smaller runs often carry a heavier setup burden per unit. Larger runs tend to spread those costs out, which is why quote comparisons only make sense when the spec is truly the same across each option.
| Option | Best For | Typical Unit Impact | Notes |
|---|---|---|---|
| Woven patch on basic cuffed beanie | Clean logos, moderate detail, lower decoration complexity | $4.20-$6.50 at mid-range quantities | Usually the most cost-efficient if the logo has readable shapes and limited color breaks. |
| Embroidered patch with multiple thread colors | Premium brand feel and strong texture | $4.80-$7.40 | Great for simple marks, but small text can get tight fast. |
| Leatherette or debossed patch | Minimal, upscale presentation | $5.10-$8.00 | Often chosen when the brand wants a quieter, more fashion-led finish. |
| PVC patch | Bold shape, durable surface, standout color blocks | $5.50-$8.50 | Works well for simple graphics, though it is not always the right fit for cosmetics branding. |
MOQ usually shifts with the construction. A simple patch program may be possible at 100 to 300 pieces, while more involved setups often want a larger commitment. That is not arbitrary; every added color, border style, or material change adds setup time. If the brand is evaluating multiple approaches, the cleanest comparison is to quote the same beanie blank, the same patch size, the same placement, and the same finish so the numbers can actually be compared.
Sample fees and shipping should also be separated from the unit price. A low piece price can be misleading if the setup charge is high or if the sample path is expensive. For buyers doing a direct-to-retail rollout, packaging and transit specs matter too. If the cartons will move through distribution centers, it is worth checking transportation expectations against ISTA testing guidance so the product arrives looking as polished as it did in the proof.
If the order includes FSC-certified paper cards or inserts, that is another detail to quote separately. The goal is simple: compare like with like, not headline price versus hidden extras. I have seen more than one “cheaper” quote get expensive after packaging, freight, and revision work showed up later.
One more pricing reality: dark beanies and complex patches tend to hide defects better than light beanies do. That can sound like a quality advantage, but it also means buyers sometimes miss minor issues until the goods are in hand. If a program uses cream or pale pink blanks, the proof should be more exact about thread contrast and edge clarity. Soft colors are less forgiving. They show everything.
Common Mistakes That Slow Down Beanie Orders
The most common approval mistake is treating the design as though it were still a flat logo on a white background. Once the patch is reduced to actual beanie size, thin lettering, delicate lines, or crowded symbols may no longer read well. A lot of problems show up right there, and they usually show up because the buyer never did a true scale check.
Color is the next big trap. If the proof does not clearly call out thread colors, patch substrate colors, or beanie blank colors, people fill in the gaps with assumptions. Those assumptions are often wrong. A cream beanie can read warmer than expected, a blush tone may lean dusty instead of soft pink, and metallic accents may need to be translated into a different material effect rather than treated as literal foil.
Placement mistakes usually come from reviewing only one style or one size. A cuffed beanie and an uncuffed beanie do not behave the same way. Different knit gauges also change how high or low a patch appears once the fabric stretches. If a buyer does not check the proof against each intended colorway or style, the final line can look uneven even when every unit was technically produced correctly.
Another common issue is approving a patch without thinking about the hairline details around the edge. If the logo has tiny counters, thin outlines, or micro text, the decoration method may need simplification. Woven patches handle detail better than embroidery, but even woven constructions have a limit. Leatherette and debossed patches can look upscale, yet they usually prefer stronger shapes. The proof should say that plainly instead of pretending every logo can survive every method.
There is also the internal process mistake: too many comments from too many people. When marketing, merchandising, and operations all send scattered notes, the proof cycle slows down fast. One person wants the logo smaller, another wants it higher, and someone else is still deciding on thread color. The result is avoidable revision traffic. A tighter sign-off chain keeps the supplier moving and keeps the launch date intact.
For brands shipping direct to stores or fulfillment centers, one more oversight can create trouble downstream: packaging and transit. If the beanies are packed into cartons that will face handling, crushing, or long-distance shipment, the packout should be considered before final approval, not after. That is where the proof review, the carton spec, and the shipment plan need to line up.
One last caveat: not every cosmetic brand needs the most decorative patch possible. A restrained woven patch on a clean knit often looks better than a busy layered construction. Flash is easy. Restraint takes a little judgment. The proof stage is where that judgment should happen.
Expert Approval Steps and Next Moves
A careful approval process is not complicated, but it does need discipline. Open the proof at full size if possible, or print it out so the team can check it the way a shopper would notice it on first glance. Look at spelling, spacing, logo proportions, patch placement, and the relationship between the patch and the knit surface. Those are the details that change the finished impression.
Then run the proof against a written checklist. The list should include artwork, colors, patch type, backing, size, placement, packaging, and any special notes tied to the cosmetics line or seasonal release. Once the checklist is complete, issue one clear approval or one consolidated revision round. That single decision is usually better than a long series of “almost there” comments that keep the order in limbo.
Keep the approval group tight. One decision-maker is ideal; two or three is workable if the roles are defined. If everyone is reviewing from a different angle without a final owner, the proof will drift. A supplier can work much faster when it knows exactly what changed and what did not.
It also helps to archive the approved proof with the spec sheet, color references, and final notes. That gives the team a clean record for reorder season and cuts down on guesswork later. If the same beanie comes back six months from now for another launch, nobody wants to reconstruct the whole decision tree from old email threads. That is how preventable mistakes survive into the next run.
The best proof approvals are not the fastest ones; they are the clearest ones.
If you are working through the cosmetics Logo Patch Beanies Digital Proof checklist properly, the final sign-off should feel controlled, not guessed at. The goal is not perfection theater. It is a beanie that looks right in hand, holds up under real lighting, and matches the brand well enough that nobody has to explain it.
That is the real payoff of the cosmetics Logo Patch Beanies Digital Proof checklist: fewer surprises, cleaner approvals, and a finished beanie that looks as intentional in hand as it did on screen.
What should be on a cosmetics logo patch beanies digital proof checklist?
Include artwork size, patch style, placement, color references, spelling, and a note on backing or finish so the proof confirms the brand mark exactly as intended. If the order has retail packaging or multiple beanie colors, add those details too.
How long does proof approval usually take for logo patch beanies?
Many approvals move fastest when the artwork is clean and one person owns the decision, because that cuts down on revision loops. A first proof often takes 2 to 4 business days, and extra time is common if the layout needs color matching, patch resizing, or comments from several departments.
What affects the price of cosmetics logo patch beanies the most?
Patch complexity, number of thread colors, patch material, and the quality of the beanie blank usually have the biggest effect on unit cost. Setup charges, sample fees, packaging, and freight should also be reviewed so you can compare total project cost, not just the per-piece number.
Can I approve the proof if I only have a flat logo file?
Yes, but the proof will only be as accurate as the artwork and instructions you provide, so clean vector files are strongly preferred. If the logo has tiny text or fine detail, ask for a scale check before you approve the layout.
How many revisions are normal before production starts?
One to two revision rounds are common when the buyer has clear specs and responds quickly. More rounds usually point to unclear placement, color, or sizing notes, which is why a thorough checklist saves time.
Are woven patches better than embroidered patches for cosmetics beanies?
Not always. Woven patches usually handle fine detail and small text better, while embroidered patches give more texture and a more tactile finish. The right choice depends on how simple the logo is and how polished or fashion-led you want the beanie to feel.
What beanie material works best for patch decoration?
Most buyers use acrylic or acrylic-blend knits because they are consistent, affordable, and easy to decorate. Denser gauges tend to hold a patch flatter and look cleaner, while loose knits can make small artwork look less precise.


