Custom Clothing Store Paper Bags Sample Approval Checklist
A customer walks out of a clothing boutique with a sharp-looking bag, the logo sitting clean on the front panel, tissue peeking out of the top, and the whole purchase feeling premium for about ten seconds; then the side gusset starts to crack, the rope handle shifts in the hole, or the brand color looks flat under the store lights. A Custom Clothing Store Paper Bags sample approval checklist helps catch those problems before production starts, while the fix is still a revised proof, a different paper stock, or a stronger handle construction rather than a full pallet of bags nobody wants to use.
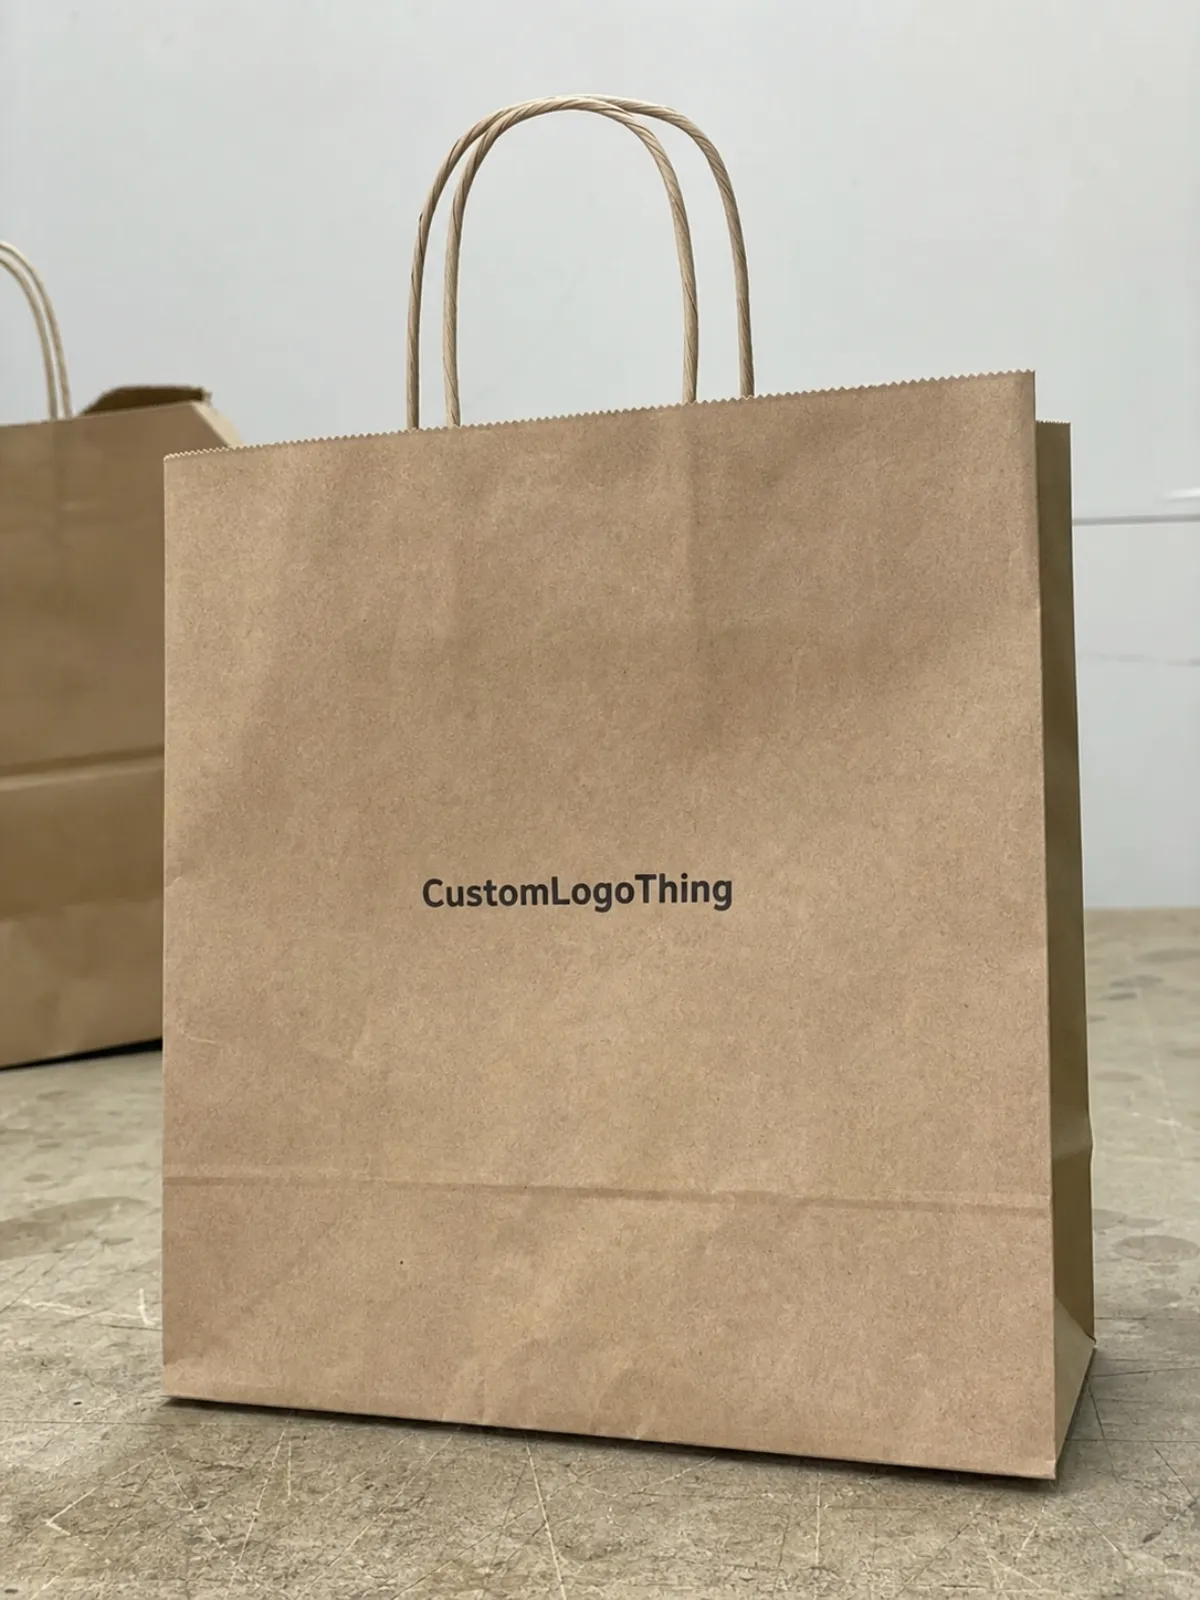
For a clothing store, a paper bag is not only a carrier. It is retail packaging, product packaging, and package branding in one piece. It may hold folded shirts, denim, sweaters, shoe boxes, belts, scarves, hangtags, receipts, tissue wrap, and sometimes a gift card envelope tucked inside. If the bag looks beautiful but bows badly under a boxed pair of boots, the sample has not done its job.
A sample approval checklist is simply a structured review tool used before full production. It confirms the paper stock, finished size, gusset depth, print placement, color accuracy, coating, handle type, reinforcement, bottom strength, and overall brand presentation. It also gives buyers, store owners, merchandisers, and purchasing teams a common language, which matters because “nice” and “premium” mean different things to different people.
Approval does not mean every fiber, dot, and crease must be perfect under a magnifier. Paper is a living material. Ink absorbs differently into kraft, coated art paper, and recycled stock. Handmade samples can show small differences that tighten up during machine converting. Still, a sample should match the approved specification closely enough that the full order can be produced consistently. That is the practical value of a custom clothing store Paper Bags Sample Approval Checklist: it turns a visual impression into a controlled buying decision.
How Paper Bag Samples Move From Artwork to Approval
The usual sample path starts with the buyer providing artwork, desired bag size, paper type, handle preference, estimated quantity, and any finish requirements. The manufacturer checks whether the design works for the bag structure, prepares a dieline or layout, confirms bleed and safe areas, and sends a proof. From there, the sample may be a white mockup, a digitally printed sample, a pre-production sample, or a production sample pulled from the actual run.
A PDF proof is useful, but it is not a bag. It confirms logo size, panel placement, fold positions, barcode location, QR code sizing, and basic color targets. A physical sample tells you whether a 250gsm white kraft bag feels too light for denim, whether a 350gsm C1S artboard with matte lamination stands cleanly on the counter, and whether a cotton rope handle is comfortable when the bag is filled.
Sample type matters. A handmade white mockup may confirm the finished dimensions and gusset shape, but it will not show final print density or machine-fold consistency. A digitally printed sample gives a closer view of layout and general branding, though the color may not match offset or flexographic production exactly. A pre-production sample using the intended paper, print method, handle, and finish is the closest reference before bulk manufacturing.
Look at the construction, not just the front panel. Clothing store paper bags often include a folded top reinforcement, bottom insert board, side gussets, twisted paper handles, cotton rope handles, ribbon handles, die-cut handles, or reinforced eyelets. A stronger bag may need a 400gsm bottom card, double-folded top, and tied rope ends. A lightweight kraft bag for shirts may work well with twisted paper handles and no eyelets.
Here is the buyer’s trap: approving only the artwork proof and assuming the finished bag will feel right. Paper shade, ink absorption, lamination texture, handle stiffness, and real carrying strength are material decisions, not just design decisions. The Custom Clothing Store Paper Bags sample approval checklist should be used at the stage that matches the risk of the order.
Key Specs to Check Before You Sign Off
Start with dimensions. Measure width, depth, height, gusset width, top fold, bottom fold, and usable interior space. A bag can technically measure correctly on the outside and still feel wrong if the gusset is too narrow for folded sweaters, stacked T-shirts, boxed accessories, or multiple garments wrapped in tissue. For apparel retail, common boutique bag sizes often sit around 250 x 100 x 320 mm for small garments, 320 x 120 x 400 mm for mid-size purchases, and larger formats for coats or shoe boxes.
Paper material changes both strength and brand feel. Kraft paper gives a natural, casual look and often works well in the 120-180gsm range for lighter bags. White kraft prints cleaner but may show scuffs. Coated art paper, often 190-250gsm for shopping bags and higher for rigid-feeling boutique bags, gives stronger color and a more polished surface. Recycled paper can be excellent, but ask about post-consumer content, shade variation, and fiber strength. FSC-related claims should be supported properly; the Forest Stewardship Council explains certification expectations for responsibly sourced paper.
GSM matters, but it is not the whole story. A 200gsm sheet with long, strong fibers and a good fold can outperform a heavier sheet that cracks at the gusset. Coating, lamination, humidity, grain direction, and glue choice all affect performance. Honestly, I think buyers sometimes overfocus on weight because it is easy to compare on a quote sheet. Real strength is more complicated.
Print review deserves a slow pass. Check logo position from the top and side edges, registration between colors, edge alignment, solid ink coverage, small type readability, and QR code scan performance if used. Dark ink on kraft may look muted. White ink may need an underbase. Fine serif type near a fold can break visually after creasing. For branded packaging, these details decide whether the bag feels intentional or just printed.
Color approval should happen under neutral light and store lighting. Pantone targets, CMYK builds, paper shade, coating, and lamination all shift final appearance. A warm boutique spotlight can make cream stock look richer and make gray ink look brown. A phone photo sent through a messaging app is not a reliable color standard.
Finishing details add cost and risk, so inspect them closely. Matte lamination can reduce glare but may scuff on dark colors. Gloss lamination increases shine and color depth. Soft-touch coating feels premium but can show fingerprints. Foil stamping, embossing, debossing, and spot UV all need accurate registration, especially around small logos. The Custom Clothing Store Paper Bags sample approval checklist should treat finish quality as both a visual and structural issue, because finish layers affect fold behavior too.
Finally, test the handle. Pull gently but firmly, inspect knots or glue points, check eyelet position, and confirm the length works for hand carry or forearm carry. A 35-45 cm rope handle often feels comfortable for boutique bags, but the right length depends on bag height and expected load.
Sample Process, Timeline, and Production Steps
A realistic process starts with artwork review, dieline setup, proof approval, material sourcing, sample production, shipping, buyer review, revisions if needed, final approval, bulk production, quality inspection, and delivery. Simple blank size samples may be ready quickly. A pre-production sample with lamination, foil stamping, custom rope handles, and a reinforced bottom board often takes longer because more departments and materials are involved.
Delays usually come from missing information. Incomplete vector artwork, no Pantone reference, unclear finished dimensions, changes in handle style, specialty paper availability, foil die preparation, or waiting for three internal departments to comment can add days. One late change to the gusset can force a dieline revision, which then affects artwork placement and carton packing counts.
Buyers can keep the process moving by providing vector files, exact sizing, target garment use, brand color standards, and a clear quantity range. If you are comparing paper options, ask for swatches early. If your order ties into store openings, seasonal drops, or pop-up events, nominate one person to collect feedback and send one consolidated response. That single habit can save more time than any rush fee.
| Sample Type | Best Use | Typical Cost Range | Main Limitation |
|---|---|---|---|
| Blank structural sample | Checking size, gusset, paper feel, and handle comfort | $25-$80 plus shipping | No final branding or print color confirmation |
| Digital print sample | Reviewing layout, logo scale, and general presentation | $60-$180 plus shipping | Color may differ from bulk offset or flexo printing |
| Pre-production sample | Confirming final material, print, finish, and construction | $150-$500+ depending on finish | Higher upfront cost and longer preparation time |
Sample lead time and production lead time are not the same. The sample stage proves the specification. Production lead time covers paper preparation, printing, drying, lamination if used, die-cutting, folding, gluing, handle attachment, packing, inspection, and freight. A simple kraft shopping bag with one-color printing may move much faster than a laminated boutique bag with foil, ribbon handles, custom inserts, and a rigid bottom board.
Build a buffer. Packaging often lands near the end of a buying calendar, yet customers notice it immediately if it is late or wrong. For technical packaging performance guidance, especially around distribution testing, the International Safe Transit Association is a useful authority, even if retail shopping bags are not always tested like shipping cartons.
Cost, Pricing, and MOQ Factors That Affect Samples
Sample cost is not really about one bag. It may include artwork setup, dieline preparation, print setup, material sourcing, hand assembly, foil plates, embossing dies, courier shipping, and labor spent making a tiny quantity outside normal production flow. That is why a sample can cost more than a finished production bag.
Blank samples are useful for size and paper feel. Digitally printed samples help with logo scale and packaging design. True pre-production samples are closest to the final order, but they cost more because the supplier is setting up real materials and finishes before the full run begins. If the order is simple, a digital sample plus paper swatches may be enough. If the bag is a high-visibility boutique piece with foil, soft-touch lamination, and rope handles, the safer route is usually a closer production-grade sample.
Minimum order quantities exist for practical reasons. Printing plates, machine setup, paper procurement, die-cutting, and converting time need to be spread across enough units. A small custom run may be possible, but the unit price rises quickly. For reference, a simple custom kraft bag might price around $0.18-$0.35 per unit at 5,000 pieces, while a larger laminated boutique bag with foil and rope handles may sit closer to $0.65-$1.40 per unit depending on size, print coverage, freight, and packing method. These are broad ranges, not promises.
Cost drivers include paper weight and grade, bag size, number of print colors, ink coverage, lamination, foil stamping, embossing, handle type, top reinforcement, bottom board, carton quantity, and freight volume. A bag that ships flat may reduce freight compared with a formed rigid package, but cartons of paper bags still take space and weight.
The cheapest sample route can become expensive later. Saving $150 on a sample does not help if the bulk bags arrive with dull logo color, weak handles, cracked gussets, or a size that does not fit your folded hoodies. Reprints, launch delays, and store-level workarounds usually cost more than careful sampling.
Ask suppliers to separate one-time setup charges, sample charges, unit pricing, freight estimates, and revision fees. That keeps the quote honest. If you are sourcing more than bags, reviewing related Custom Packaging Products at the same time can also help align paper bags with tissue, stickers, mailers, or custom printed boxes.
Common Approval Mistakes That Cause Rework
The most common mistake is approving a sample from a photo only. Photos can hide weak paper stiffness, uneven lamination texture, loose handle attachment, slight color shifts, crooked folds, and the way a bag behaves once it is filled. A good photo helps communication. It does not replace the sample.
Another mistake is reviewing the bag empty. Clothing store bags should be tested with real merchandise: two folded shirts, a pair of jeans, a scarf box, a sweater, or the heaviest purchase combination you expect at the counter. Do not load the bag with random dumbbells or canned goods unless your store sells those. The goal is normal retail handling, not punishment.
Measure the inside too. Buyers often check the outside width and height, then miss usable interior space, top opening width, gusset expansion, and whether tissue-wrapped garments slide in without crushing. A 120 mm gusset may sound generous, but a stiff laminated paper can resist opening fully, especially near the bottom fold.
Handle comfort is easy to overlook. Twisted paper handles are economical and recyclable in many programs, but they can feel thin under a heavier load. Cotton rope feels premium, yet poor knotting or weak reinforcement can fail. Ribbon handles look elegant for gift-style retail packaging, though they may not suit heavier purchases. Use the custom clothing store Paper Bags Sample Approval Checklist to compare how the handle feels after thirty seconds of carrying, not just how it photographs on a table.
Color mistakes also slip through in poor lighting. Warm retail light, daylight, fluorescent office light, and phone screens can make the same logo look different, especially on kraft or uncoated stock. If a brand color is critical, compare the sample against a Pantone reference or approved master sample under consistent lighting.
Artwork errors deserve a final proofread. Watch for low-resolution logos, missing bleed, incorrect safe margins, inconsistent logo versions, wrong black builds, small type too close to folds, old social handles, and outdated website URLs. Internal sign-off should be controlled. Too many late opinions after approval can restart the process, change pricing, and push production into a tighter window.
Approval rule: if a sample fails on size, material, logo placement, color target, handle strength, or glue integrity, pause the order and correct the specification before bulk production.
Factory-Floor Tips for Reviewing the Physical Sample
Handle the sample like a packer, cashier, and customer. Open it quickly. Set it upright. Load it with merchandise. Lift it from the counter, swing it gently, walk a few steps, then place it down again. Does it still look clean? Does the bottom flatten properly? Does the logo panel wrinkle? Practical handling tells you things a flat approval sheet never will.
Use realistic load testing. If your average purchase is one blouse and one accessory box, test that. If your peak purchase is a hoodie, jeans, and a shoe box, test that too. A clothing bag does not need to survive abuse beyond its intended use, but it does need to perform under normal store handling, short walks, and customer transport.
Inspect folds and glue lines closely. Look at side seams, bottom closure, top fold, handle attachment points, and gusset creases. Cracking on printed gussets can come from stiff coating, wrong grain direction, heavy ink coverage, or too much pressure at the fold. Uneven glue can create lifting at the side seam. Loose fibers around handle holes may signal poor punching or weak reinforcement.
Compare the sample against the approved specification sheet, not memory. The sheet should list finished size, paper GSM, paper color, print colors, finish, handle type, reinforcement, packing quantity, carton marks, and revision version. If your business also uses boxes or mailers, align the bag spec with your wider product packaging system and the materials shown under Custom Packaging Products.
Keep a signed master sample. Label it with the order number, approval date, paper material, print method, finish, handle style, and revision code. One master should stay with the buyer, and one should guide production inspection. This is ordinary quality control discipline, and it prevents arguments later because everyone can compare bulk goods with the same physical reference.
Small handmade variations can be acceptable if the manufacturer explains what will tighten during machine production. Slight hand-cut unevenness on a structural mockup is different from a wrong paper grade or weak handle. The custom clothing store Paper Bags Sample approval checklist should separate cosmetic sample limitations from real production risks.
Actionable Next Steps Before Final Approval
Gather everything before you start the review: physical sample, approved proof, spec sheet, quote, paper swatches, Pantone references, previous master sample if available, and any brand color standards. Reviewing from scattered emails and memory invites mistakes.
- First pass: check brand appearance, logo scale, color, finish, and overall shelf or counter presence.
- Second pass: measure width, height, gusset, top fold, bottom fold, handle length, and interior space.
- Third pass: load the bag with actual merchandise and test carrying comfort, bottom strength, gusset opening, and handle attachment.
Mark feedback clearly. Use photos, arrows, measurements, and short notes such as “move logo 12 mm higher,” “increase gusset from 100 mm to 120 mm,” or “match Pantone target closer on coated stock.” Broad comments like “make it better” or “color feels off” slow the production team because they have to guess what matters most.
Separate must-fix items from preferences. Must-fix items include wrong dimensions, weak handles, incorrect logo placement, unacceptable color shift, missing finish, poor glue strength, cracked gussets, or a bag that cannot hold the intended merchandise. Preferences may include a slightly longer handle, a warmer paper shade, or a different lamination feel. Both can matter, but they do not carry the same production risk.
Final approval should include written confirmation of the sample version, final artwork, order quantity, approved price, packing method, timeline, and shipping plan. If multiple packaging items are being ordered together, such as bags, inserts, tissue, stickers, and custom printed boxes, confirm whether they ship together or separately. For broader planning, Custom Logo Things keeps a practical range of Custom Packaging Products that can be coordinated around the same retail presentation.
Before signing off, use the custom clothing store paper bags sample approval checklist as a working document, not a formality. It protects the look of the bag, the strength of the structure, the accuracy of the brand presentation, and the retail launch schedule that depends on all of those details arriving right.
FAQ
What should be included in a custom clothing store paper bag sample checklist?
Include finished bag dimensions, gusset size, paper type and GSM, logo placement, print color, finish, handle type, reinforcement, bottom strength, glue quality, carton packing, and any carton mark requirements. Add a real-use test with actual garments so the bag is reviewed as working retail packaging, not only as a flat design sample. Keep the approved proof and physical sample together so production has a clear reference.
Do I need a physical sample before ordering custom paper bags for a clothing store?
A physical sample is strongly recommended if the bag has custom sizing, specialty paper, lamination, foil, embossing, rope handles, or higher presentation standards. For a repeat order with no changes, a signed master sample and approved production record may be enough. A photo proof alone cannot confirm stiffness, handle comfort, paper feel, or carrying performance.
How long does sample approval usually take for clothing store paper bags?
Timing depends on artwork readiness, sample type, paper availability, finish complexity, shipping method, and how quickly feedback is returned. Simple blank or digital samples usually move faster than pre-production samples with foil stamping, lamination, or custom handles. The best way to shorten the process is to provide final artwork, clear specs, Pantone references, and one consolidated approval response.
Why does my paper bag sample cost more than a single finished bag?
Sample pricing often includes setup, dieline work, special material handling, hand assembly, finish preparation, and courier shipping. A single sample does not benefit from the efficiency of a full production run, where setup costs are spread across many units. Ask the supplier to separate sample charges, one-time setup fees, bulk unit cost, and freight so the pricing is easier to compare.
What sample issues should stop approval before full production?
Do not approve if the bag size is wrong, the logo is misplaced, the color is outside the agreed target, the paper stock is incorrect, or the handles feel weak. Also pause approval if glue lines lift, gusset folds crack, foil or print is poorly registered, or the bag cannot hold the intended merchandise. Document the issue with photos and measurements, then request a corrected proof or revised sample before bulk production starts.
