electronics Frosted Zipper Bags Packaging Insert checklist is a narrow phrase with a broad job behind it: make the insert readable, accurate, and production-ready before it reaches a bag line. A frosted zipper bag can make a small electronics kit look more deliberate than a plain poly pouch, but the package still fails if the insert is vague, too dense, or missing the information buyers need the moment they open it. The shelf might forgive a little plainness. It does not forgive confusion.
The practical side of this checklist is simple. Define the size, the copy, the stock, the print method, the fit, and the approval path before a quote turns into a deadline problem. That keeps the job moving, keeps the packaging readable through translucent film, and reduces the sort of support questions that start with “what am I supposed to do with this?”
For electronics, the insert is rarely just decoration. It is a quick-start sheet, a warranty reference, a compatibility note, and sometimes the only place where the customer sees a barcode, QR code, or serial identifier in a usable form. When the insert does that work cleanly, the bag feels intentional instead of improvised.
Why frosted zipper bags can look premium but still fail at shelf pickup
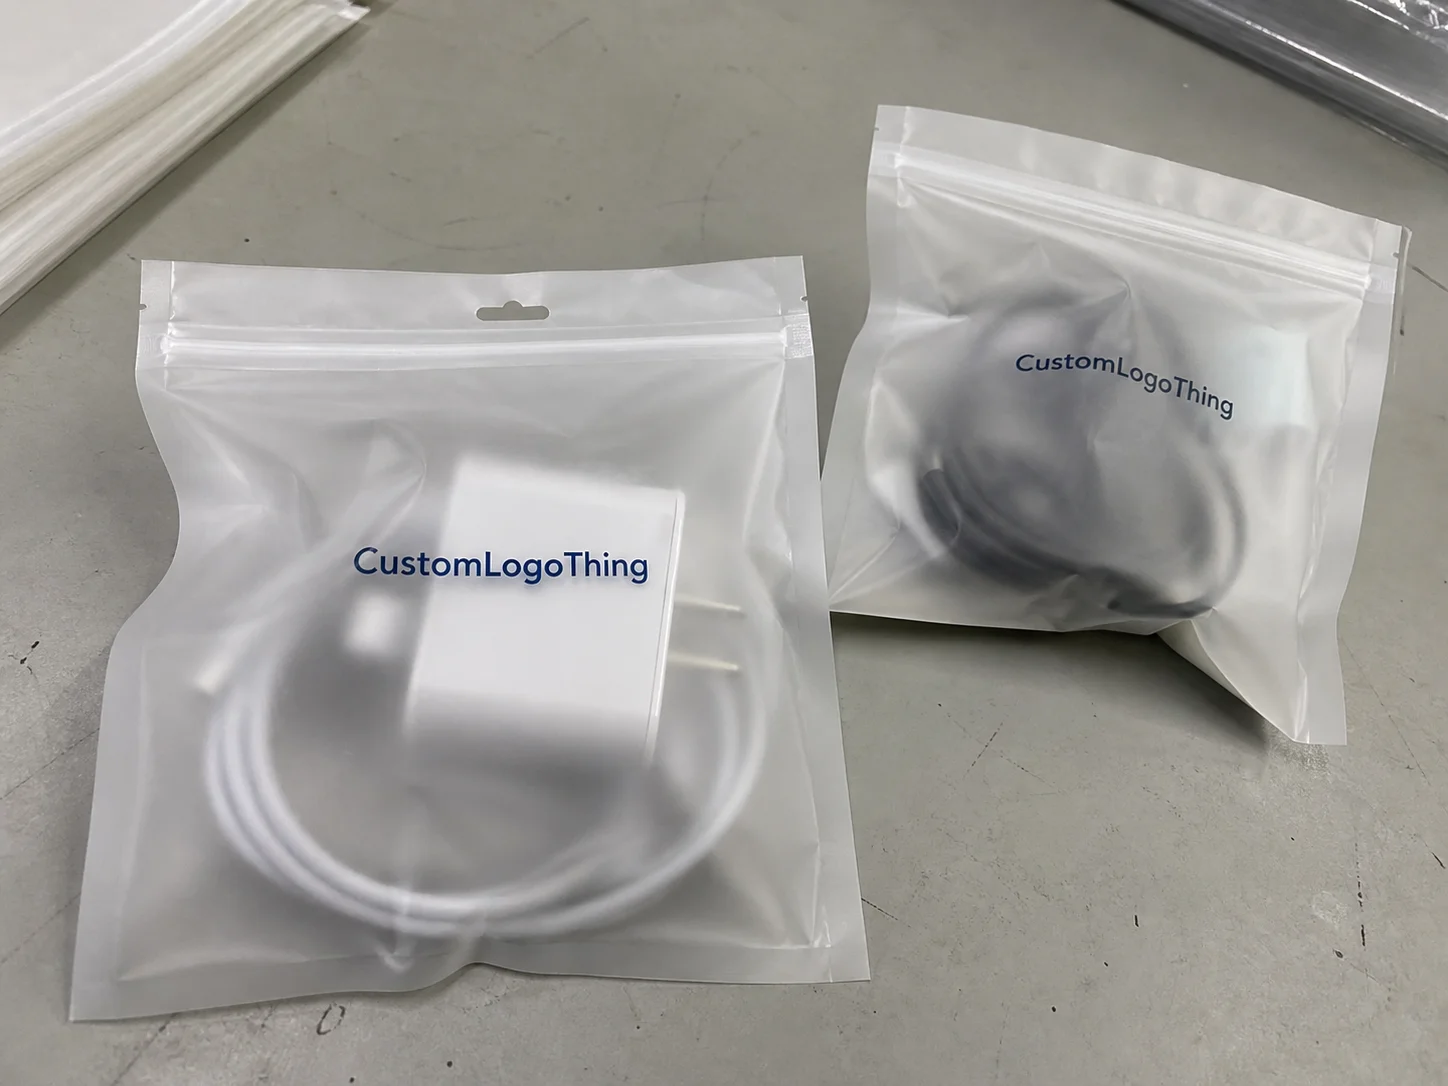
Frosted Zipper Bags have an easy advantage: they look cleaner than random loose packaging and more restrained than a full printed carton. That makes them useful for accessories, small devices, charging items, earbuds, cables, adapter sets, and other electronics where the contents are compact but still need a retail-ready presentation. The visual texture is the selling point. The problem is that the same translucency that gives the bag its appeal also makes the insert harder to read.
Text that looks sharp on a screen can wash out once it is printed and viewed through frosted plastic. Pale gray type, thin fonts, low-contrast logo treatments, and crowded layouts all get weaker when the bag softens the image. In practice, this means the insert must work harder than a similar card inside a clear pouch or a rigid box. It needs stronger hierarchy, fewer distractions, and enough white space to stay legible at arm’s length.
The best comparison is not a flyer. It is a sign. A sign has one job: communicate fast. That is the standard here too. Buyers usually spend only a few seconds scanning the package before they decide whether the product feels understandable and trustworthy. If they cannot quickly tell what is included, whether charging or pairing is required, or where to get help, the insert has not done its job.
That is why the electronics Frosted Zipper Bags Packaging Insert checklist should be treated as a packaging control document, not a design preference list. It is the point where branding, production, and customer support meet. Ignore any one of those and the package becomes more expensive than it looked on paper.
One useful habit is to print a proof on the exact stock, place it inside the actual bag, and inspect it under normal lighting instead of relying on a PDF mockup. Screens flatten contrast. Real film changes color behavior. Even a tiny shift in shade can make a premium-looking layout feel muddled once it is inside the pouch.
If the packaging program is growing beyond one SKU, it also helps to compare the bag with related components early. A matching card, box, or insert system is easier to manage when the same type hierarchy and label language are used across all formats. That is where broader Custom Packaging Products planning becomes useful instead of cosmetic.
“If the insert cannot be read through the bag in three seconds, the layout is asking the customer to work too hard.”
That is not a design philosophy. It is a practical threshold. Retail customers rarely slow down for packaging that needs explanation.
What the insert has to do inside the package
A good insert does three jobs. It identifies the product clearly. It reduces confusion after unboxing. It directs the customer toward the next action, whether that is setup, registration, warranty activation, or contact support. Anything beyond that is optional.
For electronics, the most useful inserts answer the same small group of questions over and over: What is this? What is in the bag? Does it need charging, pairing, calibration, or setup? What should the customer do if something is missing or not working? If the card solves those questions cleanly, support volume tends to drop. The value is not theoretical. Simple inserts reduce the number of follow-up emails from buyers who are unsure whether they received the right accessory or missed a step in setup.
The layout should reflect that function. One clear front panel usually handles product identity and a short benefit statement. The back can carry care instructions, a warranty note, a QR code, a barcode, or compliance language. If the card has to do more, it needs a tighter editorial pass rather than more copy. Dense panels and tiny footnotes are hard to read inside frosted plastic and even harder to trust.
Different insert types are often merged into one sheet, but they are not the same thing:
- Product card: the front-facing summary with the product name, key use case, and visual identity.
- Care sheet: handling, storage, cleaning, and safety notes.
- Warranty note: registration, coverage, exclusions, and claim instructions.
- Marketing insert: referral prompt, upsell, or post-purchase offer.
Combining them is fine when the result stays readable. It stops working once the card starts feeling like a flyer. Electronics buyers want useful facts first. Pretty copy comes second.
There is also an operational reason to keep the structure disciplined. Well-organized inserts are easier for fulfillment teams to pack correctly, easier for QA to inspect, and easier for customer service to reference when something goes wrong. That saves time in places that are usually invisible until they become expensive.
If your packaging has to meet specific transport or material expectations, it is worth checking recognized references rather than depending on supplier shorthand. For transit performance, look at ISTA testing standards. For responsible paper sourcing language, FSC certification guidance is more credible than a vague green claim on a quote sheet.
Key specs that affect fit, clarity and durability
The spec list starts with dimensions, but it should not stop there. A useful electronics frosted zipper Bags Packaging Insert Checklist includes bag size, insert size, bleed, safe area, stock choice, finish, fold style, and how the insert sits next to the product. If any one of those is vague, the quote usually becomes vague too.
Outer bag dimensions are not the same as usable layout space. A 6 x 9 inch pouch does not behave like a 6 x 9 inch brochure. Seals, zipper edges, closures, internal product thickness, and fold lines all reduce the actual room available for copy. That matters because a card that fits on a screen can buckle once it is folded into a real pouch with cables, adapters, or a device inside.
Readability usually improves when the insert uses high contrast, medium-to-large type, and a restrained number of visual elements. White space is not wasted space here. It keeps the card from looking like a wall of instructions. Dark type on a light field remains the safest choice, especially if the frosted film already softens the image. Pale text can look polished in a mockup and disappear in the bag.
Stock choice affects both the feel and the durability of the insert. The most common options are easy to compare:
| Option | Typical Use | Strengths | Tradeoffs |
|---|---|---|---|
| 80-100 gsm uncoated text paper | Simple instruction card | Easy to read, low cost, quick to print | Less premium feel, can wrinkle more easily |
| 120-170 gsm matte coated stock | Retail insert or product card | Crisper color, better stiffness, cleaner presentation | Higher unit cost, slightly less flexible in tight bags |
| Coated stock with moisture resistance | Electronics exposed to humidity or long shipping windows | Better durability, slower edge damage | More expensive and not needed for every SKU |
Matte finishes often perform better than gloss inside frosted packaging because glare is lower and the card feels less slippery to the eye. Gloss can still work, especially when the insert is mostly visual and the print area is generous, but it needs more space and cleaner contrast. The choice should follow the product, not a trend.
Barcode and QR code placement deserve their own check. A code that scans in a file preview can fail after folding, trimming, or slight warping. Keep quiet zones intact. Avoid placing codes too close to a fold or edge. Test them at final size, not at a convenient size. That sounds basic because it is basic, and basic problems are the ones that waste the most time.
Production steps and lead time for inserts and bags
Good production starts with the brief, not the artwork. A supplier needs the bag style, usable internal space, insert copy, quantity, and target ship date before anyone starts pretending a proof is final. If that sequence is scrambled, the job gets slower and the odds of revision go up.
The clean workflow is straightforward:
- Confirm the bag style and actual usable inside space.
- Finalize the insert copy and required compliance language.
- Approve the layout rules and dieline.
- Review digital proofs carefully, including folds and bleed.
- Request a sample or press proof if the fit or readability is sensitive.
- Lock production only after the approval round is clean.
That process looks obvious until a launch timeline gets tight. Most delays come from missing dimensions, incomplete copy, late barcode changes, or brand edits after proofs are already in motion. Each one is small on its own. Together they push a project past the date that mattered.
Simple single-color inserts usually move faster than multi-panel cards, special folds, foil treatments, soft-touch lamination, or kits that combine multiple packaging components. If the insert is part of a larger launch that also includes custom bags or outer cartons, add time for coordination. One vendor can move quickly. Three linked components cannot.
As a working estimate, a straightforward insert can often move in roughly 10-15 business days after proof approval. More complex jobs commonly need 15-25 business days, especially when custom finishing, folding, or bag coordination is involved. If a vendor promises something much faster, ask exactly what is included and what assumptions are being made. “Fast” can mean efficient, or it can mean incomplete.
A buyer-ready packet should include the following:
- Product dimensions and any accessory dimensions
- Exact insert size or preferred folded size
- Quantity and target ship date
- Print files or editable copy
- Compliance language, barcode data, and QR destination
- Reference photos of the bag and contents
One plain-language content sheet and one marked-up reference file usually reduce back-and-forth better than a long email thread. The first shows what must appear. The second shows how you expect it to look. When both are aligned, there is less room for assumptions and fewer surprises at proof stage.
Cost, MOQ and unit pricing for frosted zipper bag inserts
Pricing is mostly a function of what you specify: size, stock, print coverage, number of panels, finishing, proofing, folding, and whether the insert ships flat or pre-folded. If the brief is complete, the quote is usually usable. If the brief is thin, the quote becomes a guessing exercise with a spreadsheet attached.
MOQ matters because setup cost does not disappear on a small run. A 500-piece order can look expensive next to a 5,000-piece order even when the card itself is simple. That is normal. Prepress work, press setup, inspection, and finishing are not free, and they do not shrink just because the purchase order does.
For rough planning, basic inserts often land around $0.12-$0.22 per unit at 5,000 pieces, depending on size and coverage. A heavier stock or more finished piece may run about $0.20-$0.38 per unit at the same quantity. Smaller runs can easily cost more per piece. Freight, samples, and special folding usually sit outside that number, so they should be treated separately.
Here is a cleaner way to read quotes:
| Quote Element | What It Usually Means | Why It Matters |
|---|---|---|
| Setup charge | File prep, press setup, or die work | Shows whether startup cost is being allocated properly |
| Sample cost | Digital sample, press proof, or production sample | Helps catch fit and readability issues before a full run |
| Unit price | Per-piece cost at your quantity | Meaningful only when size and finishing are comparable |
| Freight | Shipping from plant to receiving point | Can materially change landed cost |
The useful questions are direct. What triggers a new setup charge? Are samples billable? Is freight included? Does a color change count as a revision or a new run? Those are not nuisance questions. They are basic procurement questions that prevent budget drift.
For electronics packaging, the lowest unit price is not always the lowest total cost. A slightly more expensive insert that reads clearly, fits well, and reduces support issues is often cheaper in practice than a bargain version that causes repacks, returns, or a second print run.
Common mistakes that trigger delays, reprints and confusion
The most common mistake is tiny text. The second is too much text. The third is pretending those are separate problems. If the insert is for electronics, the reader usually wants a fast scan, not a lecture. A clean hierarchy, short paragraphs, and clear labeling do more than decorative graphics ever will.
Another common failure is a mismatch between the insert and the bag. The card is too large, folds badly, hides the product, or uses colors that disappear behind the frosted film. A good insert should sit inside the pouch without fighting the contents. If it has to be forced into place, the dimensions are wrong or the fold style needs another pass.
Content errors are expensive too. Missing care instructions, missing warranty details, no contact path, no QR code destination, or no compatibility note all create avoidable support work. In electronics, packaging is part of the user experience. If the first unboxing is confusing, the package has already lost some of its value.
Proofing mistakes tend to show up late because they look small on a screen. Trim lines get ignored. Bleed is too tight. Fold positions move text into awkward places. Barcode quiet zones get crowded. The fix is unglamorous but effective: print the layout, fold it, place it in the bag, and inspect the result before approval.
Mixed packaging programs create one more layer of risk. The insert looks fine on its own but conflicts with the carton, shipper, or companion materials. That is where a broader product packaging review helps. If the line uses Custom Packaging Products across multiple SKUs, consistency matters more than novelty. One content system is easier to maintain than several slightly different ones.
“The cheapest packaging mistake is the one you catch before the run starts.”
That is the real purpose of the checklist. It turns assumptions into review points. It also gives production, operations, and support a shared reference when a decision needs to be made quickly.
Final checklist and next steps before you request a quote
Before you ask for pricing, confirm the basics: bag size, insert size, copy blocks, print method, quantity, budget, timeline, and the exact approval path. If those are unsettled, the quote will not be a reliable basis for planning. It will just be a rough estimate with a faster turnaround than the actual work can support.
A clean request packet usually includes one reference file, one plain-language content sheet, and one priority list. The reference file shows the design direction. The content sheet lists the exact copy that must appear. The priority list tells the vendor what matters most if something has to be adjusted to hit cost or timing targets. That order keeps the conversation practical.
Then run one internal review before release. Operations should confirm the fit. Brand should verify the messaging. Support should check whether the card answers the questions customers actually ask after unboxing. Three lenses are better than one because they catch different kinds of mistakes.
If the insert is part of a broader launch, compare it against the rest of the package system. The bag, the box, the shipper, and the instruction card should feel like one coordinated set, not separate vendors trying to solve different problems in parallel. Good package branding is mostly consistency, not ornament.
The simplest next step is to gather the specs, request samples, compare quotes, and approve only after the insert is readable inside the frosted zipper bag. That is the actual value of the electronics Frosted Zipper Bags packaging insert checklist: decide the details first, then print them once.
FAQ
What should be on an electronics frosted zipper bags packaging insert checklist?
Start with the bag size, insert size, and the exact content blocks the buyer needs to see. Add print specs, stock choice, fold style, barcode placement, and proof approval steps. Include timing, cost, MOQ, and the final contact person so the order does not stall.
How do I size an insert for frosted zipper bags used for electronics?
Measure the usable flat space inside the bag, not just the outer dimensions. Leave room for folds, seals, and any product visibility you want to preserve. Test one sample fit before approving a full run.
What paper stock works best for frosted zipper bag inserts?
Matte or uncoated stock usually reads best when the bag itself is already visually busy. Use heavier paper if the insert needs to feel premium or stay flat in the pouch. Choose moisture resistance or coating only when the product environment actually calls for it.
How much do custom inserts cost with frosted zipper bags?
Price depends on size, print coverage, paper stock, finishing, and quantity. Lower quantities carry a higher unit cost because setup work is spread across fewer pieces. Ask for an itemized quote so you can compare setup, samples, and freight separately.
How long does production usually take for electronics insert packaging?
Simple insert jobs move faster than multi-panel or highly finished versions. Lead time stretches when copy is incomplete, proofs are delayed, or samples need another revision. Build extra time if the insert is tied to a product launch or retailer deadline.


