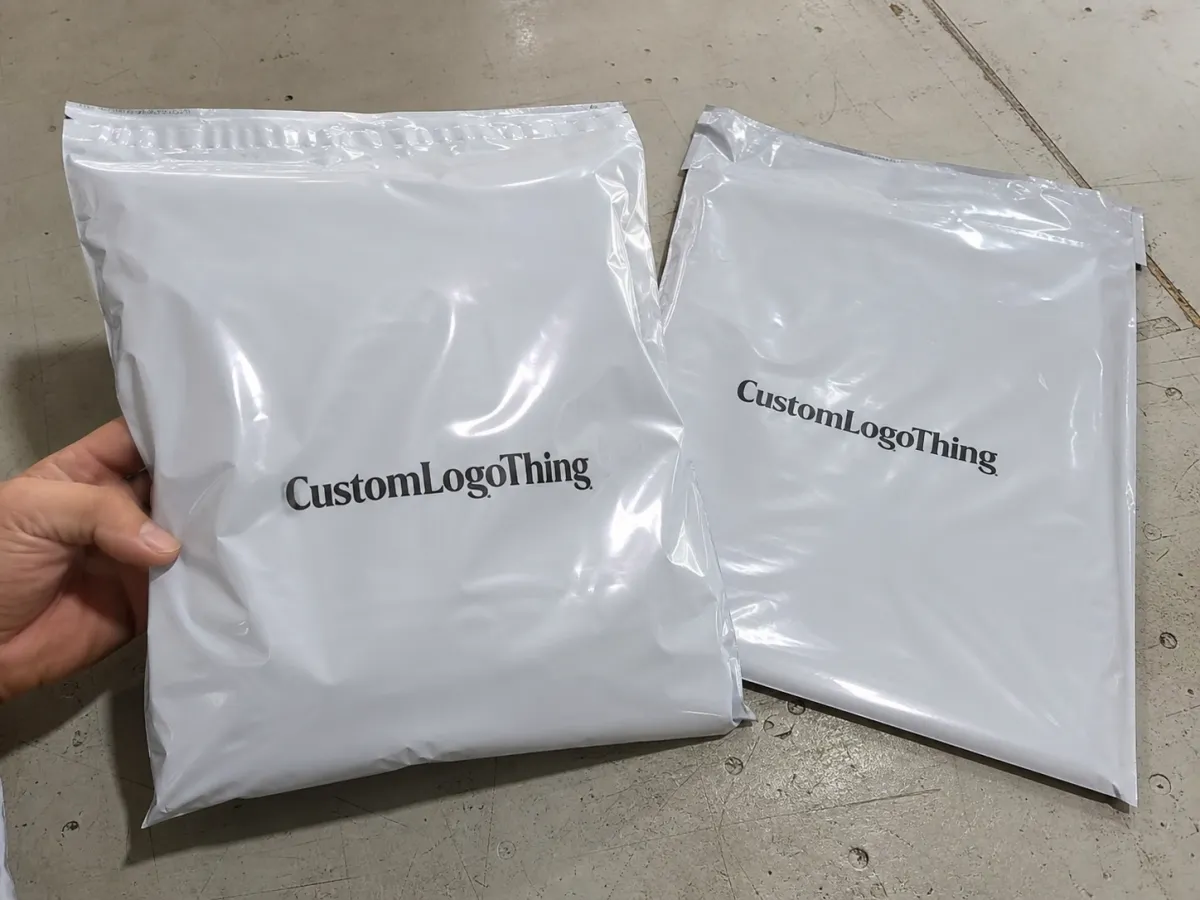
A centered mockup can look polished on screen and still land across a heat seal once the bag is filled, taped, and stacked for shipment. That gap between artwork and reality is exactly why the event merch Custom Poly Mailer bags logo placement guide matters. For branded packaging that has to travel well and still look sharp at check-in, in a booth, or in a social photo, the real task is not just printing a logo. It is placing that logo where the eye finds it fast and the bag structure does not fight the artwork.
From a packaging buyer's point of view, the useful question is not whether the logo can be printed. It is where the mark will stay readable after production, packing, transit, and handling. That small shift changes the whole conversation around package branding, retail packaging, and event merch presentation. It also saves money, because the expensive mistake is usually not a bad logo. It is a logo that looked fine in approval and poor in use.
Why the event merch custom poly mailer bags logo placement guide matters
On a flat proof, almost any logo can look balanced. On the finished mailer, the structure changes everything. A seam steals a few millimeters, a flap eats into the top edge, and the seal line can tighten the lower artwork more than anyone expected. In other words, the event merch Custom Poly Mailer Bags logo placement guide is really about protecting visibility while staying inside the bag's actual printable area.
That matters more for event merch because the mailer is often seen before it is opened. It may sit in a shipping stack, pass through registration, or show up in a photo before anyone reaches the contents. A logo that reads clearly from a few feet away gives stronger package branding, and that effect gets even better when the mark is simple, high-contrast, and not squeezed near an edge. Tiny type may survive on a PDF. It rarely survives a crowded loading dock.
Material finish changes the result as well. Matte film softens glare and can make typography easier to photograph. Glossy film reflects more light, which can weaken thin lines or pale ink under venue lighting. Opaque white mailers usually give the most consistent print surface and the easiest contrast. Frosted film can feel premium, but it often needs a stronger layout because the background is busy by nature. The same art file can feel elegant on one substrate and underpowered on another.
Film thickness matters too. Common event mailers land around 2.5 to 3 mil, while heavier-duty versions may move higher depending on the shipment profile. Thicker film feels sturdier, but it can also make the printed surface slightly less forgiving if the supplier's press setup is not dialed in. That is not a design flaw. It is a production constraint.
The goal is straightforward: strong visibility, clean print reproduction, and enough safe space that the logo survives the line between design and production. That is the real job of this event merch Custom Poly Mailer Bags logo placement guide.
How custom poly mailer printing shows up in real use
Custom poly mailer printing is usually planned around a few practical zones: the front panel, the back panel, the flap area, and any margin the construction removes from usable space. The trouble is that those zones are not identical from one bag size to the next. A 10 x 13 mailer and a 14 x 19 mailer can both look roomy in a mockup, yet one may have a tighter safe area once seals and closure overlap are accounted for.
Single-color logos tend to hold up best when the bag is folded, stacked, or handled quickly. Spot-color graphics work well if the brand has a strong identity and the printer can hold registration tightly. Full-wrap artwork can look dramatic, especially for event mailers meant to feel like a reveal, but the more coverage you ask for, the more important it becomes to manage seams, color breaks, and repeat consistency across the run. A layout that spans both panels needs more discipline than most buyers expect.
Ink coverage and background color affect visibility in very practical ways. Dark film may need white ink underprint to keep a logo from sinking into the substrate. Thin type can fill in if the press has to compensate for film movement. And if the bag will be photographed under mixed lighting, high contrast usually beats delicate detail. The camera is less forgiving than the human eye.
Here is the part many buyers miss: the best-looking placement on a flat mockup is not always the best choice on a filled bag. Once product is inside, the panel can bow or tension slightly, which changes how the eye reads the artwork. That is why good branded packaging planning looks at both the artwork and the finished shape, not one or the other. A logo that sits perfectly in the center of the file can still feel too low once the bag is packed.
For event sets that include inserts, apparel, or small merchandise, it helps to coordinate the mailer with the rest of the Custom Packaging Products so the experience feels intentional rather than assembled from separate parts.
Key design factors that decide the best print zone
Before anyone approves a layout, five variables deserve close attention: bag size, gusset depth, closure type, print method, and whether the mailers will ship flat or already packed. Those details sound minor until they move the logo by a quarter inch and make a design look crowded. A simple front-panel lockup may be fine on a larger bag, while a tighter format needs more disciplined spacing and fewer decorative elements.
Logo scale should match the viewing distance. For event use, that often means a simplified mark, heavier letterforms, and less dependence on tiny taglines that vanish once the bag is moving through a warehouse or crowd. If the bag needs secondary information, such as an event slogan or social handle, put that in a supporting role. The primary logo should still read first. A good rule is to design for one glance, not three.
Balance matters as well. Centered art feels orderly and premium. Upper-left or lower-right placement can look more editorial and may leave a cleaner field for labels or barcodes. Back-panel branding can be smart when the front face needs to stay open for shipping data. There is no single right answer, which is why the best event merch Custom Poly Mailer Bags logo placement guide starts with usage, not decoration.
Material-specific issues deserve attention too. White ink opacity on dark film can vary by supplier and press setup. Multi-color artwork may need tighter registration than the bag can comfortably hold. Glossy surfaces can make fine type harder to read, especially when light hits the bag at an angle. Those are normal production realities, not defects in the design.
There is also a simple physical limit: flexible film shifts a little during printing and a little more during filling. That is why artwork that depends on tiny alignment details is risky. In packaging terms, the most elegant design is often the one with the fewest things that can go wrong.
| Placement option | Best use | Visibility | Production note | Typical unit cost impact at 5,000 pcs |
|---|---|---|---|---|
| Front panel logo | Clean branding, fast recognition | High | Usually easiest to control and proof | Base price to +$0.05 |
| Back panel logo | Shipping labels on the front, branding on the reverse | Medium to high | Good when fulfillment needs a blank primary face | Base price to +$0.04 |
| Full-wrap artwork | High-impact event mailers and premium branded packaging | Very high | More coverage means tighter print control | +15% to +35% |
| Small repeat pattern | Retail packaging look, subtle brand texture | Medium | Works best with simple icons and stable spacing | +5% to +18% |
That table is not a universal quote sheet. It is a practical way to think about how coverage and placement affect both look and cost. A supplier that works with Custom Poly Mailers every day will usually have a sharper sense of how each layout affects the press schedule and the final bag.
Production steps and turnaround from proof to ship date
Good production starts before ink ever touches film. The usual path is artwork intake, layout check, digital proof or prepress proof, approval, print setup, production, inspection, and packing. Each step sounds routine, but that sequence is where schedule control lives. If the proof is sloppy or missing measurement notes, the correction usually shows up later as a delay.
The most common holdups are familiar to anyone who has ordered printed packaging: a logo sent only as a low-resolution image, missing vector files, color changes after approval, or late copy edits that force a new proof. Even a small wording change can reset timing if the printer has already locked the plates or screens. A rushed file almost always creates a longer timeline than a clean one.
Turnaround depends on print complexity, order volume, and whether the job requires custom color matching or special finishing. A straightforward single-color run may move faster than a full-wrap job with white underprint and multiple spot colors. As a rough planning rule, many orders land around 12-15 business days from proof approval, though that can stretch if artwork is not clean or the quantity is large. Orders with custom sizes, heavier film, or tight color matching can move closer to the upper end of that range.
That is why the best event merch custom poly mailer bags logo placement guide is also a timing tool. The sooner placement is approved, the easier it is to protect both print quality and delivery date. If a project is tied to a launch or event, that matters more than shaving a few dollars off the first proof.
The best proof is the one that shows exactly where the sealed bag will read in real life, not just how the logo floats on an artboard.
For buyers who want a broader quality check, industry references like ISTA and the packaging resources at Packaging.org are useful touchpoints. They will not tell you exactly where to place a logo, but they do reinforce a basic truth: shipping performance and visual presentation need to work together.
One practical quality-control step is to ask whether the printer is checking color against a standard, confirming edge clearances, and reviewing the bag after sealing, not just before. A front-facing logo can look perfect on an unsealed sheet and drift slightly once the film is cut and formed. Good QC catches that before the bags leave the line.
Cost and pricing: what changes your quote
Pricing on custom poly mailers usually comes down to a handful of levers: number of colors, print coverage, bag dimensions, film thickness, quantity tier, and any special finishing or custom sizing. That is why one quote can look modest while another climbs quickly. The bag itself may not be dramatically different in material cost, but the setup and print handling can be.
A simple front logo often costs less than full-wrap art because it asks less of the press and usually keeps setup lighter. More coverage means more ink, more registration control, and more chances to catch a mismatch before the run is approved. Buyers sometimes assume the mailer is "more expensive" because it is custom, but the real driver is usually how much of the surface the artwork occupies.
For planning, higher quantities still tend to lower the unit price even when the upfront setup is larger. That is old packaging math: more bags spread tooling and preparation across a wider run. A 1,000-piece order can feel expensive per unit, while a 5,000-piece or 10,000-piece order often settles into a much friendlier range. A typical event mailer order can land anywhere from roughly $0.20 to $0.60 per bag for simpler layouts, with fuller coverage and premium specs climbing above that. The range is wide because bag size, film thickness, and color count matter more than most buyers expect.
Here is a practical Comparison for Buyers reviewing branded packaging and package branding options:
| Quote factor | What it changes | Buyer impact |
|---|---|---|
| 1-color front logo | Lowest setup and simplest press control | Best for tighter budgets and fast approvals |
| 2-3 color design | More registration and proofing time | Better for stronger brand detail |
| Full-wrap print | More ink coverage and tighter alignment | Highest visual impact, higher cost |
| Thicker film or custom size | More material and possible tooling adjustment | Improves feel and fit, can raise the quote |
When comparing quotes, ask whether plate fees, tooling, freight, proofing, and color matching are included before you lock in placement. That one question prevents a lot of surprise numbers later. If the event kit also includes inserts or other custom printed boxes, it is usually smarter to treat the whole order as one packaging plan instead of a stack of unrelated line items.
Freight can be a hidden variable too. Poly mailers are light, but large runs still take space, and air shipping can erase the savings from a good unit price. For budget control, the quote should show both the product cost and the delivery assumption.
Step-by-step logo placement checklist for event merch
Start with the exact bag size, not a guess. Measure the usable print area, then mark a safe zone so the logo stays away from seals, folds, labels, and the closure margin. A lot of artwork problems happen because the logo is centered on the file, not centered in the real printable field. Those are two different things.
- Measure the bag. Confirm width, height, gusset, and seal areas before any placement work begins.
- Pick the primary face. Decide whether the front or back should carry the main brand mark based on shipping and event use.
- Set the safe zone. Leave enough space from edges so the seal, fold, or flap does not crowd the artwork.
- Resize for distance. Make the logo readable from a few feet away, not just on a screen.
- Proof the real layout. Review a mockup that shows edge-to-edge placement, not a floating logo on white space.
For event merch, that last step matters a lot. A proof should show where the logo sits relative to the mailer's edges and where any shipping label will go. If the back panel is intended for an event message, social handle, or secondary logo, say so early. Otherwise, the printer may assume it should stay blank for fulfillment or compliance stickers.
This is also where a good event merch custom poly mailer bags logo placement guide protects your budget. One clean proof is cheaper than a reprint, and one honest layout conversation is cheaper than explaining why the logo disappeared under a label.
Honest advice? Ask for two placement versions if the design allows it: one conservative layout that favors clean production, and one bolder version that pushes visibility. That gives you a better read on what your audience will actually notice. It also helps separate brand preference from actual printability.
If you are still mapping the rest of the event package, compare the mailer against other Custom Packaging Products so the whole order feels consistent in hand and on camera.
Common logo placement mistakes on poly mailers
The biggest mistake is crowding the seams. Put artwork too close to the closure flap or bottom seal and the design can distort, disappear, or look slightly off center after filling. That kind of shift is subtle on a proof, then very obvious in a stack of finished mailers. A safe zone of at least 0.25 inch from critical edges is a common starting point, and 0.5 inch is often safer when the design is busy or the bag is small.
Another common issue is overcomplicated art. Tiny text, delicate linework, and soft gradients can look polished in packaging design software but lose clarity once they are printed on flexible film. Poly mailers move a little, stretch a little, and flex more than a rigid carton. What looks elegant on paper can turn muddy on plastic. Thin reverse type is especially risky on glossy material.
Buyers also get tripped up by the final use of the bag. If a barcode, postage label, or fulfillment sticker has to go somewhere, the logo should not fight that space. Strong branding can be buried under logistics because nobody planned the mailer's real job. That is a package branding mistake, not a print mistake.
One more trap: approving the art too early without checking the safe zones. Once that happens, a clean rework usually costs time and sometimes money. It is much better to catch the issue in proof than to discover it while the event is already on the calendar. The same is true for color. A bright red on screen may print slightly deeper on film, and that shift should be checked before the order is locked.
Production teams also see avoidable problems with mixed file types. Raster logos with low resolution, missing outlines, and unconverted spot colors can all slow a job down. A clean vector file is not a luxury here. It is part of the production requirement.
In plain terms, the event merch custom poly mailer bags logo placement guide is there to keep you from paying twice for the same enthusiasm.
Expert tips and next steps before you order
Send vector artwork whenever possible, plus the exact bag dimensions, your target quantity, and a note on how the mailers will be packed. That one note can change the placement recommendation. A bag that ships flat and empty does not behave the same as one that leaves the floor pre-packed with inserts or apparel. If the mailer must fit over a thick folded garment, the safe area should account for how the center panel stretches when filled.
If you can, ask for one conservative layout and one bolder layout. The conservative version usually gives you cleaner production and easier fulfillment. The bolder version can improve shelf presence, booth visibility, or social sharing. Seeing both side by side makes the decision easier because you are comparing tradeoffs, not just shapes.
Verify the proof line by line. Check bleed, safe area, color count, and any blank space needed for labels or postage. If the order uses white ink, confirm how opacity will be handled on the chosen film. If the design is going onto darker material, that detail matters more than most people expect. Ask whether the printer will show a simulated packed mockup, not only a flat dieline.
For buyers who want the simplest path, compare three options before you approve anything: a front-panel placement, a full-wrap version, and a back-panel layout. That gives you a clear view of cost, impact, and turnaround. From there, the right choice usually becomes obvious. The strongest option is not always the loudest one; it is usually the one that holds up after sealing, shipping, and handling.
That is the practical heart of the event merch custom poly mailer bags logo placement guide: protect the brand, respect the bag structure, and keep the schedule intact so the merch arrives looking deliberate rather than improvised.
Where should the logo go on event merch custom poly mailer bags?
Place the main logo on the largest flat panel with the cleanest safe zone, away from seals, folds, and the closure flap. If the bag will ship with labels, leave one side or the back panel open so branding does not compete with fulfillment information. On many jobs, the front panel works best for recognition, while the back stays cleaner for shipping needs.
How big should the logo be on a custom poly mailer?
Size the logo for the viewing distance, not just for a mockup. Event mailers need quick recognition from a few feet away, so keep fine details and tiny text conservative if you want the mark to stay readable after the bag is filled and handled. A larger simple mark often performs better than a small detailed one.
Does full-wrap printing cost more than a single placement?
Usually yes. Larger coverage increases setup, ink use, and the chance that artwork needs tighter registration control. A single-panel logo is often the most efficient option when the main goal is clear branding at a lower unit cost. Full-wrap work can be worth it, but it should be chosen for impact, not by default.
What files should I send for poly mailer logo placement?
Send vector artwork when possible, plus the exact bag size, desired print area, quantity, and any required label or shipping space. A quick note about how the mailers are used helps the printer place the logo where it will stay visible in real-world handling. If you have brand colors, include the Pantone or production reference rather than a screenshot.
How long does custom poly mailer production usually take?
Turnaround depends on artwork readiness, print complexity, order size, and whether the order needs custom color matching or special proofing. The fastest jobs are the ones approved quickly, with complete files and clear placement instructions before production begins. Many projects land around 12-15 business days after approval, but complex jobs can take longer.

