Performance Golf Caps Print Method Comparison for Buyers
A Performance Golf Cap can survive more punishment than the logo on it. That is the part buyers learn after the first sample run. Stretch fabric, moisture-wicking finishes, mesh inserts, and curved crowns all change how decoration behaves, and the wrong choice can crack, pucker, or feel bulky long before the cap itself shows wear. A serious Performance Golf Caps Print Method Comparison has to look past the mockup and ask how the decoration behaves after heat, sweat, sunlight, packing, and repeated wear.
The first instinct is usually visual: which method looks sharpest, which one feels most premium, which one matches the brand story. Those are real questions. But the practical ones matter more once production starts. Will the logo stay legible on a perforated panel? Does the method add stiffness to a lightweight cap? Can the decoration keep its edge after a few wash cycles or a week in a golf bag? A buyer who ignores those details usually pays for them later in rework or missed deadlines.
Cap construction changes the answer as much as the artwork does. A structured front crown gives embroidery or a patch a firm base. A soft, unstructured crown moves more with the fabric, which can be good for comfort and bad for heavy decoration. Mesh-backed and perforated styles reduce stable space, so the logo size, panel layout, and seam placement matter more than they do on a classic cotton cap. That is why the best comparison starts with the blank, not the graphic file.
Performance Golf Caps Print Method Comparison: What Changes First?
The first thing that changes is the surface itself. Most performance golf caps are built from polyester, recycled polyester, spandex blends, or similar athletic fabrics designed to move and shed moisture. A 100 percent cotton twill cap gives decoration a calmer surface. A performance cap does not. It flexes, rebounds, and often includes ventilation features that interrupt the decoration zone.
That makes the job more technical than many buyers expect. A logo that looks crisp on a flat spec sheet may shift once it lands on a curved six-panel crown with a seam running through the middle. A 3D embroidery, a heat transfer, a screen print, and a patch all respond differently to that shape. The method should be chosen for the cap structure, not the other way around.
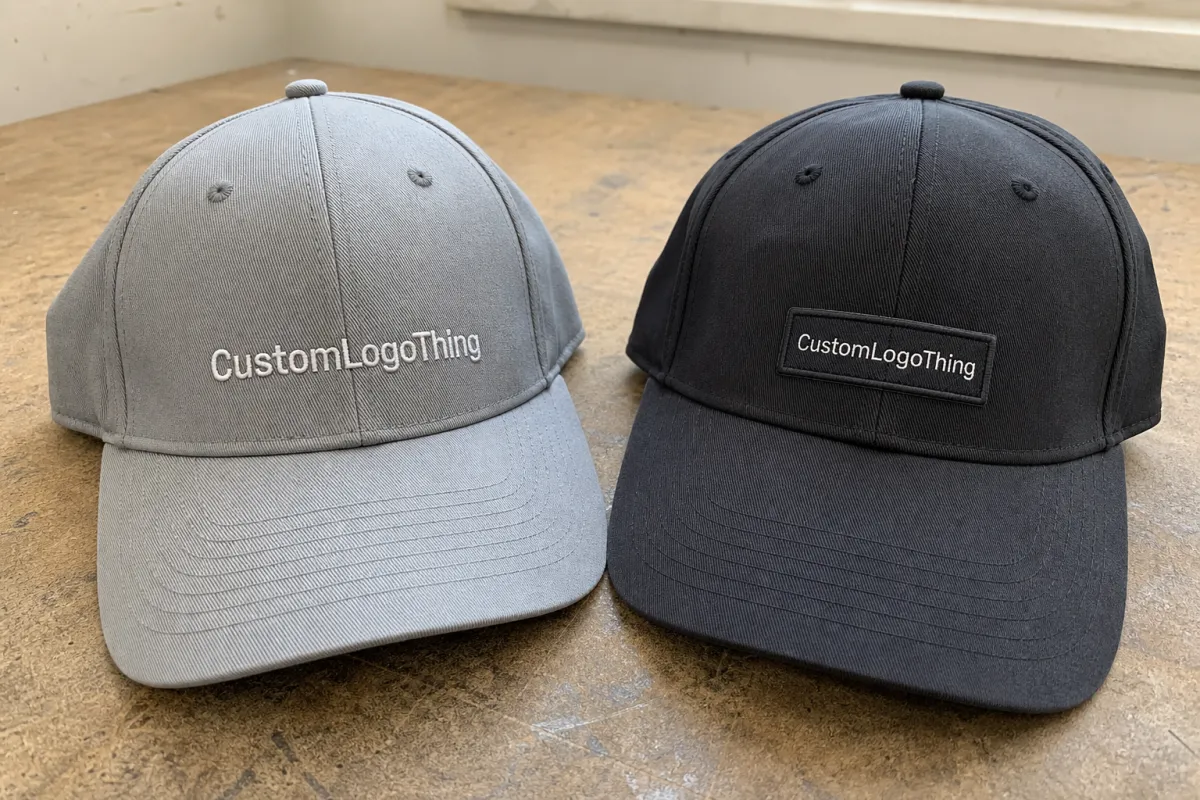
In practice, the comparison usually comes down to four questions: how premium the cap should feel, how much flexibility the decoration needs, how much detail the art contains, and how much wear the cap is likely to take. Embroidery gives texture and a classic sports look. Heat transfer is lighter and handles detail well. Screen print is efficient for simple graphics on stable surfaces. Patches can turn awkward art or seams into a more retail-ready finish.
If the cap can stretch and recover, but the logo cannot, the decoration method was the weak link from the start.
One more issue comes up often in sample review: structure versus softness. A stiff front panel can support dense embroidery or a thicker patch without trouble. A very light, stretchy panel may look cleaner with a low-profile transfer or a smaller stitched mark. The cap should still feel like a performance product after decoration. If the front becomes board-like, the method has done too much.
That is why a useful performance golf caps Print Method Comparison starts with fit, feel, and panel construction before it talks about cost. The decoration cannot be evaluated in isolation.
How Decoration Methods Grip Stretch Fabrics and Mesh Panels
Embroidery works by locking thread into the fabric. On a structured performance cap, that can look sharp and durable. On a softer cap with more give, dense stitching can pull the fabric slightly, raise the hand feel, and reduce breathability in the decorated area. That does not make embroidery wrong. It just means stitch density, underlay, and placement need to be matched to the cap. Small text can also disappear faster than buyers expect if the thread count is too high for the available space.
Heat transfer behaves differently. The graphic sits on the surface instead of being built from thread, so the cap stays lighter and the logo can flex more naturally with the crown. This makes transfer useful for moisture-wicking caps, especially when the artwork includes gradients, thin lines, or several colors. The tradeoff is process sensitivity. Temperature, pressure, dwell time, and adhesive type all affect the result. A transfer that looks great in proof can lift at the edges if the application is off by even a small margin.
Screen print can be a strong option for simple graphics, but it prefers flatter, more stable real estate. On a curved crown, a large ink field can distort visually. On mesh or perforated panels, the print may break up around the holes and lose edge sharpness. For that reason, screen print works best when the logo is bold, the placement is controlled, and the cap style gives the ink a decent landing zone.
Patches add another layer of flexibility. A woven patch, embroidery patch, leather-style patch, or printed badge can separate the logo from the cap fabric and solve problems caused by seams or stretch. That is one reason buyers like them for retail programs: the cap feels considered, and the decoration often reads as more finished. Still, patches bring their own risk. A thick backing or oversized border can make a lightweight golf cap feel heavy in the front panel, especially on lower-profile styles.
There is also a production detail many buyers overlook. Cap decoration may be one part of the order, but the packaging and support materials can use different print methods entirely. Hangtags, inserts, carton wraps, and instruction cards might go through digital printing for shorter runs, offset printing for longer runs, or flexographic printing for label work. CMYK builds can shift differently than spot color matching, and the print finishing on those materials affects how polished the whole order feels. The cap is the main product, but the packaging still shapes the brand experience.
That matters because a good performance golf caps print method comparison is not only about the logo. It is about whether the entire order feels consistent from the cap to the insert card. If the cap looks modern and athletic but the support print is muddy or off-color, the program feels less controlled.
Cost and Pricing Drivers Behind Each Cap Decoration Choice
Unit price is only part of the bill. The real cost is built from decoration method, quantity, artwork complexity, setup, and how hard the cap is to decorate. A flat structured crown is easier to work with than a curved, perforated, or seam-heavy style. A simple one-color logo is easier than a multicolor emblem with tiny type. Buyers who compare only the per-cap price usually miss the actual cost drivers.
Embroidery usually includes digitizing, which turns artwork into stitch files. That fee often falls somewhere around $25-$75, depending on complexity, but dense or detailed art can push it higher. Heat transfer may carry a smaller setup charge, while screen print often adds screen or plate preparation. Patch work can include tooling or construction charges, especially for custom shapes or specialty finishes. A quote that looks cheapest can become expensive once these front-end items are added back in.
| Method | Typical decoration cost | Usual setup | Best fit | Main watchout |
|---|---|---|---|---|
| Embroidery | $0.75-$2.25 per cap at 500 units; lower at higher volume | Digitizing $25-$75 | Structured fronts, premium presentation | Can stiffen light stretch fabric |
| Heat transfer | $0.60-$1.60 per cap | $0-$50 depending on art | Lightweight performance caps, fine detail | Needs correct heat and pressure |
| Screen print | $0.35-$0.95 per cap | $30-$80 per color | Simple logos on stable panels | Poor fit on curved or textured surfaces |
| Patch application | $0.80-$2.50 per cap | $60-$150 for patch tooling or development | Retail programs, covering awkward seams | Thickness and edge bulk |
Quantity changes the economics fast. At 100 pieces, a method with low setup and fast approval may beat a cheaper-looking process that needs more upfront work. At 2,500 pieces, that setup gets spread over enough units to matter less, and a method that seemed expensive at the beginning may land in the middle of the pack. That is why small-run and large-run pricing can point to different answers.
Rush fees, sampling, and extra decoration locations are other common cost drivers. A front logo is straightforward. Add a side mark, a back mark, and a closure hit, and the labor multiplies. If the order also includes packaging, buyers may see separate charges for labels, cartons, inserts, or print finishing on the collateral. For paper items, FSC-certified stock is a reasonable choice when the brand wants a lower-impact sourcing signal on the supporting print pieces.
Reading a quote line by line is the only honest way to compare it. Unit price, setup, sample cost, minimum quantity, shipment timing, and reorder charges should all be visible. A true performance golf caps print method comparison is not just about decoration style. It is about the full landed cost and what happens when the same order is repeated six months later.
Process and Lead Time: From Artwork to Approved Production
The process starts with artwork review. Good suppliers want vector files, clean lines, and clear placement instructions. If the file is not ready, time gets spent on cleanup before production can even be quoted accurately. That matters most for embroidery, where the art has to be translated into stitch paths, densities, and underlay settings that work on a curved crown.
Proofing is the next checkpoint. A transfer may need a film proof. A patch may need a construction sample. Embroidery usually needs a sewout or stitch proof. This step catches the problems that flat artwork hides: text that is too small, lines that collapse, borders that look too heavy, or a logo that sits awkwardly across a seam. If proofing is rushed, the schedule gets risky quickly.
Lead times vary by method and order size. A simple transfer or straightforward screen print can move quickly once art is approved. Embroidery and patch production often take longer because they have more setup and more opportunities for revision. A typical decorated cap order often lands around 7-15 business days after proof approval, though a complex patch build or a larger run can push beyond that. Shipping adds its own clock, especially when the order has multiple cartons or retail-ready packaging.
Packaging should not be treated as an afterthought. If the caps travel with printed inserts, wrap labels, or product cards, transit handling becomes part of the job. ISTA test methods are useful for understanding compression, vibration, and shipment abuse before the order leaves production. That is not a decoration issue on paper, but it affects how the customer receives the product.
For a buyer doing a performance golf caps print method comparison, the real lead-time question is simple: which method can be approved cleanly and stay on schedule without creating avoidable risk? Fast is only useful if the sample still looks right.
Key Factors That Decide the Best Method for Golf Cap Orders
Cap construction should lead the decision. A structured crown can support thicker decoration and larger marks. A soft or highly stretchable crown usually benefits from a lighter method that moves with the fabric. Mesh-backed and perforated styles reduce usable space and can disrupt large graphics, which makes smaller logos and more flexible decoration methods easier to live with.
The intended use matters just as much. A retail golf line usually needs more perceived value, so a woven patch or embroidery may be the right fit. A tournament giveaway is often judged on clarity and budget, which can make transfer or screen print the better call. Staff uniforms and athletic branding usually lean toward comfort and repeatability, especially when the cap will be worn for long stretches in heat.
Durability expectations change the ranking too. Caps worn in strong sun and sweat need decoration that holds color and shape under real use. Embroidery and quality patches tend to age well because they are physically anchored to the fabric. Heat transfer can perform well too, but only when the film is matched to the cap and applied correctly. Poorly chosen transfers are the ones that curl or peel early.
Artwork detail often decides the final answer. A simple one- or two-color mark works well with embroidery or spot-color screen print. A logo with gradients, fine lines, or small type may need CMYK transfer or a patch build that preserves detail better. If letters are tiny or the logo includes a tight outline, ask for a sample at full size on the actual cap shape. Flat art rarely tells the full story.
A practical rule: the more the cap stretches, vents, or curves, the more the decoration should stay light, flexible, and compact. Big graphics and athletic fabrics do not always get along.
Other checks worth running before approval:
- Logo size and placement on the actual panel, not only on a flat proof.
- Whether the front crown has enough structure to carry the chosen method.
- How the cap feels after several hours of wear and movement.
- Whether the decoration needs premium texture or a lighter athletic hand feel.
- How repeat orders will match on color, location, and scale.
Step-by-Step Guide to Picking the Right Print Method
Start with use case. A cap for a golf tournament, a retail shelf, and a staff program all have different priorities. Tournament caps usually need clean visibility and controlled cost. Retail caps need a stronger finish and a more deliberate feel. Staff programs often care most about durability, comfort, and reorder consistency.
Then narrow the field to two or three methods. Compare the same logo, the same cap blank, the same size, and the same placement across each quote. Otherwise the comparison is distorted from the start. One supplier may be pricing a 3-inch front logo while another is quoting a smaller side mark or a different decoration zone altogether. That is not a fair comparison.
Next, ask for a decorated sample or a proof on the exact cap style. This is where curve, seam placement, and edge clarity become obvious. A logo that looks balanced in a PDF can drift when it crosses a panel seam or sits too close to a vent line. If the supplier can show a real sample, that is better than a mockup. A photo proof on the exact blank still beats guessing.
Then compare the quote against a short checklist:
- Does the method fit the cap material?
- Does it support the artwork cleanly at full size?
- Does it stay inside budget at the target quantity?
- Will it meet the required ship date?
- Can it be repeated on reorder without drift?
That last point deserves more attention than it usually gets. A good first run means little if the reorder comes back with a slightly different stitch density, transfer gloss, or patch size. Reorder stability is part of quality, especially for brands that run seasonal or ongoing programs.
A complete performance golf caps print method comparison should end with one final question: what will the buyer notice first when the cap is in hand or on someone’s head? If the answer is edge sharpness, color control, or texture, the method needs to support that first impression, not compete with it.
Common Mistakes, Expert Tips, and Your Next Move
Choosing the method before confirming the cap fabric is a common mistake. A process that works on a firm cotton cap can fail on a stretchy polyester style. Another easy miss is placing a large graphic over a seam or vent and expecting it to lie flat. The cap rarely cooperates. Buyers also skip stretch and wash testing too often, which is how cracking, edge lift, and distortion slip through to bulk production.
Expert buyers usually make the same moves. They quote the same artwork across multiple methods. They request a sample on the actual cap style, not a random blank. They confirm placement tolerances for the front panel, side mark, and closure area. They check the logo from normal viewing distance, not just under close inspection. They keep reorder notes with the cap style, color, decoration method, and approval sign-off in one place.
The supporting materials matter too. A cap with a clean embroidered front can still feel less finished if the hangtag or insert looks off. If the order includes printed collateral, the paper grade, color matching, and finish should match the same level of control used on the cap itself. Packaging does not rescue a weak decoration choice, but it can make a strong one feel more complete.
The best move is simple: shortlist two methods, get side-by-side pricing, and compare samples on the real cap. Use the same yardstick every time: price, lead time, decoration quality, comfort, and reorder consistency. That keeps the decision grounded in production reality instead of appearance alone.
A strong performance golf caps print method comparison should make the choice clearer, not busier. If the cap blank, artwork, schedule, and budget all point to the same method, the order usually goes smoothly. If they do not, the sample stage is the place to find out.
FAQ
Which print method lasts longest on performance golf caps?
Embroidery and well-made patch applications usually last longest because they are anchored to the cap and handle repeated wear well. Quality heat transfers can also last a long time if they are matched to stretch fabric and applied with the right temperature and pressure.
Is embroidery or heat transfer better for moisture-wicking golf caps?
Embroidery gives a premium, textured finish, but it can add weight and reduce flexibility on very light performance fabric. Heat transfer usually keeps the cap lighter and smoother, which often makes it the better fit for breathable athletic styles.
How do mesh panels affect a golf cap print method comparison?
Mesh panels reduce stable surface area, so large or dense decorations can distort, crack, or lose alignment more easily. Smaller logos and flexible decoration methods usually work better on ventilated or perforated panels.
What should I compare in custom golf cap quotes?
Compare unit price, setup or digitizing fees, sample charges, minimum quantity, turnaround time, shipping, and any rush fees. Make sure every quote uses the same cap style, logo size, placement, and number of decoration locations.
How do I avoid crooked or cracked logos on performance caps?
Ask for a sample on the actual cap material before bulk production. Approve the size, placement, and decoration method only after you have seen how the logo sits on the real crown and how it handles the fabric's stretch.


