Fitness Studio Frosted Zipper Plastic Bags Print Method Comparison
Fitness studio Frosted Zipper Plastic Bags Print Method Comparison matters because the bag is often part of the first physical impression a member gets. It sits on a front desk, holds welcome kits or retail items, and needs to look intentional under bright lobby lighting.
The frosted finish softens glare, hides some visual noise, and makes printed artwork easier to read than a glossy clear bag in many settings. That also makes the print method more important: the same logo can look crisp, muted, or expensive depending on how it is applied.
Why frosted zipper bags feel premium at the front desk
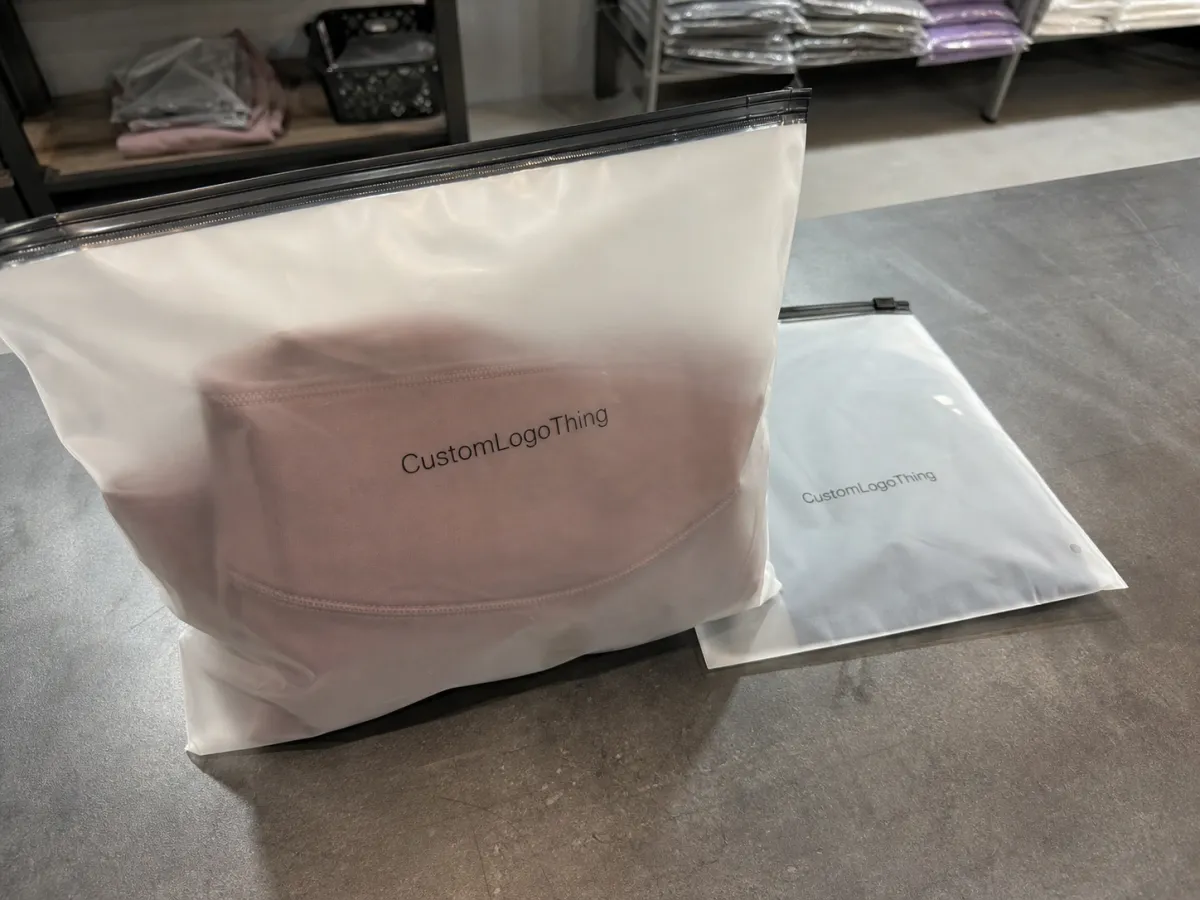
Frosted film diffuses light, so logos usually read more consistently under recessed fixtures, daylight, and reflective countertops. Clear bags can look sharp in one moment and washed out in the next. Frosted bags are usually less sensitive to that change.
That matters in busy studios where staff are moving fast and bags are being handed over all day. The frosted surface helps the package look organized even when the front desk is active. It also makes the bag feel more considered than a plain shipping-style pouch.
- Welcome kits with onboarding inserts or small accessories.
- Retail packs for apparel, socks, grips, wraps, or recovery items.
- Challenge rewards that need better presentation than a standard bag.
- Member gifts where the packaging has to feel deliberate.
- Event handouts for launches, open houses, or workshops.
"If a logo only looks right on a white background file, it still has work to do."
That is the practical test for this kind of packaging. A frosted zipper bag can forgive a lot, but it will not rescue weak artwork, fuzzy type, or a layout that depends on perfect lighting. The bag should support the brand, not hide design problems.
Fitness Studio Frosted Zipper Bags Print Method Comparison
The right print method depends on quantity, color complexity, and how fixed the artwork is. Frosted film usually rewards bold graphics and simple shapes. It is less forgiving of tiny text, delicate gradients, and thin lines.
| Method | Best fit | Strengths on frosted film | Watch-outs | Typical order profile |
|---|---|---|---|---|
| Screen printing | One to two spot colors, strong logos | Good opacity, crisp solids, durable ink laydown | Setup time, less flexibility for gradients and tiny details | Medium to larger runs with stable artwork |
| Digital printing | Short runs, multi-color art, changing graphics | Fast proofing, CMYK flexibility, easier file changes | Can look softer than spot color on dark or dense graphics | Small to mid-size runs with tighter deadlines |
| Flexographic printing | High volume and repeat production | Lower unit cost at scale, stable repeatability | Plate setup, less forgiving when artwork changes late | Large orders with fixed artwork |
| Hot stamping | Premium accents, small logos, foil-like highlights | Strong contrast and a finished look | Not suited to full-coverage graphics or complex color work | Selective use on a limited print area |
Screen printing is usually the cleanest choice for simple logos that need good opacity. On frosted film, it tends to hold solid color well and read clearly from a distance. It is also a good match when the studio wants a durable mark without extra complexity.
Digital printing works better when the order is smaller, the artwork changes often, or the design has more colors. It saves setup time, but the final look can be slightly softer than a spot-color print, especially with dense dark artwork or very fine detail.
Flexographic printing is best when the same bag will be reordered repeatedly. Once plate cost is spread across a large quantity, the unit price becomes attractive. The trade-off is flexibility: late changes are expensive and slow.
Hot stamping is more of an accent choice than a full decoration strategy. It can make a small logo or detail feel premium, but it is not a good fit for complex artwork or large coverage.
One technical point matters a lot on frosted film: texture can soften thin type and make small registration issues more visible. That is why simple layouts, stronger line weights, and restrained color choices usually print better than complicated files that looked impressive on screen. If the bag will be used with printed inserts or cards, keep the visual tone aligned so the whole kit feels like one system.
Cost and pricing: what actually changes the unit cost
Quotes are easier to compare when the cost is broken into parts: bag, print, setup, freight, and any rush charge. A low bag price can stop being low once decoration and shipping are added. A quote that looks higher at first can still be the better deal if it avoids tooling or reduces waste.
- Quantity affects how much setup cost gets absorbed per bag.
- Color count matters most in screen, flexo, and hot stamping.
- Print coverage raises cost faster than a small corner logo.
- Film thickness changes both material cost and the feel of the bag.
- Rush timing can push up production cost or freight cost.
For rough planning only, not final quotes, a one-color screen print on a mid-size frosted zipper bag may land around $0.18 to $0.35 per unit at a 5,000-piece level. A short digital run of 500 to 1,000 units often sits around $0.35 to $0.70 per bag when the art is colorful or the deadline is tight. Flexo can be very competitive on large repeat orders, but only after plate charges are spread across enough pieces.
The key is to ask for line-item pricing: bag price, print price, tooling or plate charges, proofing, freight, and any rush fee. That is the only way to compare two suppliers fairly. If one quote is bundled and the other is itemized, the bundled one can look cheaper even when it is not.
If the order includes paper inserts or companion materials, price those the same way. A studio kit is often more than one printed item, so the full budget should include every component that ships together. Paper finish, folding, and ink coverage can change the feel of the kit, but they also change the cost.
Process and timeline: from artwork approval to delivery
Most delays happen because the artwork or size decision is not final early enough. A standard flow is quote, artwork review, proof, sample or mockup, production, inspection, and shipment. If the file is clean and the dimensions are already set, the process moves much faster.
Digital printing is usually easiest when the design is still changing. Screen printing and flexography need more prepress work, so they benefit from early approval. That does not make them slow by default; it just means late edits are more disruptive.
For planning, it helps to think in checkpoints:
- Proof approval: often 1 to 3 business days when the artwork is ready.
- Sample or mockup review: same day to a few days, depending on the supplier.
- Production: often 7 to 15 business days after approval.
- Transit: shipping time plus extra buffer for event deadlines.
Rush jobs can be done, but every time a schedule is compressed, the cost of last-minute changes rises. A small wording update that seems harmless on a screen can become expensive once production starts.
For shipments that need to survive handling and stacking, general packaging test references from ISTA can be useful, especially when the order includes mixed materials. If a kit includes inserts or labels, stewardship references from Packaging.org can help keep the full package organized. The goal is simple: avoid failures that were preventable.
Key spec choices that affect print quality and daily use
The spec matters as much as the decoration. A bag can be printed well and still feel wrong if the zipper drags, the film is too thin, or the contents force the pouch into an awkward shape. The quote should be read as a use-case decision, not just a decoration decision.
- Film thickness affects stiffness, durability, and how well the bag stands up.
- Seal strength matters if the bag will be opened and closed repeatedly.
- Zipper quality changes perceived value very quickly.
- Gusset depth helps with folded apparel, towels, and boxed accessories.
- Print placement needs to stay clear of seams, zippers, and stressed folds.
For light retail items or giveaways, a thinner film may be enough. For heavier kits, repeated handling, or anything the member will reuse, a thicker build usually feels better and lasts longer. The difference is easy to feel in hand, even if a buyer would not describe it in technical terms.
Artwork placement deserves close review. A logo too near the zipper can distort when the bag is full. Type that crosses a bend can break up. On frosted film, those issues show faster because the surface already softens contrast.
Rub resistance is another practical concern. A bag that looks good on day one but scuffs after a few front-desk handoffs will not hold up as a branding tool. In a fitness setting, bags are handled, stacked, and sometimes reused, so the print method should be judged by how it performs after real use.
If inserts are included, match the paper finish to the bag’s visual tone. Matte paper often pairs well with frosted plastic because both feel restrained. Gloss can work too, but it should be a deliberate choice rather than a default.
Step-by-step ordering checklist for fitness studios
The fastest way to narrow the options is to start from use. A retail bag, a new-member kit, and an event giveaway are different orders even if the logo is the same. Each one can call for a different size, quantity, and print method.
- Define the job. Decide whether the bag is for retail, onboarding, an event, or a reward kit.
- Choose the size first. Fit the actual contents, not just the desired look.
- Prepare clean artwork. Vector files are still the easiest path for print accuracy.
- Confirm color values. Use PMS for spot matching or CMYK for digital print.
- Set a quantity target. Ask for tiered pricing so break points are visible.
- Decide on coverage. A small logo and a large printed panel cost very differently.
- Work backward from the deadline. Leave time for proof review and one revision cycle.
Before approving a sample, check it under the same lighting where it will be used. A lobby with daylight, a desk with downlights, and a retail wall under track lighting can all change how the frosted surface reads. The same print may look stronger in one place than another.
Also test zipper action, seal integrity, and fit with the actual contents. A bag that looks good but fights the staff member who opens it every day will not stay well liked for long. The real quality check is not the photo; it is the hands-on use.
If the order includes companion cards or inserts, review them together. A package can lose coherence quickly when the bag and the printed insert were approved separately. That is especially true when the paper item and the plastic bag are produced by different methods.
Common mistakes that raise cost or dull the branding
The most common problem is artwork that is too delicate for the substrate. Thin strokes, tiny copy, and raster logos often look fine on a screen and weaker on frosted film. Texture, zipper placement, and bag movement all work against overly detailed art.
- Late design changes after proof approval.
- Unclear quantity tiers that make unit cost hard to compare.
- Ignoring minimums when comparing digital, screen, and flexo quotes.
- Too much ink coverage that hides the frosted effect.
- Poor file prep that creates extra prepress work and delays.
Another frequent mistake is assuming CMYK is always the best option. It is useful for colorful artwork, especially in digital printing, but it is not automatically better for a simple brand mark. A one- or two-color spot print can be sharper, easier to read, and cheaper at the right volume.
There is also a visual mistake that does not show up in the spreadsheet: printing too much of the bag. Frosted film has its own character, and full coverage can remove the very quality that made it feel premium. In many cases, a restrained mark on a quiet frosted field is stronger than a full-bleed design.
How to compare samples and quotes without losing the plot
The cleanest comparison method is straightforward: review the sample or proof, then review the pricing structure. If the sample looks right but the quote is unclear, there is still a risk problem. If the price looks good but the sample feels off, the branding problem remains.
A practical scorecard usually comes down to five points:
- Price clarity and whether the quote separates bag, print, and freight.
- Lead time from proof approval to shipment.
- Print clarity on frosted film, not just on a paper mockup.
- Communication speed when artwork questions come up.
- Fit for use with the actual contents staff will pack.
That framework keeps the decision grounded in what matters after delivery. A bag that prints beautifully but arrives too late has failed. A bag that arrives on time but cannot hold the intended contents has also failed. Good packaging is a balance of appearance, cost, and timing.
For fitness studios, the strongest choice is usually the one that reads clearly at the front desk, survives daily handling, and fits the budget without hidden surprises. Screen printing, digital printing, flexographic printing, and hot stamping all have a place. The right answer depends on the art, the quantity, and how the bag will be used after production.
Which print method is best for fitness studio frosted zipper bags?
Screen printing is usually best for simple one- or two-color logos that need strong opacity. Digital printing suits shorter runs, faster turnarounds, and artwork with multiple colors or gradients. Flexographic printing is more practical on larger repeat orders where the same artwork will be used again.
How does the frosted finish affect print color on fitness studio bags?
The frosted surface softens contrast, so lighter inks may need stronger color values to stay readable. Dark solids and bold shapes usually hold up best. A physical sample under the studio’s actual lighting is the most reliable check.
What MOQ should I expect for frosted zipper bags with custom printing?
Minimums vary by method and supplier. Digital jobs often allow smaller quantities than screen or flexo because they avoid plate or screen setup. Higher-volume methods can still be more economical overall, but only once setup cost is spread across enough bags.
How long does production usually take for custom frosted zipper bags?
Proof approval can happen within a few business days if the files are ready. Production often takes about 7 to 15 business days after approval, depending on the method and quantity. Shipping time should be added on top of that, especially for event-driven orders.
What should I check before approving a sample bag?
Check zipper action, seal quality, and the fit of the actual contents. Confirm logo placement, color contrast, and whether the frosted finish helps or hurts readability under real lighting. Also verify carton counts and labeling before the full run starts.


