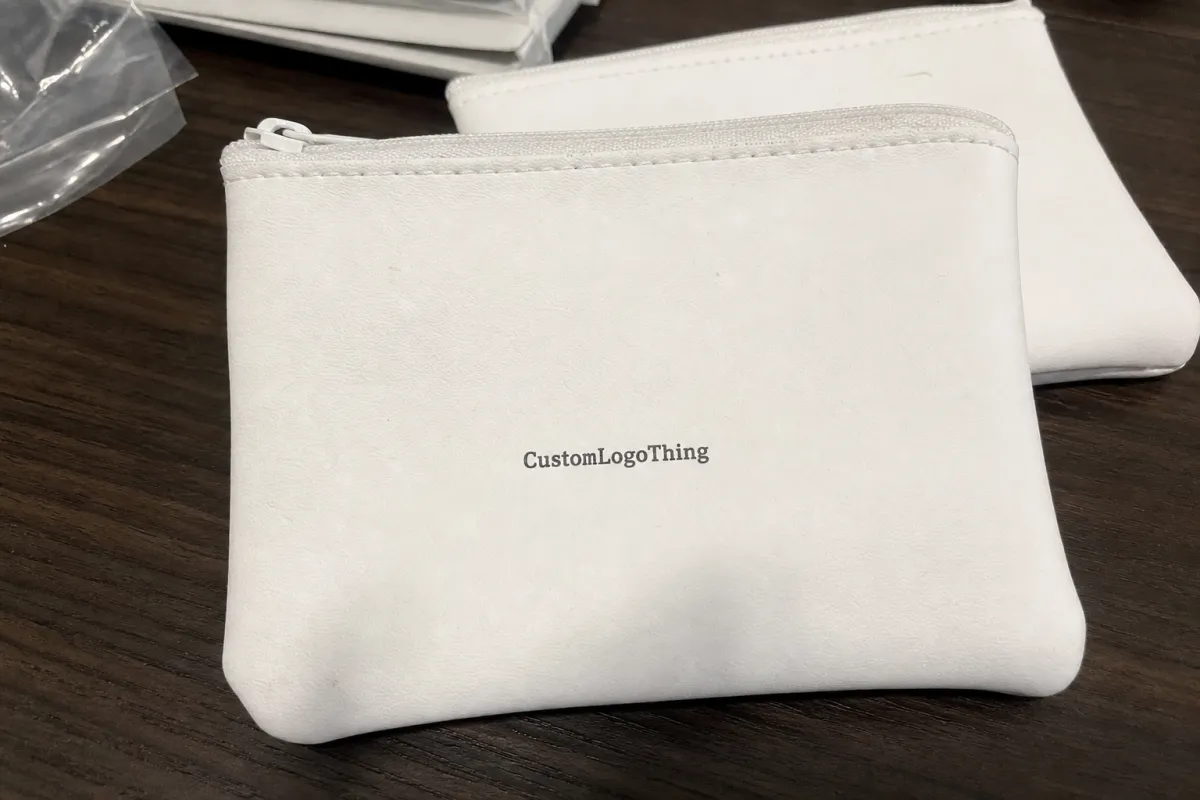
Jewelry Brands Zipper Pouch Bags Artwork Proof Checklist
A jewelry brand approves a pouch proof in a hurry. Then the bags arrive and the logo sits too close to the zipper, the metallic ink looks muddy, and the QR code scans only half the time. That is not a design problem. It is a proofing problem. A jewelry brands zipper pouch bags Artwork Proof Checklist exists to stop that kind of inventory headache before production starts.
An artwork proof is the last technical checkpoint before plates, screens, digital setup, or converted files are locked. Once it is approved, every mistake turns into a unit cost. That matters more with jewelry packaging than with a generic mailer because the pouch is often photographed close, handled by customers before the product is seen, and expected to look premium even at a small size.
For zipper pouches used with rings, chains, charms, earrings, repair kits, and accessory inserts, the proof should confirm artwork placement, bag size, material, zipper position, print method, color callouts, bleed, safe zones, warning text, barcode or QR readability, packing specs, and shipping details. If the pouch is going to sit near a counter display or appear in ecommerce photos, the margin for sloppiness gets even smaller.
Packaging is unforgiving because the design space is interrupted by structure. A zipper track takes room. Heat seals take room. Gussets and folds take room. The artwork may look balanced on a flat screen and still fail on the finished bag. The checklist keeps those mechanical limits visible.
Practical rule: if a detail affects customer perception, scannability, retail compliance, or reorder accuracy, it belongs on the proof.
How an Artwork Proof Works Before Zipper Pouch Production
The proofing flow is straightforward. The buyer sends artwork and order specs. The supplier checks file quality. A production or prepress team creates a digital proof. The buyer reviews it. Revisions happen if needed. Written approval releases the job into production. The process sounds simple because it is. The catch is that simple work still fails when one step is rushed.
There are two common proof types: digital PDF proofs and physical pre-production samples. A digital proof is quicker and cheaper. It usually shows artwork placement, dimensions, print colors, zipper location, safe zones, and proof version. For a straightforward one-color logo on a standard pouch, that may be enough.
A physical sample shows what a PDF cannot. You can judge scale, material feel, zipper function, opacity, gloss, and how the bag behaves when filled. That is especially useful for first runs, metallic effects, translucent films, or retail launches. Spending $75–$250 on a sample can be cheaper than correcting 10,000 bags that miss the mark.
Do not treat a proof as a color guarantee unless the supplier is matching to a Pantone reference, printed drawdown, or approved physical sample. A monitor is a preview, not a standard. Screen color shifts, and office printers distort even more aggressively. If a proof looks “close enough” on a laptop, that is usually code for uncertainty.
The supplier is usually checking technical issues: vector format, image resolution, fonts, print area, seam allowance, zipper clearance, and whether the artwork can survive the selected print method. A thin 0.25 pt line may look elegant in Illustrator and then disappear on flexible film. The buyer has a different job: check spelling, SKU codes, URLs, QR destination pages, color expectations, and the actual customer experience. That division matters.
Zipper pouches need more scrutiny than flat labels because the structure can distort the design. The zipper track, sealed edges, hang holes, tear notches, gussets, and folds all reduce usable space. A jewelry brands zipper pouch bags Artwork Proof Checklist keeps those constraints from turning a polished design into a production mistake.
Artwork Specs Jewelry Brands Should Confirm on Every Proof
Start with file quality. Vector AI, EPS, or PDF files are preferred because they scale cleanly. Raster logos should usually be 300 DPI at final print size. A tiny PNG copied from a website does not become print-ready because someone labels it “high res” in an email.
Then confirm the bag dimensions and orientation. Check width, height, usable print area, zipper direction, top margin, bottom seal, and whether the pouch will be displayed upright, flat, or hanging. A 3 x 4 inch pouch behaves differently from a 5 x 7 inch pouch, especially once a backing card or chain is inside.
Safe zones matter more than most buyers expect. Keep logos and text away from zipper tracks, heat seals, rounded corners, side seams, hang holes, and gussets. For many small jewelry pouches, a 3–5 mm minimum clearance is a sensible starting point, but the supplier’s tolerance should win. Some films and sealing methods need more room.
If the artwork bleeds to the edge, ask for the required bleed amount. Flexible packaging moves under heat and pressure, so a design that kisses the trim line in a mockup may show a white sliver on the finished pouch. That is a common failure on full-coverage backgrounds.
Color deserves real attention. Use Pantone numbers for spot colors and CMYK values for process printing. Metallic gold on screen is not metallic ink. Gold-colored CMYK is not foil. Foil is not the same as metallic ink. Different effects, different costs, different lead times. Buyers who treat them as interchangeable usually get the wrong finish.
Typography should be outlined or embedded. Small text needs to be checked at actual size, especially on frosted, metallic, or translucent material. Thin serif fonts may look refined in a brand deck and unreadable on a 2.5 inch pouch. Low-contrast copy, like pale gray on frosted film, often looks premium right up until nobody can read it.
Barcode and QR code checks are non-negotiable if the pouch supports retail, warranty registration, care instructions, or authentication. Confirm size, quiet zone, contrast, and destination URL. Test scans from a printed proof when possible. Use more than one phone. Camera quality and lighting change the result faster than most teams expect.
Jewelry brands may also need choking warnings for small parts, material disclosures, country of origin, suffocation warnings for certain bag sizes, SKU labels, recycling marks, and retailer-required text. Sustainability claims should stay specific. Vague wording invites trouble unless the material and structure actually support the claim. If the pouch includes a paper insert card, certification should be checked separately through the FSC system. Plastic pouch printing and paper certification are different issues.
Process, Timeline, and Lead Time for Proof Approval
Proofing has a schedule, even if everyone wishes it did not. File review may take 1–2 business days. A first digital proof often takes 1–3 business days. Each revision round can add 1–2 business days. A physical pre-production sample can add roughly 5–15 business days, depending on material, print method, and freight.
Approval speed is often controlled by the buyer, not the factory. If the founder, designer, legal team, and operations lead all need to sign off, that has to be built into the calendar. Otherwise the “quick” order turns into a week of silence followed by a request to rush the launch. Production teams see this pattern constantly.
A typical custom pouch order moves through these stages:
- Artwork intake: logo files, dieline, colors, copy, and order specs are received.
- Technical check: prepress reviews resolution, fonts, print area, zipper clearance, and bleed.
- Proof creation: the supplier prepares the PDF proof or sample plan.
- Buyer review: your team checks artwork, copy, codes, color, and layout.
- Revision: corrections are made if needed.
- Final approval: written approval releases production.
- Payment confirmation: deposit or balance terms are cleared.
- Production scheduling: printing, converting, quality control, packing, and shipping are booked.
What slows proofing? Missing Pantone numbers. Low-resolution logos. Unclear bag dimensions. Late compliance copy. Barcode changes. Vague feedback like “make it pop.” Nobody can act on that. Say bigger, brighter, centered, 20% more contrast, or move the logo 4 mm down. Specific feedback saves time.
Request a physical sample if you are using a new material, placing a first large order, choosing metallic ink, printing heavy coverage, using translucent film, matching tight brand colors, or preparing packaging for retail photography. If the pouch will be photographed for ecommerce, a sample is cheaper than reshooting product pages later.
Rush proofing can help, but it is not a shortcut around review. Skipping checks is how brands end up with thousands of pouches carrying a typo in their own URL. One final approver and one backup approver will prevent more damage than a long chain of opinions.
Cost, MOQ, and Unit Cost Factors Hidden in the Proof
The proof may be free, included, or billed separately. It depends on order size, supplier policy, customization level, and whether a physical printed sample is required. Digital proofs are often included with custom orders. Physical pre-production samples often range from about $50–$250+ before freight, especially if custom printing, special film, or extra setup is involved.
MOQ varies widely. Stock-size custom printed zipper pouches can start lower because the base structure already exists. Fully custom film, special zipper colors, unusual sizes, recyclable material structures, or complex multi-color printing usually push minimums higher. Small test runs sound attractive, but packaging equipment rewards efficient setup, not indecision.
Unit cost is driven by bag size, film thickness, zipper type, flat versus stand-up format, gusset, hang hole, print coverage, number of colors, spot versus process print, matte or gloss finish, and special features like foil, frosted film, or recyclable mono-material film. A 2 mil flat pouch with a one-color logo is not priced like a thick stand-up pouch with flood printing and foil.
| Option | Typical Use | Cost Impact | Proofing Concern |
|---|---|---|---|
| One-color logo on stock pouch | Simple rings, charms, findings, repair kits | Usually lowest cost and fastest setup | Check logo size, zipper clearance, and ink contrast |
| Two-sided print | Brand front with care copy or SKU back | Moderate increase depending on print method | Check front/back orientation and back-side copy carefully |
| Full-coverage background | Retail-ready branded presentation | Higher due to ink coverage and setup | Confirm bleed, color consistency, and seam distortion |
| Metallic ink or foil | Premium collections, giftable packaging | Higher, often with longer lead time | Request a sample or drawdown if finish matters |
| Clear or frosted film | Showing jewelry while keeping a branded pouch | Varies by film and white ink layers | Confirm opacity, white underprint, and product blocking |
Artwork choices change pricing more than some buyers expect. More colors, full backgrounds, metallic effects, and two-sided printing can raise cost. Minimal one-color logos are usually cheaper and faster. That does not make plain packaging better by default. It just means the buyer should know exactly what is being paid for.
Revision costs matter too. Too many proof rounds can add fees or delay the job, especially if changes happen after plates, screens, or production setup have started. Approve the structure first, then artwork. Changing pouch size after proofing wastes time and can reset pricing.
A low unit cost is not automatically a good buy if the pouch scuffs, hides the jewelry, or makes the logo look blurry. Use the Jewelry Brands Zipper Pouch bags artwork proof checklist to compare cost against the packaging experience, not just the quote total.
Step-by-Step Review Guide Before You Approve the Proof
Step 1: Check the order details first. Confirm bag style, size, material, thickness, zipper color, finish, print sides, quantity, packing method, and shipping address before admiring the logo. Wrong quantity or wrong material is a bigger problem than a perfect layout.
Step 2: Review the dieline or layout. Confirm front, back, top, bottom, zipper track, seals, gussets, hang holes, tear notch, and any label area. If the proof shows dashed lines, shaded zones, or “do not print” areas, read them. They are not decoration.
Step 3: Zoom to 100% and check scale. A logo can look fine on screen and still be too small on a 3 x 4 inch pouch. Print the proof on paper at actual size if you can. Cut it out. Hold it next to the jewelry. Ten minutes here can save a lot of regret.
Step 4: Verify every word. Check brand name, tagline, website, social handle, email, SKU, size, material terms, warnings, and recycling symbols character by character. Do not skim. Skimming is how “sterling silver” becomes “sterlng silver” across an entire run.
Step 5: Test scannable codes. Use multiple phones if the proof includes QR codes. If the code links to a landing page, confirm the page is live before printing thousands of bags. Check the quiet zone around the code. Decorative borders can break scan reliability.
Step 6: Check colors against brand standards. Confirm Pantone, CMYK, white ink layers, opacity, metallic effects, and whether the supplier is matching to a sample or approximating from a digital file. “Looks close on my laptop” is not a color standard.
Step 7: Consolidate internal feedback. Designer, founder, retail buyer, compliance, and operations should not send separate notes that conflict. Put comments into one list. If two notes contradict each other, solve that before sending the supplier into revision churn.
Step 8: Send approval clearly in writing. Include proof version number, date, order number, and final notes. No vague thumbs-up emoji approvals. This is packaging, not a group text about dinner.
Approval language that works: “Approved for production: Proof V3, 4 x 6 inch frosted zipper pouch, black one-color front print, white ink under QR code, quantity 5,000 units.”
Common Proofing Mistakes That Make Jewelry Pouches Look Cheap
Mistake 1: Placing the logo too close to the zipper. The zipper is hardware, not a frame. It can crowd the logo or distort the layout visually. Keep the clearance in mind, and allow more room on very small pouches.
Mistake 2: Ignoring the contents. Earrings, chains, clasps, tags, and backing cards can block artwork once the pouch is filled. A centered logo on an empty proof may sit behind a necklace card in real use. Review the design with the product inside a similar bag.
Mistake 3: Using low-contrast colors. Pale gold on clear plastic may sound elegant and then disappear under store lighting. Soft gray on frosted film can do the same. Contrast is not crude. It is how people actually read packaging.
Mistake 4: Forgetting white ink underlayers. On clear or frosted film, colors can look transparent, dull, or wrong without a white base. If the proof includes a white ink layer, confirm where it prints and whether it sits under the logo, QR code, or full design.
Mistake 5: Treating metallic effects casually. Metallic ink, foil, and gold-colored CMYK are not interchangeable. If the finish matters, specify it. If the supplier says “gold,” ask which type.
Mistake 6: Approving tiny text nobody can read. Jewelry brands love delicate typography. Production equipment and human eyes do not always agree. On small pouches, keep essential copy larger, darker, and simpler than your first instinct.
Mistake 7: Not checking both sides. Back-side care copy, warning text, SKU labels, barcode placement, and country-of-origin text are where boring but expensive errors hide. Everyone stares at the front. The back quietly causes the chargeback.
Mistake 8: Assuming the digital proof shows texture, gloss, or opacity perfectly. It does not. Ask for material photos, previous samples, a printed drawdown, or a physical sample when finish matters, especially for frosted, matte, metallic, or recyclable films.
Mistake 9: Changing artwork after approval. Can it be done? Sometimes. Cheap and painless? Rarely. Once production setup starts, changes can trigger fees, delays, or scrap. A disciplined Jewelry Brands Zipper Pouch Bags artwork proof checklist is cheaper than a panic revision.
Next Steps: Build a Clean Approval Packet Before Ordering
Before ordering, assemble a clean approval packet. Include final logo files, brand color specs, pouch size, quantity, material preference, zipper color, print sides, finish, sample request, target delivery date, shipping address, and compliance copy. Sending six partial emails usually guarantees something gets missed.
Create one master approval document with the proof version, order number, pouch dimensions, artwork notes, color specs, and sign-off fields. It does not need to be fancy. A shared PDF or spreadsheet is enough. The point is to stop people from hunting through email threads later while someone asks which file was final.
Mock up the actual jewelry inside a similar pouch before final approval. That catches scale problems, transparency issues, and product-blocking mistakes. If you sell rings, place a ring box, card, or insert in the mockup. If you sell chains, check how the chain falls in the bottom. Real contents change the design more than most flat proofs suggest.
Ask the supplier direct questions before signing off:
- What print method will be used: digital, screen, flexo, gravure, foil, or another process?
- What safe zone do you recommend around the zipper, seals, corners, and hang hole?
- Is white ink needed under the logo, color areas, or QR code?
- What color tolerance applies to this print method and material?
- Can the QR code or barcode be tested from a printed sample?
- What changes after approval would trigger extra cost or delay?
- What is the updated production timeline after proof approval?
Save approved proofs and production samples for reorders. Reorders should reference the approved version, not a file named final_FINAL_reallyfinal.pdf. Keep one physical sample in a labeled folder or bin with the order number, date, material, and supplier details. That tiny bit of organization prevents a lot of confusion six months later.
Ask for written timeline confirmation after proof approval, not before. In many custom packaging workflows, the clock starts when artwork is approved and payment terms are met. If the proof takes five extra days to clear internally, production does not begin five days earlier because the launch calendar looked ambitious.
Before approving custom packaging, use the jewelry Brands Zipper Pouch Bags artwork proof checklist to verify size, color, copy, code scans, zipper clearance, and production notes in one pass. One careful review now is easier than explaining a warehouse full of avoidable mistakes later.
FAQs
What should be included in a jewelry zipper pouch artwork proof checklist?
Include bag size, material, zipper placement, print area, logo position, safe zones, bleed, color specs, font handling, barcode or QR code testing, warning copy, SKU details, and final proof version. For jewelry, also check how the product will sit inside the pouch because chains, cards, tags, and clasps can block key artwork.
Do jewelry brands need a physical proof for zipper pouch bags?
Not always. A digital proof is usually enough for simple one-color logos on standard pouch materials. Request a physical sample for first orders, large runs, metallic effects, clear or frosted films, tight brand colors, retail packaging, or anything being photographed for ecommerce.
How long does artwork proof approval add to zipper pouch bag production?
A digital proof often adds 1–3 business days, plus revision time if changes are needed. A physical pre-production sample can add roughly 5–15 business days depending on material, print method, and shipping. Slow internal approvals are a common hidden delay, so assign one final approver before the proof arrives.
How does artwork affect the cost of custom jewelry zipper pouch bags?
More print colors, full coverage designs, two-sided printing, metallic effects, foil, white ink layers, and special finishes can increase unit cost. Simple one-color logos on standard-size pouches are usually more economical and faster to produce. Late changes after proof approval may create extra setup or revision fees.
What are the most common proofing errors on jewelry brands zipper pouch bags?
Common errors include logos too close to the zipper, unreadable fine text, missing white ink under clear film, incorrect Pantone colors, untested QR codes, wrong SKU copy, and artwork placed where the jewelry blocks it. Most of these are caught by printing the proof at actual size and reviewing it against a filled sample pouch.


