At a busy market, shoppers decide quickly. That is why Logo Patches Unit Cost for farmers market sellers matters: a small branded patch can make aprons, hats, and tote bags look established without forcing you into a large apparel order. If you sell produce, baked goods, candles, flowers, or handcrafted goods, patches create consistency across the booth without paying to print the same logo on everything over and over.
They are not always the cheapest decoration method on a tiny order. But they are often the better buy when you want durability, flexibility, and branding that survives washing, sun, mud, and weekly setup wear. That is the real decision.
Why logo patches make market booths look more premium fast
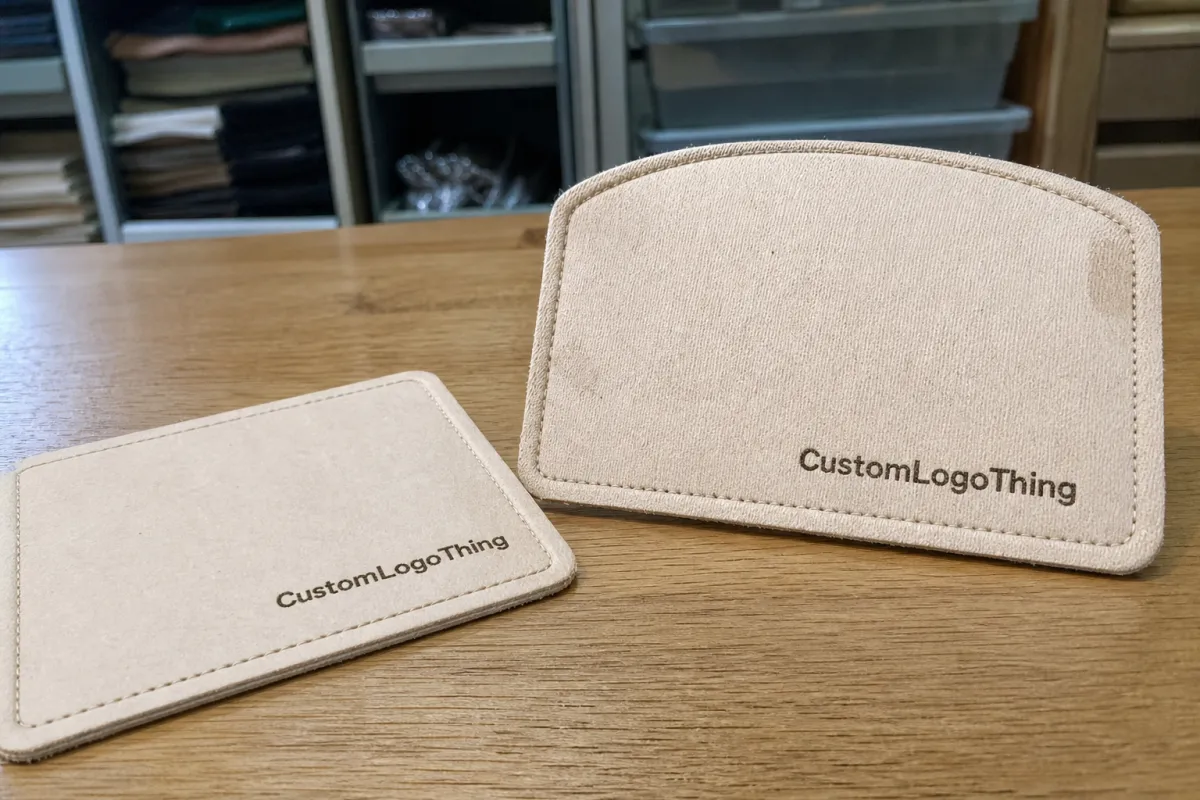
Shoppers judge a booth in seconds. A plain apron says “we showed up.” A clean sewn-on patch says “we planned for this.” That difference is small on paper and obvious in person. Farmers Market Sellers usually do not need heavy apparel customization; they need one branding piece that makes everyday items look deliberate.
Patches work because they move across multiple items. One logo patch design can go on aprons, hats, tote bags, jacket sleeves, table covers, staff shirts, and reusable produce bags. That means you can brand a whole booth without paying for full custom embroidery or printed garments each time you change your lineup. For sellers who rotate products by season, that is a better risk profile than buying a stack of shirts that may sit in a box until next summer.
The cost logic is straightforward. A patch is a reusable brand asset. Buy a few blank core items, then add branding only where it matters. If your logo changes later, the patch style changes with it. The base apparel does not have to be discarded.
“A good patch should make the item look finished, not busy. If the logo is fighting the garment, the patch lost.”
For Farmers Market Sellers, the best uses are practical:
- Aprons for food prep, sampling, and checkout
- Hats for sun protection and uniform branding
- Tote bags for customer purchases or merch
- Table covers and booth signage edges for a coordinated look
- Staff shirts for consistent identification
- Reusable produce bags for repeated handling and outdoor wear
Here is the part many buyers discover only after ordering: patches are not always the lowest-cost decoration method at the smallest quantity. They are, however, often lower risk than buying printed garments in bulk while the booth presentation is still being tested. That is why sellers compare Logo Patches Unit Cost for farmers market sellers against direct embroidery or screen printing before placing a first run.
Patch styles farmers market sellers should compare before ordering
There are four main patch styles worth comparing: embroidered, woven, printed, and PVC or rubber. They do not feel the same, and they do not solve the same problem. That matters more than most quote sheets make it sound.
Embroidered patches use raised thread and have a classic, handcrafted look. They work well for rustic brands, bold logos, and shapes that do not rely on tiny text. If the brand has thick lettering, a simple icon, or a farm-style badge shape, embroidered is often the easiest fit. They also read as durable, which helps if the booth aesthetic leans natural or heritage-inspired.
Woven patches are tighter and flatter. They are usually the better choice when a logo has small text, thin lines, or more detailed artwork. If a stitched version would turn a tagline into mush, woven usually preserves it. That is why patch pricing can shift depending on whether the art needs woven detail work or can be handled by standard embroidery.
Printed patches reproduce gradients and photo-like artwork better than thread-based options. They are useful when a logo has fades or too many small elements to stitch cleanly. The tradeoff is tactile: printed surfaces can feel less premium than woven or embroidered options, especially up close. For booth branding, that may be fine. For merch sold at a markup, maybe not.
PVC or rubber patches give a modern, weather-resistant look. They work for outdoor gear and items that pick up dirt often. They also handle edges and shapes that would be awkward in embroidery. But they do not suit every brand. A heritage dairy, artisan bakery, or botanical brand may feel out of place with a rubber patch unless the rest of the design language supports it.
| Patch style | Best for | Typical feel | Good buyer fit |
|---|---|---|---|
| Embroidered | Bold logos, simple shapes | Classic, textured | Farm brands, rustic booths, aprons |
| Woven | Fine text, detailed artwork | Clean, flat | Logos with small lettering or line art |
| Printed | Color fades, complex art | Smooth, graphic | Promo gear, limited-run merch |
| PVC / rubber | Outdoor gear, modern branding | Bold, weather-ready | Heavy-use aprons, utility bags |
Backing matters too. Sew-on is the safest choice for repeated washing and rough use. Iron-on is convenient, but it should not be the first choice for heavy-wear aprons or anything that goes through frequent laundering. Hook-and-loop makes sense for removable branding on seasonal gear or event staff uniforms. Adhesive is usually short-term, not a long-term branding plan.
If the logo is tiny or busy, ask for a proof before approving the style. A patch that looks acceptable in a mockup can collapse visually once it is reduced to real size. That is the fastest way to waste tooling fees and setup charges on a run nobody wants to wear.
Key specifications that affect fit, durability, and brand clarity
Size is the first spec to get right. For hats, 2 to 3 inches is the usual range. For chest placement on shirts or aprons, 3 to 4 inches is more realistic. Larger patches work better for tote bags, jacket backs, or apron bibs where the patch needs room to breathe. If you try to cram a full slogan into a 2-inch patch, you are paying to make the brand unreadable.
Edge finish changes the visual result more than many buyers expect. Merrowed edges give a classic stitched border and work well on round, oval, or square patches. Laser-cut edges suit irregular shapes and sharper silhouettes. The finish is not just decoration; it affects how the patch sits against the fabric and how refined it feels on the product.
The design itself also affects cost. Thread count, base fabric, and color count all influence clarity. More colors can raise unit cost, but the bigger issue is readability. If a logo depends on gradients, tiny leaf veins, or thin script, the patch style may need to change. Good patch art is not about preserving every detail. It is about preserving the right ones.
Durability is not optional for market sellers. Branding gets sun exposure, friction from bags and straps, repeated folding, and probably a few spills. If the item is washed often, sew-on backing and a sturdy base fabric make more sense than a delicate adhesive layer. For outdoor use, ask how the patch handles UV exposure and abrasion. No supplier can promise immunity to wear, but obvious weak points can be avoided.
Practical sizing mistakes show up fast:
- Too much text in too little space
- Thin lines that disappear in embroidery
- Too many gradients for stitched production
- Border thickness that overwhelms the logo
- Ignoring negative space, which makes the patch feel crowded
Negative space helps the logo read at a distance. Farmers market branding is seen from across a table, through foot traffic, and while customers are carrying vegetables in one hand. A crowded patch usually loses that battle.
If you want a quality reference point, outdoor-use testing and pack durability standards from organizations like ISTA are useful for thinking about friction, handling, and transit stress, even if you are not shipping the patch in a test carton. Repeated handling exposes weak construction either way.
Logo patches unit cost, MOQ, and pricing ranges to expect
Logo Patches Unit Cost for farmers market sellers depends on size, stitch count, backing, shape complexity, and quantity. That is the part that controls nearly every quote. A small, simple patch ordered in a larger run costs much less per unit than a detailed custom shape ordered in a short run. Setup charges and tooling fees are built into the math.
Here is the practical pricing pattern buyers usually see:
| Order profile | Typical cost per piece | Notes |
|---|---|---|
| Short run, simple design | $0.80-$2.50 | Higher setup impact, more expensive per unit |
| Mid-size run, standard embroidery or woven | $0.35-$1.20 | Usually the sweet spot for booth branding |
| Bulk order, simple shape | $0.18-$0.60 | Best unit cost, but requires more upfront cash |
| Specialty shape or premium backing | $0.70-$2.00+ | PVC, thick borders, or custom cut shapes raise price |
Those are practical ranges, not fixed rules. A woven patch with fine lettering may cost more than a simple embroidered badge at the same size. Hook-and-loop backing can raise the total too. And if the order is rushed, expect extra charges. The cheapest quote on paper can become expensive once shipping, sample fees, and proof revisions are added.
MOQ is the other major lever. Lower minimums are useful if a booth refresh is being tested or a new brand look is being tried. Higher minimums lower the cost per piece, but they also tie up cash in inventory. For sellers working weekend markets and holiday events, the question should be sell-through speed: can that quantity realistically move in a season? If not, the lower MOQ may be the better buy even with a higher unit cost.
When comparing quotes, ask for these line items:
- Setup fee
- Digitizing fee if the artwork is being converted for embroidery
- Sample or proof fee
- Shipping
- Rush charges if faster turnaround is needed
The right comparison is landed cost, not sticker price. Landed cost means the full amount paid to get the patches in hand and ready to use. A quote that looks cheaper by 10 cents can end up more expensive once freight, revisions, and handling are added. Buyers get burned here all the time because the quote sheet looked clean and the invoice did not.
Spend more when the patch will live on best-selling merch or front-facing booth gear. Better stitching, cleaner borders, and stronger backing protect brand perception. A worn-out patch on a visible apron makes the whole booth look tired.
Production process and turnaround from artwork to delivery
The normal process is straightforward. Artwork is sent, size is confirmed, a mockup is approved, a digital proof or sample is reviewed, and production starts. If the artwork is clean, the process moves faster. If not, everything slows down. Usually the problem is not the factory. It is the file.
Vector artwork is the best starting point. AI, EPS, or editable PDF files create cleaner patches and faster approvals than a fuzzy JPG copied from a social profile. If the only file available is low resolution, the artwork may need to be redrawn before production. That adds time and cost, but it is still better than approving a blurry patch and hoping it improves later.
Typical turnaround depends on complexity and quantity. Simple patch styles often move faster than specialty materials or multi-color woven runs. A realistic production window is often 10 to 20 business days after proof approval, with shipping added on top. Rush work is possible in some cases, but it usually costs more and leaves less room for revisions.
Lead time matters for farmers market sellers because booth launches, holiday markets, harvest weekends, and festival season do not wait. If the patches arrive after the first event, the cost advantage disappears quickly. You are paying for inventory that missed the selling window.
International shipping and customs can also turn a “fast” order into a slow one. Proof delays do the same. If the team takes three days to approve a mockup and then asks for a revision, the calendar keeps moving. Organized buyers send final files early and keep decision-makers aligned before the order is placed.
For packaging and branded merch buyers who care about sustainability, FSC-certified paper packaging for retail sets a useful standard for responsibly sourced materials. You can check the benchmark at FSC. Different product category, same principle: confirm material claims instead of assuming they are automatic.
How to avoid expensive patch ordering mistakes
The biggest mistake is approving artwork that will not survive real patch production. Legibility, border behavior, sizing, and color use should be checked before anything moves forward. If the logo will read poorly at the chosen size, it is better to know that early than to discover it after 500 units are made.
Small brands benefit from proofing discipline because one bad run is not just a cost issue. It is dead inventory. Nobody wants to wear a patch that looks cheap, off-center, or difficult to read. A clean proof process protects cash and brand image at the same time.
Consistency matters too. If patches are being used across aprons, hats, merchandise bags, and packaging labels, the logo needs to stay visually consistent from one item to the next. That does not mean every piece is identical. It means the brand language stays recognizable. That is how a booth starts looking organized instead of random.
Here is what a serious quality check usually covers:
- Color match against the approved artwork
- Trim and edge consistency
- Secure backing adhesion or stitching
- Clean border finish
- Readable text at the final patch size
Sometimes the right move is to simplify. Fewer colors. Bigger lettering. Cleaner shape. Better patch. That is not a downgrade; it is what makes the patch work in the real world. And yes, it often improves logo patches unit cost for farmers market sellers because simpler production usually means lower waste and fewer revisions.
The goal is fewer mistakes, fewer replacements, and less wasted inventory. That is what sellers actually pay for.
Next steps to get an accurate quote and order the right patch run
Before requesting pricing, gather the basics: logo files, target size, preferred backing, item placement, and estimated quantity. If those five details are clear, quotes improve quickly. If they are vague, the process turns into back-and-forth instead of a buying decision.
Choose the item first. A hat patch is not the same as an apron patch, and a tote bag patch is not the same as chest placement. The size and shape should match where it will live. Plenty of buyers pick the patch before they pick the garment and then wonder why it looks awkward.
Ask for two quote options if possible:
- A low-MOQ test run
- A better bulk pricing option with stronger unit economics
That makes the decision easier. Risk can be compared against savings instead of staring at one number and hoping it works out. Also ask whether the quote includes digitizing, proofing, and shipping. Hidden charges are common, which is frustrating, but predictable enough to plan for.
Request a mockup placement preview before confirming production. One simple visual can prevent a patch that is too big, too small, or too close to a seam. A good preview beats a vague “looks fine” email every time.
Then compare the unit cost against expected sell-through. If the patches are going on core booth gear or merch with steady demand, bulk order economics can make sense. If a seasonal concept is being tested, lower MOQ may be the smarter move even when the cost per piece is higher. Practical buying beats proud buying.
For most sellers, the best order is the one that fits both margin and usage. That is the point of checking logo patches unit cost for farmers market sellers before placing the run. Buy the patch style that matches the garment, the logo, and the pace of the market business. Everything else is just expensive guessing.
Frequently asked questions
What is the typical logo patches unit cost for farmers market sellers?
Unit cost depends on patch size, stitch detail, backing, and quantity. Smaller, simpler patches cost less per piece at higher quantities. Short runs and detailed designs usually raise the per-unit price.
What patch backing is best for farmers market apparel and aprons?
Sew-on is the most durable for repeated washing and outdoor work. Iron-on is convenient for lighter use but may not last as long on heavy-wear items. Hook-and-loop works for removable branding on aprons, hats, or event gear.
What MOQ should a small market seller expect for custom logo patches?
MOQs vary by material and supplier, but lower minimums are common for test runs. A smaller MOQ costs more per patch, while larger orders reduce unit cost. Ask for two pricing tiers so you can compare testing versus bulk buying.
How long does it take to produce custom logo patches after artwork approval?
Turnaround depends on patch style, quantity, proof revisions, and shipping method. Simple designs usually move faster than detailed or specialty material runs. Faster orders still need clean files and quick proof approval to stay on schedule.
Can small logos or detailed farm brand artwork work on patches?
Yes, but woven patches usually handle fine detail better than standard embroidery. Very small text may need a larger size or simplified artwork to stay readable. A proof or sample is the safest way to confirm the design before full production.


