Paper Takeaway Bags Sample Checklist for Smart Buyers
A paper takeaway Bags Sample Checklist is the fastest way to spot the expensive mistakes before a full order locks in. Weak handles, wrong sizing, poor print alignment, and a bottom panel that gives way under real food weight usually show up early if you know what to test. Ignore the sample and those same flaws tend to show up later, at scale, with a purchase order already signed.
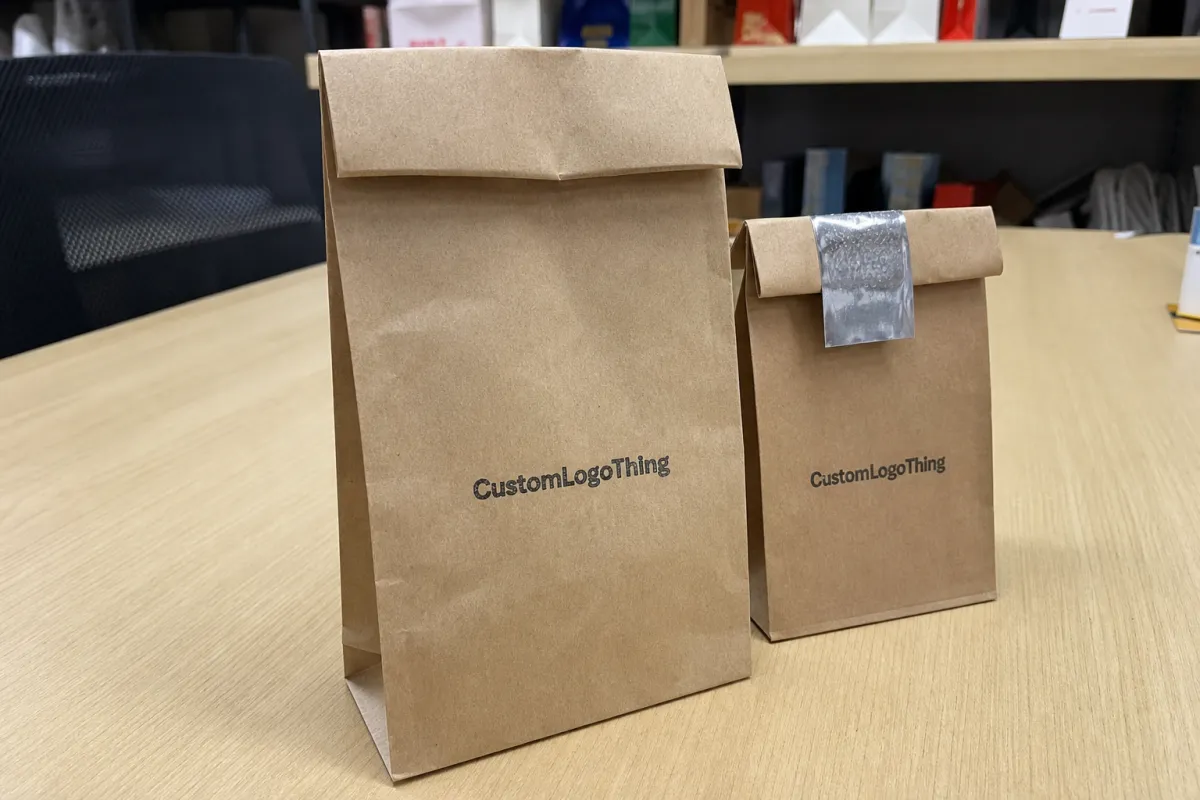
For cafes, bakeries, food delivery programs, and grab-and-go retail, the sample has one job: prove the bag works in a rushed service environment. That means greasy cartons, awkward stacking, wet hands, and people moving too quickly to admire packaging. A mockup can look polished and still fail the practical test. A working sample tells a much sharper story.
That story matters because Paper Takeaway Bags are carrying more than logo visibility. They are holding heat, moisture, edge pressure from containers, and the occasional one-handed lift. The difference between a bag that feels fine and one that holds up often comes down to paper weight, handle construction, and how the bottom is folded and glued. In packaging, the smallest invisible decisions usually cause the biggest visible failures.
What a paper takeaway bags sample checklist should catch fast
The sample should expose failure modes, not decorate a shelf. A good checklist looks at structure first, branding second. If the bag cannot stand open, cannot carry the actual meal load, or tears at the handle punch after a few lifts, there is no reason to keep talking about artwork.
Start with the basics. Does the bag match the stated dimensions? Does it fit the real containers, not the idealized ones in a spec sheet? Does it stay upright long enough for staff to pack it without fighting it? Those details sound ordinary, but they shape service speed more than buyers expect. A bag that collapses on the counter can cost seconds every single order, and seconds add up fast across a lunch rush.
Paper feel tells you more than a polished PDF ever will. Kraft stock between 80gsm and 120gsm can feel like two different products depending on fiber quality, caliper, and finish. Lower weights suit light pastries and dry goods. Heavier stock works better for multi-item lunch orders or retail-style presentation. If the bag feels thin in the hand, it usually behaves thin under load too.
What should the checklist catch first?
- Paper stiffness: enough body to stand open, but not so much that folding becomes awkward.
- Seam strength: side seams and bottom folds should stay intact under the target weight.
- Handle pull: twisted paper, flat tape, and die-cut handles all need real stress testing.
- Print quality: sharp edges, readable small text, and color placement that matches the artwork proof.
- Service fit: the bag should accept the actual food pack-out without forcing or distortion.
Grease resistance deserves a direct check if the bag is meant for hot food or oily packaging. The test does not need laboratory theater. A short dwell with a lightly oiled carton can reveal whether the paper softens, darkens, or transfers through at the corners. If the bag is meant for heavier use, ask the supplier what coating or treatment is used and whether it changes recyclability claims in your market.
Pretty is not the same as packable. A sample should prove the bag can do the job, not just look good on a screen.
If fiber sourcing matters to your brand, ask for certification details such as FSC where applicable. That is straightforward to verify through fsc.org. If a supplier mentions shipment abuse resistance, ask what carton packing method they use and whether they have tested the outer pack against normal transport handling. A bag that survives production but arrives crushed is still a failure.
How sampling, approval, and lead time actually work
Sampling is rarely the neat, single-pass process people hope for. The path usually starts with specifications: dimensions, paper weight, handle style, print colors, finish, carton count, and any performance requirement such as grease resistance or a recycled-content target. The supplier then prepares either a stock sample or a custom sample, depending on the complexity of the order.
That sounds orderly. It often moves in fits and starts. Artwork revisions add time. Paper substitutions add time. Handle changes add time. Color matching adds time. If your logo uses fine type or a strict brand red, expect at least one revision round, sometimes two. That is not a red flag by itself. It is the normal cost of making packaging that has to look consistent on paper and behave consistently in a packing line.
Lead time has three separate clocks: sample production, sample shipping, and factory queue time after approval. Buyers usually focus on the first one and underestimate the other two. A sample can be ready quickly if the stock paper is already in house, while the full order may still wait behind other production work. Custom paper, special handles, embossing, or a new cutting tool can stretch the schedule further.
There are three sample types worth keeping distinct:
- Reference sample: a finished example that shows material and general style.
- Pre-production sample: the version that should match the bulk order as closely as possible.
- Production pull sample: a bag taken from the actual run for final inspection.
Only one of those deserves true sign-off. A reference sample helps you choose direction. A pre-production sample confirms the build. Approving the wrong one is how buyers end up surprised by the first delivery. The differences may be small on paper, but a small change in fold position or handle style can alter how the bag carries weight.
Typical timing depends on complexity. A plain stock-based sample can arrive in about a week if the supplier already has the materials. A custom printed sample with new artwork, reinforced construction, or special finishing can take two to four weeks once revision cycles and shipping are included. If the order is urgent, say so early. The fastest way to create delay is to announce the deadline after the artwork has already gone out.
Paper, handle, and print choices that drive cost
Price is shaped by a short list of decisions, and most of them are visible only if you ask the right questions. Paper weight, paper grade, handle style, print coverage, finishing, and carton packing all affect the final number. Buyers often focus on unit cost and miss the fixed setup charges that sit underneath it. That is how a seemingly low quote becomes expensive once the full order lands.
Paper weight is one of the clearest drivers. Moving from 80gsm to 120gsm can change the bag from lightweight takeaway packaging to something much closer to retail-grade carry packaging. Heavier stock usually increases stability, but it also affects foldability, print absorption, and price. On large runs, that difference compounds quickly. A ten-cent change per unit may look minor until it becomes a four-figure swing across a season order.
Handle choice matters more than many buyers think. Twisted paper handles are usually economical and functional for standard carryout. Flat tape handles can feel more comfortable, especially on larger bags. Rope handles and die-cut reinforced handles often improve presentation, but they can also push labor and material cost upward. The cheapest handle is not always the best value if it slows packing or feels flimsy under weight.
Print coverage also changes the budget. A one-color logo on one panel is usually simpler than full-bleed coverage across multiple surfaces. More ink, more passes, and tighter registration checks add production time. Specialty finishing changes the picture again. Lamination, embossing, soft-touch coatings, and foil all increase setup complexity, and they can create waste if the supplier is not set up for that exact build.
| Sample or build option | Typical use | Rough cost impact | What it reveals |
|---|---|---|---|
| Plain stock sample | Size, shape, handling feel | $15-$40 plus shipping | Whether the structure fits the job |
| Custom printed sample | Logo, color, artwork placement | $60-$180 plus shipping | Print accuracy and brand appearance |
| Pre-production sample | Final approval before bulk order | $80-$250 plus shipping | Near-final material, finish, and assembly quality |
Those numbers move with size, tooling reuse, and whether the supplier has to source paper or hardware from scratch. A small order can look expensive because the fixed costs are spread over fewer units. That is not a bad quote; it is the reality of short runs. If the sample fee is credited back after bulk approval, that helps. If not, it should still be viewed as cheap insurance against a poor production decision.
MOQ and tooling charges deserve attention too. A die-cut handle or a custom bottom profile can introduce plate, knife, or setup costs that never appear in the headline price. It is better to know that early than to discover it after approvals are already in motion. A low sample cost can be misleading if the full order requires special tooling later.
Step-by-step sample check before you sign off
Do not approve the bag because it “looks fine.” Inspect it like it will be used tomorrow morning, because that is usually the timeline. Start with measurements. Check width, gusset, height, handle drop, and flat-fold size against the approved spec sheet. A few millimeters can matter when a pastry box or delivery carton needs to slide in without bending the sides.
Next, test the load with the real items the bag will carry. If the bag is for lunch combos, use lunch combos. If it is for bakery orders, use the same pastry boxes and inserts that go out the door every day. The sample should be loaded to real service weight, not staged with random objects. That is the only way to find out whether the handle bite is comfortable and whether the bottom keeps its shape.
Pay attention to how the bag behaves after a few lifts. Some bags feel solid once and then weaken as soon as the handles flex repeatedly. Others look stable on the bench and then bow badly when the weight settles. Both behaviors matter. A bag is not a static display item; it is a moving container that gets handled by tired staff and impatient customers.
Print inspection deserves the same discipline. Check placement against the dieline, not against memory. Look for color drift, soft edges, pinholes, ink density changes, and barcode readability if the design includes a scan code or product label. Small text is especially unforgiving. A line that looks crisp on the proof can blur once the ink hits a more absorbent kraft surface.
Use a practical sequence:
- Measure the sample and compare it with the signed-off spec.
- Pack the actual items it will carry.
- Lift the bag by the handles several times.
- Set it down, reopen it, and reload it at normal service speed.
- Check for moisture or grease effects if the food type calls for it.
- Inspect the print, corners, folds, and glue lines under good light.
That last step is easy to skip and hard to regret less later. If the sample survives careful bench testing but fails during a lunch rush, it is still the wrong bag. The Paper Takeaway Bags sample checklist should mimic the pressure of real use, not the calm of a review table.
Common mistakes that turn a good sample into a bad order
The most common mistake is approving a sample without checking the actual fill weight. A bag that looks sturdy with a light test load can start failing once it carries real food, drink cups, and cardboard inserts. Real service loads are awkward. They bend differently. They place stress where tidy sample tests never do.
Another mistake is ignoring line behavior. A bag that opens nicely for one person in a quiet room may slow down a full team during peak service. If the mouth of the bag collapses, if the gusset refuses to square up, or if staff need both hands just to keep it open, that friction becomes labor cost. Packaging failures are rarely dramatic at first. They are usually annoying, then expensive.
Artwork placement causes problems too. Logos placed too low can disappear into folds. Fine borders can shift into the trim area. A mockup may look balanced while the actual dieline pulls the design off-center by a few millimeters. That is why the final cutting path matters more than the clean mockup file on screen. Paper does not care that the layout looked perfect in a PDF.
There is also a tendency to treat one approved sample as a guarantee. It is not. Paper varies slightly by batch. Ink density can shift. Handle tension may change across production lots. That is why buyers need incoming checks, even on orders that start with a clean sample. Quality control is not a sign of distrust; it is the only reason bulk ordering stays manageable.
It helps to think in failure modes:
- Load failure: the bag sags, splits, or bottoms out under real weight.
- Handling failure: the bag is awkward to pack, stack, or carry.
- Print failure: the design shifts, dulls, or becomes hard to read.
- Spec failure: the bag does not match the approved dimensions or paper build.
If any one of those shows up in the sample, the right move is to fix the sample, not to hope production will improve it. Production usually magnifies a weak build. It rarely repairs it.
Expert moves for cleaner production steps and fewer delays
A one-page spec lock saves time because it removes ambiguity. Keep it short: size, paper weight, handle style, colors, finish, carton count, intended use, and acceptable tolerance. If the answer lives in six email threads and one spreadsheet no one has opened in a week, delays are already underway.
Keep annotated photos of the approved sample. Front, side, bottom, open-mouth, and handle close-ups are usually enough. Mark the logo placement, fold direction, glue line, and any special reinforcement. That visual record reduces the “I thought you meant…” problem, which is one of the most expensive phrases in packaging.
If two versions are close, compare them side by side. One may have better handle strength. The other may carry a lower unit price. Sometimes the cheaper version wins. Sometimes the stronger bag saves more money by reducing labor complaints, damaged food, and customer frustration. The right answer is the one that performs under service pressure, not the one that looks best in a spreadsheet.
A few process habits help a lot:
- Set a revision window, such as 24 to 48 hours, so the project does not drift.
- Confirm whether sample fees are credited back on the bulk order.
- Request a final artwork proof before the purchase order is released.
- Keep the approved master sample on file for reorder comparison.
Transit deserves attention too. If the bags will move through multiple handling points, ask how the cartons are packed and whether the outer case is stiff enough to protect the contents. A good bag in a crushed carton still creates problems at receiving. If your team makes recycled-content or fiber claims, match the wording to the actual material spec and local labeling rules. Loose language creates avoidable risk.
Most delays are not mysterious. They come from vague specs, slow approvals, and minor changes that are actually major changes in disguise. Fix the inputs and the project becomes calmer. That is not glamorous, but it is how packaging gets done without fire drills.
What to do next after the sample passes
Once the sample passes, freeze the spec sheet. This is the moment where buyers are tempted to improve one last detail because the sample looks good under office lighting. Resist that impulse unless the change is truly necessary. Small late edits are how a stable order turns into a moving target.
Confirm the final quote, MOQ, Lead Time, carton count, and packing method. Then ask for a final artwork proof or pre-production confirmation before the PO is released. If the supplier changes paper, handle stock, or assembly method after approval, that needs to be visible in writing. Quiet substitutions are the sort of thing that seem minor until the reorder arrives and nothing lines up.
Keep one approved sample with your team and one with the supplier. That gives both sides a physical reference. It sounds basic because it is basic. Basic documentation is often the difference between a repeatable order and a guessing game.
Run the paper takeaway Bags Sample Checklist one final time before release. Check the dimensions, the handle pull, the print, the carton count, and the signed notes. If everything matches, you can move into production with far fewer surprises. That is the real value of a strong sample process: fewer arguments, fewer substitutions, and a first run that behaves the way the sample promised.
What should a sample checklist for takeaway bags include?
Start with dimensions, paper weight, handle type, bottom strength, print quality, and any coating or grease resistance you need. Add a real load test using the actual items the bag will carry. Finish with approval notes for artwork placement, color tolerance, carton packing, and reorder consistency.
How many paper takeaway bag samples should I compare before ordering?
Compare at least two versions if you are choosing between paper grades, handle styles, or print coverage. Use the comparison to judge cost against performance, not just appearance. If the order is large or the bag carries heavier food, ask for a pre-production sample too.
Does sample cost usually come off the final production order?
Sometimes, but not always, because custom samples can include setup, material, and shipping costs. Ask whether the quote credits the sample fee back after you place the bulk order. If it does not, treat the fee as protection against a much larger mistake.
How long does paper takeaway bag sampling usually take?
Stock-based samples can move quickly, while custom printed samples need more time for setup and approval. Artwork revisions, paper changes, and factory queue time are the usual delays. Ask for separate estimates for sample production, sample shipping, and full-run turnaround.
What if the sample looks right but fails in real use?
Retest the bag with the correct fill weight, handling speed, and transport conditions from your actual operation. Send the supplier photos and measurements, not just a complaint, so they can identify the weak point. Do not approve production until the failure is fixed in the sample, because the full order will not correct itself later.

