Buyer Fit Snapshot
| Best fit | Printed Bottle Labels with Logo projects where brand print, material claims, artwork control, MOQ, and repeat-order consistency need to be specified before quoting. |
|---|---|
| Quote inputs | Share finished size, material target, print colors, finish, packing count, annual reorder estimate, ship-to region, and any compliance wording. |
| Proofing check | Approve dieline scale, logo placement, barcode or warning zones, color tolerance, closure strength, and carton packing before bulk production. |
| Main risk | Vague material claims, crowded artwork, missing packing details, or unclear freight terms can make a low unit price expensive after revisions. |
Fast answer: Printed Bottle Labels with Logo: Material, Adhesive, Artwork, and MOQ should be specified like a repeatable production item. The safest quote records material, print method, finish, artwork proof, packing count, and reorder notes in one written spec.
Production checks before approval
Compare the actual filled-product size with the drawing, then confirm tolerance on folds, seals, hang holes, label areas, and retail display edges. Reserve space for logos, QR codes, warning copy, and material claims before decorative graphics fill the panel.
Quote comparison points
Review material grade, print process, finish, sampling route, tooling charges, carton quantity, and freight assumptions side by side. A quote is only useful when the supplier can repeat the same color, closure quality, and packing count on the next order.
Printed Bottle Labels With Logo: A Practical Guide
A label can look perfect on a monitor and still fail the second a cold bottle starts sweating. I have watched that happen more than once. The artwork looked clean, the colors were right, and then the bottle came out of the cooler with a curled corner and a very expensive attitude. That is why printed bottle labels with logo deserve real attention to stock, adhesive, finish, and application, not just the logo file.
If you are comparing printed bottle labels with logo for beverages, oils, cosmetics, or specialty products, color is only one piece of the job. Bottle material matters. So does curve, condensation, fill temperature, storage, and the way the label gets applied on the line. Ignore those pieces and the label will remind you, usually at the worst possible time.
What Printed Bottle Labels With Logo Actually Do
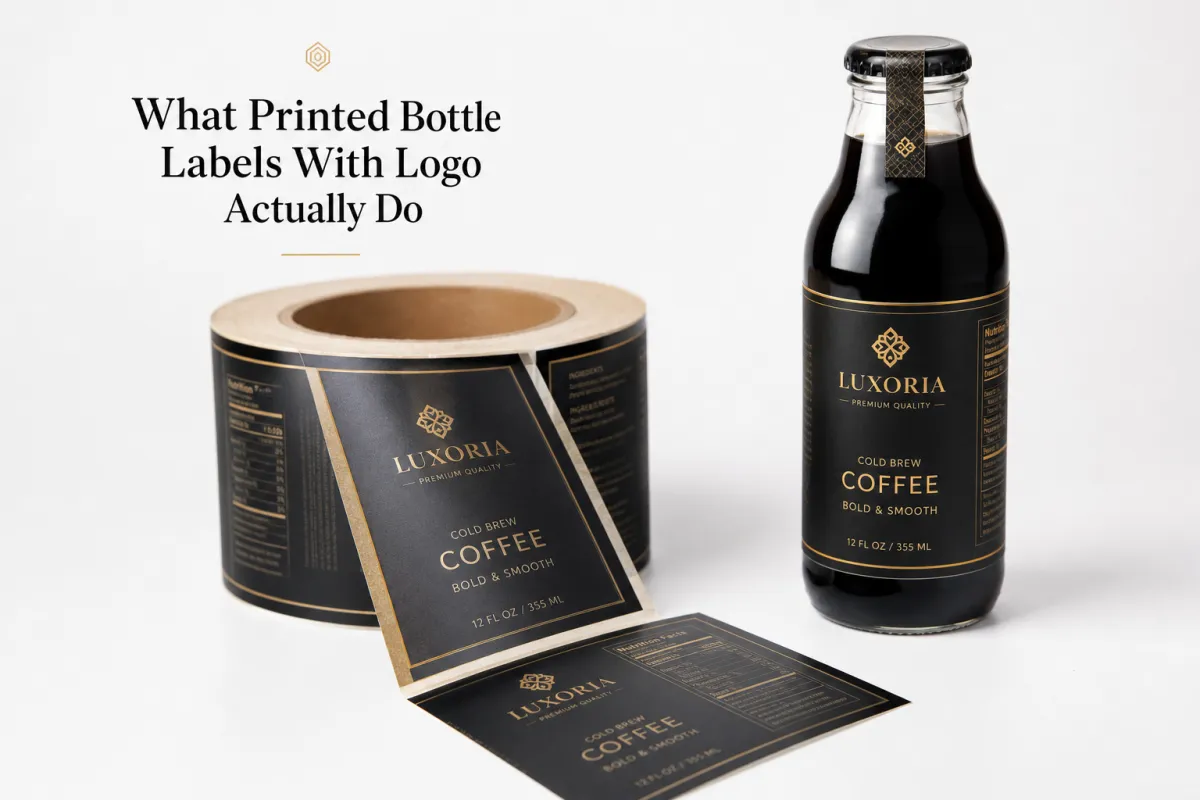
Printed bottle labels with logo have three jobs. They identify the product, carry the brand, and survive the conditions the bottle actually faces. That sounds simple until the bottle gets tossed in ice, handled with wet hands, shoved through packing, and stacked under bright store lights. Then the label is doing a lot more than looking nice.
I treat printed bottle labels with logo as part of the packaging system, not as decoration. The bottle shape, fill temperature, shelf life, and shipping path all affect the outcome. A smooth glass spirits bottle may need a different adhesive and stock than a PET bottle for cold brew or shampoo. Same logo. Very different reality.
Glass, PET, and coated metal behave in different ways. Glass gives a stable surface, but condensation still attacks the adhesive. PET flexes a bit and usually needs a label that balances grip with clean application. Oils and cosmetics can leave residue near the neck or base, so printed bottle labels with logo in those categories often need better scuff resistance and moisture performance. Tapered bottles add another wrinkle. The curve changes how the logo reads from the front, and that changes the layout more than people expect.
From the branding side, the label is often the first tactile contact a customer has with the product. From the production side, it is a controlled print item with hard limits. Printed bottle labels with logo have to serve both. They need to read clearly from across the shelf and stay put through shipping, stocking, cooler doors, and repeated handling. Buyers who ask only about the look are missing half the job.
From a practical standpoint, the product environment should drive the spec. A label for a dry pantry bottle can get away with a paper stock that would look ridiculous on a chilled beverage. A label for a hand-lotion bottle that sits in a bathroom gets exposed to splashes, steam, and lotion residue. A label is only “good” if it works where the bottle lives. Fancy mockup, meet real life.
If you want a broader packaging reference for materials and conversion, packaging.org is a useful place to start. It will not replace a supplier quote, but it does help you ask sharper questions about stock, finish, and line performance.
For brands with multiple SKUs, printed bottle labels with logo also keep the line consistent across sizes. One flavor may call for a bright gloss finish. Another may look better in matte. The logo still needs to feel like it belongs to the same family. Clean dielines, consistent color targets, and repeatable material choices matter more than flashy graphics. That is what keeps the shelf from looking random instead of intentional.
How Printed Bottle Labels With Logo Are Produced and Applied
The production flow for printed bottle labels with logo starts before ink ever touches stock. Artwork comes first: dieline, bleed, safe area, copy, barcode placement if needed, and any versioning for flavors, scents, or sizes. A decent supplier checks the label dimensions against the actual bottle diameter or panel width instead of trusting a generic template. That step prevents a lot of fit problems later. Boring? Sure. Necessary? Absolutely.
After the layout is approved, proofing begins. This is where printed bottle labels with logo either stay smooth or turn into a pile of revisions. The proof should show logo placement, typography size, color intent, and the relation between the label edge and the bottle shape. On a tapered bottle, even a small change in wrap length can throw the logo off-center once it is applied. Good proofing catches that before cartons are sealed and somebody starts pointing fingers.
Digital printing usually fits shorter runs, multiple versions, and jobs that need quick turnaround with lower setup cost. Flexographic printing tends to make more sense as quantities rise, especially when the design stays stable and the order is big enough to justify plates and setup time. That is the practical split. Printed bottle labels with logo do not need the fanciest process. They need the right one for the order size, shelf life, and brand standard.
Finishing changes both feel and durability. Matte reads softer and more understated, while gloss gives more pop under retail lighting. Soft-touch can feel premium on cosmetics or specialty beverages, though it is not the best choice if moisture or abrasion is a problem. Varnish offers some protection at a lower cost, while laminate usually gives better scuff resistance and moisture protection. With printed bottle labels with logo, finish should follow the use case, not the mood board that looked good at 2 a.m.
Application matters just as much. Small runs may be hand-applied. Mid-size orders often use semi-automatic labelers. Bigger programs move to fully automatic lines that depend on predictable roll dimensions, unwind direction, gap, and core size. If the labels ship in rolls, the production team needs to know whether the roll is wound out or in, what core diameter is required, and how much space sits between labels. A roll that looks fine in the box can still jam a machine if one spec is off.
For bottle programs that need broader label options, a good spec sheet matters more than a sales pitch. That is the part people skip and then act shocked when the labels do not feed properly. If the same label family has to work across several bottle shapes or product lines, document the bottle drawings, the line speed, and the application method before you lock the order. It saves time and cuts down on the usual back-and-forth.
When teams talk about application speed, they often ignore the last step at the line. Labels that are wound too tightly, too loosely, or cut with uneven spacing can slow installation even if the print itself is perfect. With printed bottle labels with logo, the feed format is part of the product. Fast line, fast labels. Anything else creates friction.
For tighter quality control, a supplier may also reference peel and shear behavior, especially when adhesives have to survive cold, wet, or abrasive handling. That does not turn a label order into a lab report. It just keeps the print looking good after real-world abuse. Labels do not care that the spreadsheet said they should.
Printed Bottle Labels With Logo: Materials, Finish, and Pricing Factors
Materials drive a large part of the cost structure for printed bottle labels with logo. Paper stock is usually the starting point. It works well for dry environments, room-temperature shelf products, and short runs where price matters more than moisture resistance. Put that same label in a cooler, freezer, or ice bucket and paper can soften, curl, or lift at the edge. That is where film stocks like BOPP usually make more sense.
BOPP, or biaxially oriented polypropylene, is a common choice for moisture-resistant bottle labeling. It handles condensation better than standard paper and holds up well on chilled beverages, personal care products, and oils that get handled often. Clear film can create a no-label look. White film gives stronger opacity and brighter color. For printed bottle labels with logo, the right film choice depends on whether you want the label to disappear into the bottle or stand out with a bold face.
Price depends on more than stock. Quantity matters because setup costs get spread across more pieces as the run grows. Shape complexity matters because custom contours, rounded corners, and narrow neck labels require extra finishing. Color count matters, especially if the artwork uses dense coverage or multiple spot colors. Finish matters too, because a matte laminate or specialty varnish usually costs more than a basic protective coat. With printed bottle labels with logo, the quote is really a stack of choices.
Here is a practical way to think about typical cost behavior:
| Label Option | Best Use | Typical Price Behavior | Main Watch-Out |
|---|---|---|---|
| Paper stock | Dry, room-temperature products | Often the lowest per-piece cost on short and mid-size runs | Can soften or lift in wet, cold, or oily conditions |
| BOPP film | Chilled drinks, cosmetics, oils | Usually a moderate step up in cost, but stronger in use | Needs the right adhesive and accurate conversion specs |
| Clear film | Minimalist or no-label look | Often priced above standard paper or white film | Requires careful color planning and bottle surface control |
| Laminate or specialty finish | Premium shelf presentation or abrasion resistance | Raises unit price and can add setup or lead time | May push the order into a higher minimum or slower schedule |
To make those ranges more concrete, a short run of 1,000 printed bottle labels with logo might land around $0.18-$0.45 per label depending on coverage, shape, and finish. A run of 5,000 to 10,000 pieces can often drop into a lower unit range, sometimes closer to $0.04-$0.14 per piece for simpler builds. That is a ballpark, not a promise. Artwork complexity, material choice, and finishing can move the number fast. Still, it helps to know the curve before you start comparing quotes like they all mean the same thing.
Special jobs cost more for reasons that are easy to miss. Variable data, multiple SKUs, sequential numbering, or flavor-line versioning all add handling time. Tighter color matching may add press checks. Metallic accents, textured faces, and protective overlaminates make the production path more involved. Even small changes to printed bottle labels with logo can move the quote because the press setup and finishing steps are no longer the same as a plain flat-stock run.
For sustainability-minded buyers, paper still makes sense when the product environment allows it, and FSC-certified paper is worth asking about when chain-of-custody matters. The cheapest label is not always the right one. The right label performs in the bottle's actual environment without waste, rework, or shelf damage. That is a better metric than a tiny price win that disappears the first time a cooler opens.
One more pricing trap: people compare quotes without matching specs. A paper label with basic varnish is not equivalent to a laminated film label, even if the artwork looks identical. If the quote sheet does not list substrate, adhesive, finish, and roll format, it is not a clean comparison. It is just a more complicated way to fool yourself.
Step-by-Step Timeline for Printed Bottle Labels With Logo
A realistic timeline for printed bottle labels with logo starts with measurement and ends with delivery that works on the line. The first step is not the art file. It is the bottle spec. Measure the diameter, the straight-wall area, the taper if there is one, and the exact placement zone where the label will sit. If the label wraps around a curved panel or lands near a shoulder, that geometry has to be built into the artwork before anything gets locked.
After the bottle is measured, confirm how the labels will be applied. Hand application, semi-automatic application, and high-speed automatic lines all create different constraints. A hand-applied label can tolerate a bit more variation than a roll made for a machine, but the sizing still has to be right. For printed bottle labels with logo, the application method shapes the format, not the other way around.
The proofing stage usually creates the most back-and-forth. A clean proof should verify the dieline, the copy, the logo placement, the finish, and any required compliance text. If the artwork has multiple versions, name each SKU clearly and document every change. That saves time later because printed bottle labels with logo are easier to approve when everyone is looking at the same file instead of three slightly different ones pretending to be final.
Once approved, a simple digital order may move into production in about 5-8 business days, with shipping added on top depending on distance. More complex jobs, especially those involving specialty finishes, roll conversion for automated equipment, or several label versions, often need 10-15 business days after proof approval. If samples or press proofs are required, add a few more days. A realistic schedule beats an aggressive one that looks nice in a spreadsheet and falls apart in the plant.
That schedule should also include time for line testing. If the labels will go onto an applicator, the production team needs time to confirm unwind direction, core size, roll diameter, and label spacing. A few minutes of test feeding can save hours of downtime later. That is one reason experienced buyers order printed bottle labels with logo before the launch date gets too close.
Shipping and receiving deserve their own slot in the timeline. A good print job can still miss the mark if it ships after the fill window. Freight timing, palletizing, and carton counts all matter. If the bottles are headed into a distributor network, transit stress should be part of the thinking. For more background on package testing, the protocols discussed by ISTA are useful because they show how vibration, compression, and handling can affect what reaches the shelf.
One timing detail is easy to overlook: roll orientation. If the labels are supplied in rolls for an applicator, the unwind direction has to match the machine. A perfectly printed label with the wrong roll wind can stop production cold. That is why the handoff from print to filling line is not a side note. It is part of the job, and a pretty important one.
Common Mistakes That Hurt Printed Bottle Labels With Logo
The first mistake is picking a label stock that looks good on a flat sample and falls apart on the real bottle. Printed bottle labels with logo need to be tested under actual use conditions, not just admired under good lighting. Paper may look elegant on a dry counter and then wrinkle or lift when the bottle sits in a cooler. A glossy stock may look sharp and then scratch during packing. Studio conditions are not the real world.
The second mistake is weak artwork hierarchy. Tiny type, low-contrast colors, and logo placement too close to the edge become bigger problems once the label wraps around a curved bottle. A logo that looks centered on a flat proof may sit too high or too low on the actual container. If the product has a shoulder, taper, or seam, that geometry should be part of the design. With printed bottle labels with logo, the bottle is part of the composition.
Another common issue is approving a proof without checking it on the bottle. That sounds obvious, and still happens constantly. The art may fit the dieline, but the final placement can clash with the fill line, neck band, cap, or molded texture. Once labels are printed in quantity, that mistake gets expensive fast. I always recommend placing at least one physical proof on a real bottle before releasing a large order of printed bottle labels with logo.
"A label does not fail politely. If the stock is wrong or the size is off, it shows up fast, usually right when the product is on the line or in the cooler."
Operational mistakes cause just as much damage. The wrong roll core, the wrong gap, the wrong unwind direction, or the wrong carton count can create delays that have nothing to do with print quality. If the order is headed to an automated line, the machine requirements should be shared early and checked again before production. That matters even more for printed bottle labels with logo on small-diameter bottles or containers with unusual curves, because feed behavior gets more sensitive.
There is also a pricing mistake that shows up constantly: comparing quotes that are not built to the same spec. A paper label with basic varnish should not be treated like a laminated film label with the same unit price logic. The quote may look better on one line item, but the performance gap can be huge. If the product needs cold-chain storage, scuff resistance, or oil resistance, the cheapest number can become the most expensive choice after damage, rework, or spoilage.
Finally, some teams forget to test under bright retail lighting. Matte and gloss do more than change feel. They change how the logo catches light, how shadows read, and how the brand looks from across the shelf. The right printed bottle labels with logo should still read clearly when the bottle is half empty, covered in fingerprints, or sitting beside a dozen competitors. That is the practical standard, not some polished mockup that only works from six feet away in a controlled photo setup.
Expert Tips for Better Printed Bottle Labels With Logo
My first tip is simple: test the label on the real bottle, in the real environment, before you commit to the full run. Put it in the refrigerator if that is where the product will live. Handle it with damp hands. Leave it under bright light. If the bottle will be packed, shipped, and stocked repeatedly, the test should reflect that. Printed bottle labels with logo are much easier to improve when the test is physical instead of theoretical.
My second tip is to choose the finish on purpose. Matte can give a refined, quiet look that works well for premium spirits, oils, and minimal cosmetic lines. Gloss gives stronger visual impact and often helps color feel richer. Laminate is worth the added cost when scuff resistance matters, especially on bottles that get handled often or packed tightly in cases. The finish on printed bottle labels with logo should support the brand story and the product environment at the same time.
Third, keep critical information away from edges, seams, and high-curve zones. Logos, dosage information, and key claims belong in the safest part of the label face. That is a design habit and a production habit. On a tapered bottle, a shape that looks clean on a flat screen can distort a bit in the hand. When the artwork accounts for that movement, printed bottle labels with logo hold up better after application.
Fourth, standardize file handling. Use one naming convention, one approved logo file, one color target, and one versioning method. That sounds administrative. It also saves real money on reorders. A buyer who can pull the same approved assets for multiple runs gets more consistent color and fewer surprises in production. If you manage several SKUs, that discipline becomes even more valuable because repeat orders of printed bottle labels with logo should not drift from batch to batch.
Fifth, ask for a sample or press proof when the label has an unusual shape, a very dark background, a metallic face, or a finish that is new to the product. Not every order needs a press proof, but unusual jobs often deserve one. That small step can show whether the logo is too thin, the contrast is too low, or the adhesive feels off on the bottle surface. It is a practical quality check, not a formality.
For teams trying to tighten the supply chain around bottle packaging, the most useful habit is consistency. Keep the same bottle measurements, the same label spec, and the same approval path every time you reorder. The fewer moving parts, the fewer surprises. That sounds dull, and it is. It also works.
One more point that gets ignored too often: build your quality expectations around distribution, not just shelf display. If the product ships through different climates, or if it rides in cases that get compressed and bounced, treat transit as part of the label spec. That is where package testing protocols become useful, and it is why some teams look at resources from ISTA before releasing a large bottle program.
Next Steps Before You Order Printed Bottle Labels With Logo
Before you request quotes, measure the bottle carefully and confirm how the label will be applied. Diameter, usable panel, taper, cap clearance, and placement zone all need to be known. If the bottle is going through a hand line, a semi-automatic applicator, or a full-speed machine, say that up front. Those details shape the spec for printed bottle labels with logo more than most people realize.
Gather the logo file, product copy, color references, and any compliance text before asking for pricing. When vendors compare the same size, stock, finish, and quantity, the quote is easier to trust. If you already have a dieline, include it. If not, ask for help creating one from the bottle measurements. A clean spec speeds approval and reduces the odds that printed bottle labels with logo will need a revision after the first proof.
Ask for samples or material swatches if the product faces moisture, cold storage, oil, abrasion, or frequent handling. A bottle that sits on a dry shelf has very different needs from a bottle that lives in a fridge or an ice bucket. Material choice should follow use conditions, not just the appearance of the print. The right stock saves waste later, and it saves a lot of annoying rework too.
Build the schedule backward from launch. Count proofing days, production days, shipping days, and setup time at the filler. If the line needs testing, add that too. A calm schedule beats a rushed one almost every time, especially when printed bottle labels with logo are part of a launch that cannot move. A week saved on paper is not worth a week lost on the floor.
Put all of that together and the decision gets easier: choose the label that fits the bottle, the environment, and the line, not just the lowest price. That is how printed bottle labels with logo stop being a guess and start behaving like a dependable part of the packaging system. Keep the bottle conditions, the application method, and the finish in view from the start, and the final result looks like it belongs on the shelf instead of fighting it.
Frequently Asked Questions
How much do printed bottle labels with logo usually cost?
Cost depends on quantity, material, finish, shape, and whether the job needs special durability or roll conversion. Short runs usually cost more per label because setup is spread across fewer pieces, while larger runs lower the unit price. For a fair comparison, ask for quotes using the same size, stock, finish, and quantity so you are not comparing a paper label to a laminated film label and pretending they are equivalent. With printed bottle labels with logo, the spec matters as much as the logo.
What material works best for printed bottle labels with logo on chilled bottles?
A moisture-resistant film like BOPP is usually a stronger choice than paper when condensation is part of the use case. Pair the material with an adhesive rated for cold, wet, or refrigerated conditions so the label does not lift at the edges. Test the label on a chilled bottle before approving the full run, because real-world moisture can change performance quickly. For chilled printed bottle labels with logo, that test is the safest step you can take.
How long does it take to produce printed bottle labels with logo?
Timing depends on proofing speed, material selection, printing method, finishing, and whether samples are required. Simple jobs can move through production in about 5-8 business days after proof approval, while projects with multiple SKUs, specialty finishes, or applicator testing often need 10-15 business days or more. Build in extra time for revisions and shipping so the labels arrive before the line needs them. That buffer is especially useful for printed bottle labels with logo tied to a launch date.
Can printed bottle labels with logo be used with automatic labeling equipment?
Yes, but the label format must match the machine specs for roll direction, core size, gap, and unwind orientation. Bottle shape and line speed also matter, especially on tapered or small-diameter containers. A line test is the safest way to confirm the labels feed cleanly and apply at production speed. If the roll spec is off by even a small amount, printed bottle labels with logo can slow the whole line down.
What files do I need for printed bottle labels with logo artwork?
Vector logo files are best because they hold edge quality and scale cleanly for print production. Provide any brand colors, copy, and a dieline if you already have one, because that speeds proofing and reduces errors. If only raster artwork is available, make sure it is high resolution and suitable for the final label size. Strong artwork prep makes printed bottle labels with logo easier to approve and much easier to print well.
Measure the bottle, match the stock to the environment, and confirm the application method before you place the order. Those three steps solve most of the headaches before they exist. Do them now, not after the labels are printed and everyone is staring at a cooler full of problems.
Related packaging resources
Use these related guides to compare specs, costs, quality checks, and buyer decisions before making the final call.


