Private Label Caps Unit Cost Breakdown for Buyers
A Private Label Caps unit cost breakdown only helps if it shows what actually moves the number. The final quote is the last thing worth looking at. By then, the cost has already been set by the cap build, the decoration method, the trim package, and how much labor the factory needs to put the whole thing together.
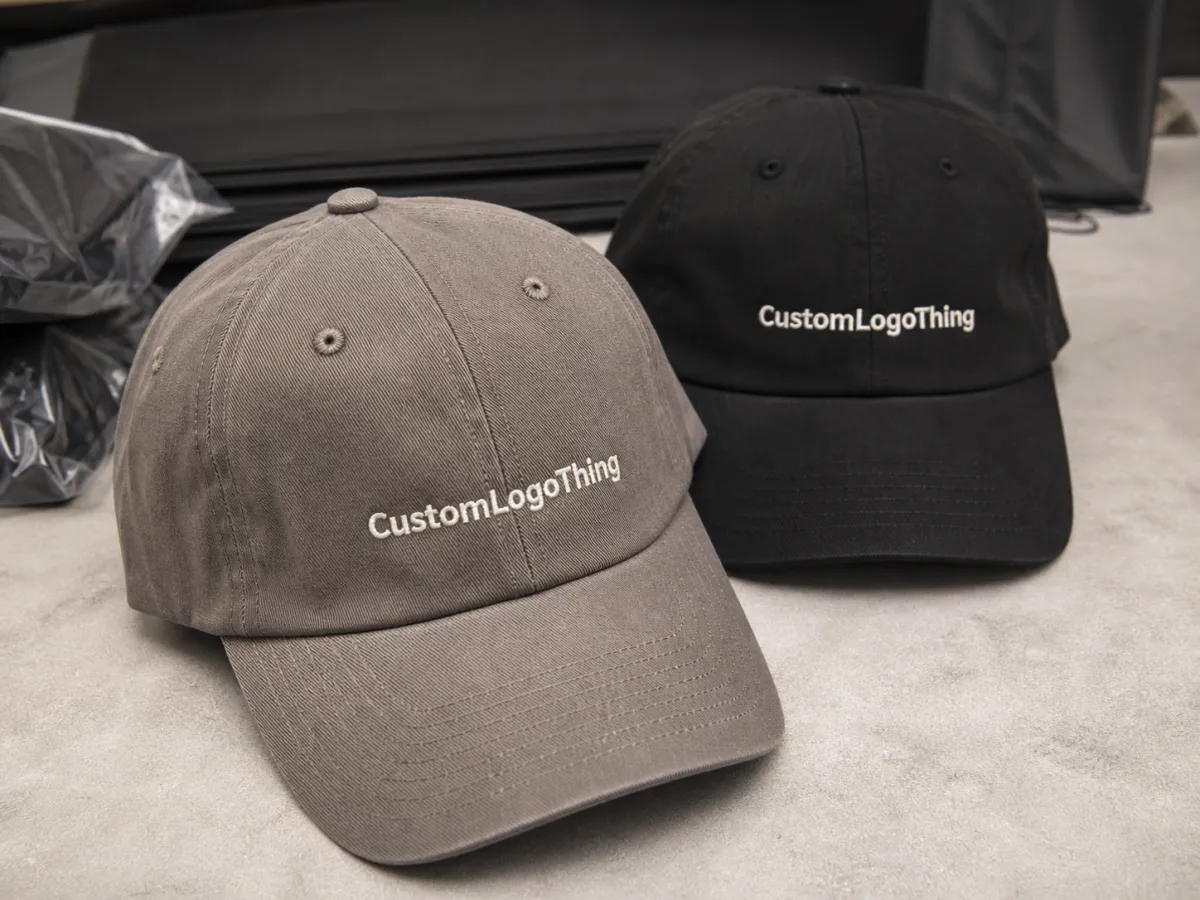
The frustrating part is that two caps can look almost identical in a product photo and still sit in very different price bands. One has a simple back closure and a low stitch count. The other has a structured crown, denser embroidery, a woven patch, and retail packing that sounds small until someone has to do it 5,000 times. That is where the money goes.
Why a small cap change can move your price more than expected
Buyers usually start with fabric because fabric is visible. Fair enough. But cap pricing often moves more from construction than from cloth. A five-panel cotton twill cap with a simple strap closure is a very different production job from a six-panel structured cap with front buckram, a denser crown, and tighter embroidery registration. The difference shows up in sewing time, handling time, and reject risk.
A small design change can force a different production path. Switch from a flat embroidery logo to a woven patch, and the factory needs a different application step. Change the closure from plastic snapback to metal buckle, and the back finish changes. Ask for a cleaner front panel with sharper shape retention, and you are usually adding reinforcement. None of that sounds dramatic on paper. In the sewing room, it matters.
The cheapest-looking cap is not always the cheapest cap to make. If the decoration needs a second pass, the closure needs extra hardware, or the crown needs more structure, the labor shows up whether the mockup did or not.
That is why the spec sheet needs to lock early. Crown profile, panel count, brim shape, closure type, and logo method should be fixed before bulk pricing starts. Otherwise every quote is a moving target, and the supplier is guessing just as much as you are.
Choosing the cap build that fits the brand and budget
The cap build should match the way the product will be sold and worn. A low-profile unstructured cap feels relaxed and usually uses fewer reinforcement steps than a structured mid-profile crown. A flat brim gives a different retail look than a pre-curved bill. Fitted sizing adds grading and size-run complexity that can raise both sample work and production risk. These are not style details. They are cost details wearing a style mask.
Fabric choice matters too, but not in a vague, mood-board way. Cotton twill is common because it sews cleanly and accepts embroidery well. Brushed cotton gives a softer hand. Polyester and performance blends hold shape better and can work well for sport or outdoor programs, but the material response changes how the thread sits and how the brim and crown are handled. If the logo looks sharp on one fabric and fuzzy on another, that is normal, not a factory mystery.
Closure selection deserves the same treatment. Snapback, hook-and-loop, strapback, and fitted each create a different assembly path. A simple plastic snap is usually cheaper than a metal buckle, but the metal option may better fit a premium retail position. The right choice is the one that fits the price point and the customer, not the one that sounds fancy in a product meeting.
Good spec work also covers the details people forget until the quote lands. Sweatband material, seam tape, eyelets, underbill color, woven side labels, and hang tags all influence the unit cost. Those items may look small individually. Put them together and they can push a budget cap into a different band entirely.
If the cap needs sewn-in neck labels, woven side labels, or branded hang tags, they should be part of the brief from the start. Custom Labels & Tags can add a cleaner retail finish without turning the order into a labor trap, provided the artwork and placement are locked early. The quote is easier to trust when those pieces are named rather than implied.
- Structured vs. unstructured: structured caps usually need more reinforcement and more consistent front-panel shaping.
- Low-profile vs. mid-profile: crown depth affects fit, grading, and the visual weight of the cap.
- Curved brim vs. flat brim: visor shape changes handling and finished presentation.
- Snapback vs. strapback vs. fitted: closure choice affects assembly time, hardware cost, and reorder consistency.
Specs that drive decoration and consistency
Decoration method is usually where the price starts separating in a visible way. Embroidery is still the most common choice for a clean logo with limited colors. Stitch count matters more than most buyers expect. A small front mark might sit around 4,000 to 6,000 stitches. A larger, denser, or more detailed design can run well beyond that and add measurable machine time. More time means more labor. No mystery there.
Patches change the equation again. A woven patch, PVC patch, leather patch, and felt patch each come with their own production route. Some need tooling or setup charges. Some need a backing material or secondary stitching step. Some need more care during application because the cap panel is curved and the patch is not. The artwork might be simple. The manufacturing path usually is not.
Print can work well for larger graphics or lighter coverage, especially when the brand wants a flatter look. But print is not automatically cheaper. Artwork size, color count, placement, and the type of fabric all affect the result. A logo on a smooth polyester panel behaves differently from the same graphic on brushed cotton. Buyers who understand that usually get fewer sample surprises.
The cleanest way to control decoration cost is to finalize the artwork before sampling. Send Pantone targets, logo scale, placement distance from the brim, and panel alignment in writing. If the logo is supposed to sit centered 2 cm above the brim seam, say that. If the patch edge needs to land inside a specific panel zone, say that too. Guesswork is expensive. Re-sampling is worse.
For repeat orders, consistency is everything. Keep the cap body, panel count, crown shape, and logo position fixed across colorways whenever possible. That keeps the line close to the original approval and reduces the chances of a small deviation becoming a production issue. Reorders go faster when the factory does not have to reinterpret the spec.
Use the spec sheet to cut out the noise. A decent spec sheet should tell the supplier whether the logo is embroidery, patch, or print; whether the visor is flat or curved; whether the inside finish uses a woven label or printed care label; and whether the cap includes branded taping or a standard finish. The more exact the spec, the cleaner the comparison across suppliers.
If the cap is part of a broader retail package, it helps to plan the label set at the same time as the cap artwork. Matching labels, hang tags, and inserts keep the order organized and reduce the back-and-forth that usually eats time late in the process. That kind of planning is not flashy. It just saves people from fixing preventable mistakes.
Private label caps unit cost breakdown: where the money goes
The simplest way to read a private label caps Unit Cost Breakdown is to split it into four buckets: blank cap, decoration and finish, one-time setup, and freight or landed cost. If those are all mixed into a single line, the quote becomes hard to compare and even harder to budget. A clean breakdown also makes reorder pricing clearer, because first-run setup does not behave the same way as repeat-run pricing.
| Order profile | Blank cap | Decoration and finish | One-time setup | Typical unit before freight |
|---|---|---|---|---|
| 5-panel cotton twill, simple embroidery | $1.05-$1.60 | $0.70-$1.40 | $25-$60 | $1.75-$3.00 |
| 6-panel structured cap, woven label, back closure trim | $1.35-$2.20 | $1.10-$2.20 | $40-$90 | $2.60-$4.70 |
| Performance blend cap, patch decoration, retail pack | $1.50-$2.60 | $1.40-$3.20 | $60-$120 | $3.20-$5.90 |
| Fitted or higher-complexity build | $1.80-$3.10 | $1.50-$3.60 | $70-$150 | $4.00-$6.80 |
Those ranges are meant to show structure, not promise a fixed rate. Country of origin, labor rate, fabric market, thread density, closure style, and order size all move the number. A compact order with a lot of setup can easily cost more per piece than a larger run with a simpler build. That is normal. It is also why the lowest quote is often the most misleading one.
One-time charges are the first place buyers get tripped up. Digitizing, sample development, mold fees, patch tooling, special labels, and custom inserts are usually not repeated on every reorder. They matter more on the first production cycle than on the second. If the supplier does not separate them, the comparison is fuzzy.
Packaging can also quietly raise the unit cost. Individual polybags, barcode stickers, retail inserts, inner carton labels, and master carton markings all add handling time. A cap that ships loose in bulk is a simpler order than a cap that needs retail-ready pack-out. Same product. Very different labor profile.
Freight and duties need to stay visible too. A quote that looks attractive at the factory gate can become a bad landed number if the shipment goes by air or if the receiving warehouse charges for retail prep. For projects that need transit protection, some buyers ask the supplier to follow ISTA transit test guidance. If the brand wants paper-based inserts or cartons with sustainability claims, FSC-certified material may be relevant. Those are not style touches. They are supply-chain decisions.
A quote is easier to trust when the line items are separated clearly: blank cap, decoration, labels, pack-out, and freight. That makes the Private Label Caps unit cost breakdown useful instead of decorative. Buyers can compare like for like, which sounds basic because it is. A lot of pricing confusion disappears once the components stop hiding inside each other.
MOQ tiers, price breaks, and quote inputs that matter
MOQ changes the math fast. A 50-piece order carries a much bigger share of setup cost per unit than a 250-piece run. At 500 pieces, the unit price often drops again if the style stays fixed and the factory can run the same trim package without interruption. The trick is to ask for tiered pricing at 50, 100, 250, and 500 pieces so you can see where the curve starts to flatten.
The biggest mistake is comparing quotes that are not built the same way. One supplier quotes the cap and embroidery only. Another includes polybags, hang tags, barcode stickers, and carton labeling. Those are not equal quotes. They are different scopes wearing the same number. If you want a real read, match the cap style, decoration method, packaging, and shipping terms before you compare the price.
Special requests should be declared early. Mixed colorways, custom retail inserts, rush production, alternate thread colors, and multiple logo placements all change the cost structure. So do changes to the back closure or the brim finish. If the buyer adds those after sample approval, the factory may need to rebuild the schedule or add extra labor that was never in the first quote. That is how budgets quietly drift upward.
Reorder pricing belongs in the discussion from the start. A first order usually carries higher setup charges. A second run can move faster and cost less if the factory keeps the same fabric, thread, and trim package on file. That matters for brands planning seasonal color drops or quick restocks. Reorders are where a good spec sheet pays off.
- Ask for breakpoints: 50, 100, 250, and 500 pieces show where the price drops happen.
- Keep the spec fixed: one cap body, one decoration method, one pack-out.
- Separate reorders: first-run setup is not the same as repeat-run pricing.
- Call out extras: mixed colors, inserts, rush timing, and alternate closures change the math.
Process and timeline from proof to final shipment
A normal cap order moves in a predictable line: quote, artwork proof, sample approval, bulk production, inspection, packing, then shipment. Predictable does not mean fast. Each step can pause if the artwork is incomplete, the color target is unclear, or the sample needs revision. The factory can only move as quickly as the approvals allow.
For a straightforward private label cap, artwork proofing may take 1-2 business days. Sampling often takes 5-10 business days depending on decoration method and whether any tooling is needed. Bulk production commonly lands around 12-18 business days after approval when materials are already in hand. Shipping is separate. Ocean freight can add several weeks, while air freight is faster and usually more expensive than buyers want to admit in the planning stage.
A clean approval process saves more time than a rushed production schedule. Missing files, late color sign-off, and unclear packaging instructions usually cause more delay than the sewing line itself.
Do not blur production time and transit time. A supplier can finish the caps on schedule and still miss the launch window if freight is booked too late. That matters on retail programs where cartons need final labeling, warehouse routing, or store-ready pack-out before they can move.
It also helps to ask how approvals are documented. A good production file should show the approved sample against the final trim package, not just a loose email thread with a few images attached. That matters more than people think, especially when the order includes custom labels, tag inserts, or carton markings that need to match the purchase order exactly.
How we keep quality steady on repeat private-label runs
Repeat orders are where sloppy documentation starts costing money. The cap body, closure, stitch count, logo placement, label type, carton count, and packing method should all be written down in a way that survives a personnel change. If the first approval was for a 6-panel structured cap with a woven label and a specific thread color, the reorder should reference those exact details instead of trusting memory. Memory is not a spec.
Pre-production samples are the main checkpoint before bulk sewing starts. I usually check the sample against the approved artwork and color references first. That catches the obvious problems. Then I check seam quality, visor shape, panel symmetry, and closure alignment. Small shifts are easier to fix there than after thousands of pieces are already in the line.
Inspection should be just as disciplined. Review embroidery registration, stitch balance, patch placement, closure function, carton counts, and retail packing instructions before the shipment leaves. If the order includes printed inserts or branded labels, compare those against the approved trim list. A lot of avoidable defects come from small substitutions, not dramatic failures.
Approved materials should stay on file whenever possible. Keeping the same fabric, thread, and trim package helps preserve the original look and reduces reorder friction. It also protects margin. Changing one supplier-approved component at random usually creates more cost than the change saved.
For teams managing both the cap and the trim package, linking the order to Custom Labels & Tags keeps the packaging story cleaner and makes later reorders less painful. It also gives a new buyer a fighting chance when the original merch person has moved on and the only thing left is the spec sheet.
Next steps to request an accurate quote
If you want the first number to be useful, send a reference photo, target quantity, logo file, preferred cap style, and the closure you want to sell. Add packaging notes too. A cap that ships loose is not the same as a cap that needs individual polybags, hangtags, and carton labeling. One is a simple bulk order. The other is a retail prep job pretending to be a simple bulk order.
Ask for separate pricing on blank, decorated, and packed versions. That makes it much easier to see where margin is gained or lost and whether a different decoration method would improve the unit economics. It also helps if the supplier lists setup charges and tooling fees separately, since those are often hidden inside a single line and become hard to compare later.
- Send the cap reference, target quantity, and logo file in one package.
- State the cap build: structured or unstructured, panel count, brim shape, and closure type.
- Confirm packaging needs: polybag, hangtag, barcode, master carton, or retail-ready packing.
- Ask for sample timing, bulk lead time, and freight method before approval.
That approach gives you a cleaner Private Label Caps unit cost breakdown, a better read on MOQ, and a more realistic view of bulk pricing before the PO goes out. If the goal is margin, not just a nice mockup, that is the number that matters.
What is included in a private label caps unit cost breakdown?
The main pieces are the blank cap, decoration, trims, labels, and finishing. Packaging, inner cartons, and master cartons may also be included if the order needs retail-ready delivery. For imported orders, freight and duties should be reviewed separately so you know the landed cost, not just the factory price.
How does MOQ affect private label cap unit cost?
Higher quantities usually lower the unit cost because setup work is spread across more pieces. Small runs carry more impact from digitizing, sampling, and finishing labor. Ask for multiple breakpoints so you can see where the best cost per piece starts.
Which decoration method keeps private label caps pricing lowest?
Simple embroidery is often efficient for clean logos with limited colors. Patches can raise cost if they need tooling, backing, or extra application time. Print can work well for some graphics, but the lowest price depends on artwork size, coverage, placement, and fabric.
How long does a private label caps order take after approval?
Timeline depends on sample approval, material availability, and the decoration method. Straightforward runs move faster when artwork and spec details are final before production starts. Shipping time should be added separately, especially if the order moves by ocean freight.
What should I send for an accurate private label caps quote?
Send a product reference, desired quantity, logo file, and preferred cap style. Include notes on closure type, packaging, color targets, and whether you need samples first. The more complete the spec, the easier it is to compare pricing and avoid revision rounds.

