Private Label OPP Header Bag Buying Guide for Sample Sign-Off
If you are building a Private Label Buyer OPP Header bags Sample Approval Checklist, start with the physical sample, not the mockup. A bag can look acceptable on screen and still fail once the header depth, hang hole, seal line, and fill weight are measured against the real product. Sample approval is not paperwork theater. It is the cheapest place to catch a wrong size, weak closure, bad print registration, or a header that sits crooked on shelf.
From a buyer’s point of view, the job is plain enough: get a bag that fits the product, hangs cleanly, protects the contents, and does not create a reprint mess. That requires a tight spec, a disciplined approval workflow, and a supplier that will flag problems before production starts. The expensive mistakes usually happen in the gap between “looks fine” and “meets spec.”
private label buyer opp header bags sample approval checklist
Sample approval is where private label packaging gets disciplined or gets expensive. A clear OPP header bag can still fail if the product sits too high, the hang hole lands too close to the seal, or the print shifts the brand mark off center. The sample is not only about appearance. It is a test of fit, function, and retail presentation.
In practice, the fastest way to save money is to slow down at sign-off. One wrong dimension can turn a full run into unusable inventory, and that lesson is rarely cheap. Review the sample as if it is already on the store hook: does it hang straight, does the branding read clearly, does the opening protect the product, and can store staff handle it without tearing or distorting the pack?
That is why the Private Label Buyer OPP Header bags sample approval checklist should focus on retail outcomes, not vague approval language. The bag has to fit the product, display cleanly, and survive handling. If the pack is headed for a chain store or club format, the standard gets stricter, not looser. Shelf mess is not a cosmetic issue. It affects sell-through.
“Approve the sample the way the customer will see it, not the way it looks in a PDF. That is the difference between a clean launch and a reprint headache.”
- Product fit: Verify the filled bag closes without bulging or slack edges.
- Header alignment: Check the hang hole, height, and edge trim on the real sample.
- Print clarity: Confirm the logo, barcode, and legal text are readable at arm’s length.
- Retail handling: Make sure the pack can be stocked, hung, and opened without damage.
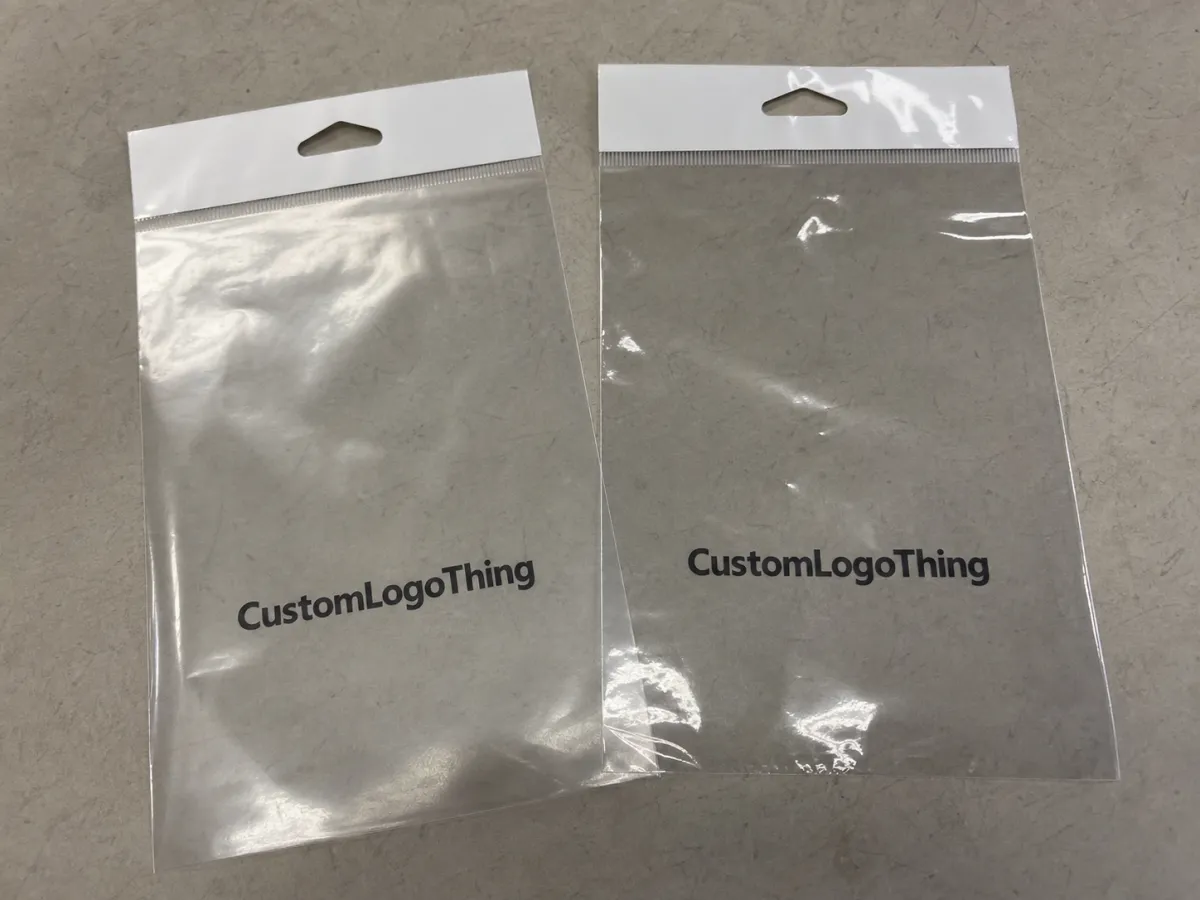
- Sample consistency: If you receive two samples, compare them side by side before approval.
A good buyer also measures the sample against the product, not just against the drawing. A 2 mm shift in header depth can sound minor until the top edge blocks the hang hole or crowds the artwork. That kind of issue often slips through because the bag is judged flat, while the product will be sold full. The sample should be reviewed in both states.
Material and Build Specs to Lock Before You Request Samples
Before you request samples, lock the construction. An OPP header bag is not just “clear bag plus card.” You need to define the film body, the header style, the closure method, and any treatment that affects performance. Typical clear OPP film runs from 30 to 50 microns for lighter retail items, while thicker builds are better for products that need more body or shipping protection.
For the header card, most private label buyers focus on stiffness before they look at color. That is sensible. A weak header curls, bends at the peg, and makes the whole pack look less finished. Depending on the presentation, buyers usually specify paperboard in the 250-400 gsm range or an equivalent card stock with enough rigidity to stay flat. If the pack needs a premium feel, ask whether a matte coating, gloss varnish, or laminate affects scuff resistance and fold behavior.
The header can be a simple insert card, a reinforced card, or a printed top section with a hang hole. Each option changes the look, the cost, and the pack speed. A round hole is common, but euro slots, slot-and-round combinations, and custom cuts can be a better fit depending on the display system. If you need anti-static treatment, venting, or extra seal strength, say that upfront. A supplier cannot guess correctly and then act surprised when the sample behaves differently.
For buyers managing multiple SKUs, the small details matter more than the broad category. A lightweight item might need a narrow gusset and a shorter header, while a denser product may need a larger footprint so the pack does not look crowded. The wrong proportion can make the packaging feel more expensive than the item inside, or the reverse. Neither is ideal.
If you need a refresher on common packaging terms, packaging references at packaging.org are useful for baseline terminology and material context. That kind of reference helps keep spec language precise, which matters more than style during approval.
Here is the practical spec list to lock before sample order:
- Film type and thickness: OPP grade, microns, clarity, and anti-static if needed.
- Header build: card stock, reinforcement, print coverage, and hole style.
- Closure method: heat seal, adhesive strip, or open-top fill plan.
- Retail format: peg hang, shelf display, or mixed merchandising.
- Compliance needs: barcode size, warnings, FSC paper, or recycling marks.
- Tolerance target: Width, height, and hole position tolerance agreed before the proof is issued.
Many buyers also ask for a simple measurement sheet with product width, product height, pack depth, header depth, hole diameter, and seal width. That sheet prevents a lot of ambiguity. If the supplier measures one way and the buyer checks another, the approval conversation will drift fast.
Artwork, Copy, and Compliance Details to Check on the Sample
Artwork errors are easier to miss on bag samples than on flat paper proofs. Clear film creates glare. White text can disappear. Thin rules can look broken once they sit over the seam or near a fold. If the header carries the brand mark, the barcode, the legal copy, and the SKU, each item needs breathing room. Cramped layouts are a warning sign, not a design choice.
Check the sample in normal retail lighting, not under a desk lamp. Then tilt it. Then hang it. That sounds overly cautious until a barcode scans badly because the dark background sits too close to the fold or the artwork loses contrast in a fluorescent aisle. Print that looks acceptable in a proof file can flatten once it meets film, heat, and gloss.
There is also the matter of claims. If the header includes recyclable language, FSC references, or product safety statements, those claims need to be backed by the approved material set and the right file trail. Buyers often assume that a supplier will catch compliance gaps automatically. Some do. Many do not. The sample should be checked against the exact claim copy that will ship.
Helpful sample checks include:
- Barcode readability: Scan it from a practical distance, not only by eye.
- Copy legibility: Confirm legal text size and contrast under standard shelf lighting.
- Color consistency: Compare the sample against the approved color target, not memory.
- Seam overlap: Make sure no key text sits on a fold or seal line.
- Front/back orientation: Verify the brand face lands where store teams expect it.
For products that need matching packaging components, keep the brand system coordinated across the line. A header bag can look polished on its own and still feel disconnected if the rest of the pack uses different type sizes, color values, or icon language. Consistency is one of the few packaging details shoppers notice without trying to.
Pricing, MOQ, and Unit Cost Drivers for Private Label Orders
OPP header bag pricing is not mysterious, but it does swing based on the build. MOQ usually drops when the bag is a standard size with light print and a simple header. It climbs when you add custom dimensions, heavy print coverage, special board, or a hang-hole style that needs tooling. A buyer who asks for “the same bag, but better” usually ends up paying for the better part.
For rough planning, a simple clear OPP header bag might land around $0.10-$0.18 per unit at 5,000 pieces, while a printed bag with a reinforced header can sit closer to $0.18-$0.35 per unit. Larger or more complex builds can push higher, especially if the artwork coverage is heavy or the header uses premium board. Sample pieces often cost more per unit because tooling, proofing, and setup are spread across only a few bags.
Ask for quotes at multiple volumes. Otherwise you are comparing a fantasy price to a real one, and that never ends well. The best quote is apples-to-apples: same film thickness, same header stock, same print method, same carton spec, same approval basis. If the sample is built one way and the production order is built another way, you have not approved a product. You have approved confusion.
| Option | Typical MOQ | Unit Cost Range | Best For | Main Watchout |
|---|---|---|---|---|
| Stock-style clear OPP header bag | 3,000-5,000 pcs | $0.10-$0.18 | Simple retail items, fast replenishment | Limited branding and fewer structural choices |
| Custom printed header with standard film | 5,000-10,000 pcs | $0.18-$0.35 | Private label launches and branded shelf display | Proof rounds and print placement need tight review |
| Heavy-duty or specialty build | 10,000+ pcs | $0.28-$0.55 | Premium goods, fragile items, or regulated packs | Tooling, board grade, and extra checks raise cost |
Cost drivers are usually easy to spot once you know where to look:
- Material gauge: thicker film and stiffer board cost more.
- Print method: more colors and larger coverage raise setup and unit cost.
- Revisions: extra proof rounds add time and often add fees.
- Die work: custom cut shapes and hang holes need tooling.
- Packing method: nested, counted, or carton-ready packs can change labor cost.
If the order will travel hard or sit in distribution for a while, ask how the pack aligns with ISTA transport test methods at ista.org. That is not overkill. It is how you avoid approving a beautiful bag that collapses after handling.
Sample Approval Workflow, Lead Times, and Delivery Milestones
A decent approval process has a rhythm. Quote first. Dieline next. Artwork proof after that. Physical sample. Buyer review. Marked-up revisions if needed. Final sign-off. Production release. Then delivery. If the supplier jumps straight to production without controlled approval, that is not speed. That is gambling with the budget.
Simple samples can move fast, especially if the dimensions are standard and the print is basic. More custom builds take longer because someone has to confirm the product fit, the header proportions, the fill behavior, and the artwork registration. If color targets are not clear, the approval clock stretches. If measurements are missing, it stretches again. That is how a “quick sample” becomes a two-week back-and-forth.
Typical timing looks like this: 2-4 business days for a straightforward proof, 5-10 business days for a custom physical sample, and often 12-15 business days from approval to production release once everything is locked. Add transit time separately. If the launch date matters, say so early. A supplier can plan around urgency. They cannot plan around silence.
Common delays buyers can control:
- Late artwork changes after the sample is already built.
- Missing SKU details or barcode requirements.
- Unclear seal placement or fill direction.
- Unconfirmed ship-to address or carton label format.
- Multiple decision-makers editing the same proof without version control.
That last point causes more confusion than people admit. One contact should own the sign-off. If three people edit the same proof, the approval trail becomes hard to trust. A clean record saves time, and it gives both sides something concrete to point to if the run needs to be matched later. That is worth far more than the illusion of group consensus.
What a Reliable Supplier Checks Before Moving to Production
A reliable supplier does more than print what you send. They check whether the artwork fits the dieline, whether the tolerances make sense, and whether the specified material actually supports the final pack. That matters, because a lot of customer-side artwork files are built for a brochure mindset, not a production mindset. Production does not care about good intentions. It cares about measurements.
The stronger suppliers catch conflicts before the run starts. For example, a barcode placed too close to the fold line will scan badly. A seal line too near the product can make filling awkward. A header that is too short can look weak even if the dimensions are technically within spec. These are the details that separate a neat pack from a pack that needs explanations.
Look for these quality controls:
- Repeatable sample consistency: the second sample should match the first sample.
- Print registration: logos, text, and barcodes should stay aligned.
- Cut accuracy: trim and hole placement should not drift.
- Carton protection: finished bags should not scuff before they reach the buyer.
- Documentation: revision notes should be easy to trace.
Service matters here too, but not in the vague sense. Fast replies are nice. Clear replies are better. A supplier who writes down spec changes, labels the revised proof, and keeps the approval trail clean is easier to work with and less likely to create a dispute later. That sort of discipline is not flashy, but it prevents expensive rework.
Some buyers also want FSC paper for the header card. That is fine, but the paper grade, chain-of-custody paperwork, and print notes all need to match what was approved. If sustainability claims are part of the package, the paperwork has to be real, not decorative. The same applies to recyclable claims and country-of-origin text.
Common Approval Mistakes That Lead to Reprints
The biggest approval mistake is signing off on the flat mockup and assuming the sample will behave the same way. It will not. The bag may need a different fold line, a different header depth, or a slightly shifted seal to work with the actual product. A sample review should happen with the product inserted, filled, and hung. Flat samples only tell half the story.
Another common miss is ignoring the header height. Buyers often focus on logo placement and forget that the header has to carry the pack visually on the peg. If the top section is too small, the product looks crowded. If it is too large, the bag can feel wasteful and raise unit cost. That balance matters more than people want to admit.
Barcode size, fold lines, and seal placement can also wreck an otherwise decent design. A barcode that prints cleanly on screen can still scan poorly if the background contrast is weak or the placement sits too close to a crease. A fold line that seems harmless can cut through key text. A seal placed too high can block fill and create weak top corners. Small errors create big expenses.
“The sample passed on the desk, failed on the hook, and that was the only opinion that mattered.”
Use this side-by-side check before final sign-off:
- Compare the physical sample to the signed dieline.
- Measure height, width, header depth, and hole position.
- Check the filled pack, not just the empty bag.
- Review artwork, barcode, and legal text under normal lighting.
- Confirm carton count, pack style, and ship condition.
That is the backbone of the private label buyer Opp Header Bags sample approval checklist. Not glamorous. Very effective. Reprints are expensive because the mistake usually hides in plain sight until the wrong quantity is already in motion.
How to Brief the Next Sample Without Losing Time
If you want the next sample to be worth approving, send clean input. Start with target dimensions, product weight or fill size, print file, quantity goal, required features, and the deadline for review. Add the hang-hole style, closure method, carton count, and any compliance text you need included on the header card. The more precise the input, the fewer guesses the supplier has to make.
One contact should manage the file trail. One marked-up proof should show the changes. One final sign-off document should state exactly what was approved. That sounds boring because it is boring, and boring is what you want here. Approval confusion is how good packaging turns into a blame game.
A useful buyer brief also includes what not to change. If the product is sensitive to compression, say so. If the pack must hang on a narrow peg, say so. If the header can tolerate only a small increase in board thickness before the silhouette looks stiff, say so. Those constraints are easy to overlook until the sample arrives and everyone starts discussing preferences instead of requirements.
Before you release production, make one last pass through the private label buyer opp header bags sample approval checklist: dimensions, fit, print clarity, barcode legibility, carton count, and packing method. If all of that lines up, approve the spec and move forward. If something feels off, fix it now. The cost of a careful delay is small. The cost of a reprint is not.
What should I check before approving private label OPP header bag samples?
Verify the measured dimensions, header depth, seal placement, and hang-hole position against the approved dieline. Then check print clarity, barcode readability, and product fit once the bag is filled, not just when it is flat. Also confirm carton count, packing method, and whether the sample matches the intended production film thickness and board grade.
How does MOQ affect OPP header bag pricing for private label orders?
Higher MOQs usually reduce unit cost because setup, tooling, and proofing are spread across more bags. Custom sizes, extra print colors, and special header structures can raise MOQ or move the order into a higher price tier. Ask for pricing at two or three volume levels so you can compare actual breakpoints before you commit.
How long does the sample approval process usually take?
Simple spec changes can move quickly, but custom samples take longer when artwork, dimensions, or color targets are unclear. The fastest path is a clean dieline, final artwork, and one decision-maker reviewing the sample. If revisions are needed, the timeline usually resets based on the complexity of the change.
What files do you need to quote private label header bags accurately?
Send final dimensions, quantity target, print count, material preference, and any closure or hang-hole requirements. Include editable artwork, barcode files, and notes on color matching or compliance text. If you have a sample photo or competitor reference, add it so the quote reflects the right build instead of a guess.
What usually causes OPP header bag samples to fail approval?
Most failures come from wrong sizing, poor artwork placement, or a header that does not match the retail display plan. Other common issues are weak print contrast, unreadable barcodes, and seal locations that interfere with filling or hanging. A rushed review usually misses these problems, which is why a written checklist matters.


