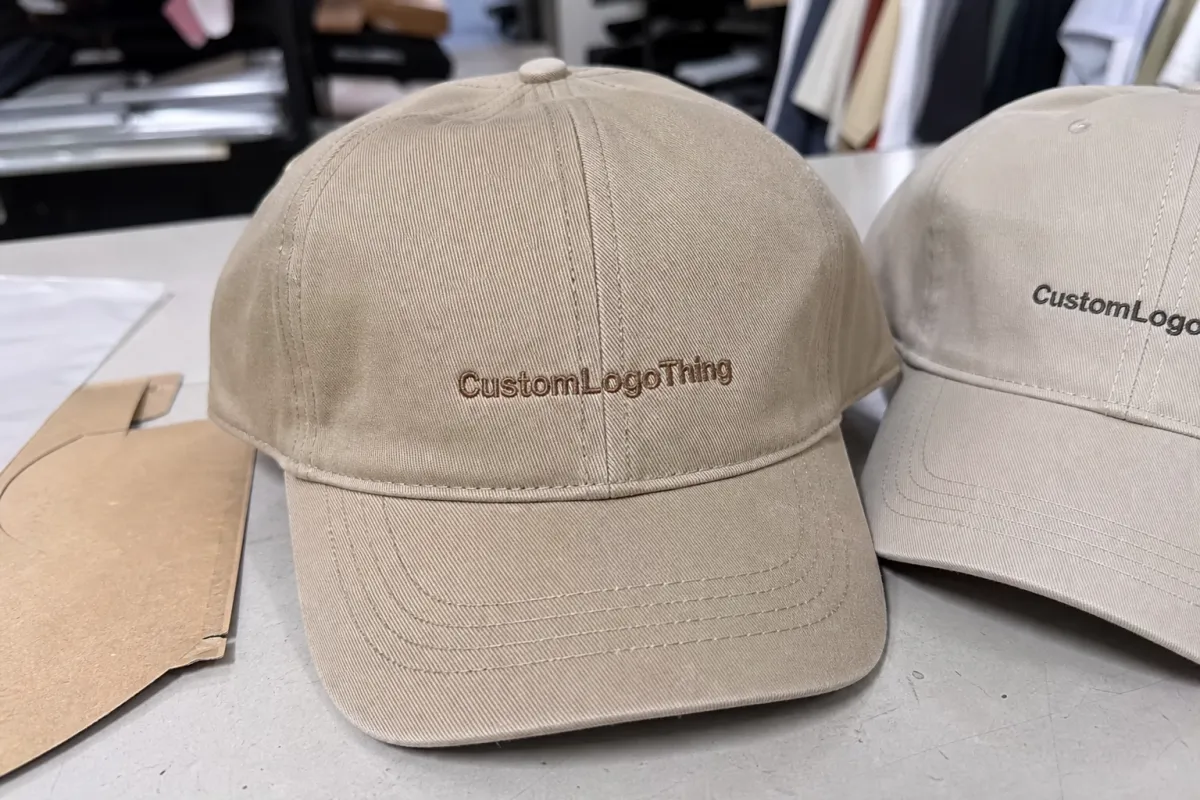
A cap sample can look tidy on a screen and still fail the moment it is held, bent, or photographed under ordinary light. That gap matters more with toy-related branding, where the product has to read as playful, clean, and correctly scaled at a glance. A small logo that looks balanced in a render can feel cramped on a shallow crown. A soft fabric can look premium in a flat lay and still collapse the moment the brim gets handled.
This is where a toy Embroidered Baseball Caps material sample guide earns its keep. It forces the decision away from abstract approval and toward the actual object: the shell fabric, the embroidery, the brim insert, the closure, and the way the cap sits on a head. One sample can prevent a very expensive mismatch because it shows how the parts behave together, not in isolation.
For toy-branded headwear, that distinction is not cosmetic. Bright colorways, small graphics, and character-driven artwork leave little room for guesswork. A millimeter of placement error, a thread shade that drifts warm, or a front panel that is too stiff can change the feel of the whole product. Buyers often discover that after the fact, when the carton is already packed and the retail photos are already planned.
Toy embroidered baseball caps material sample guide: why one sample can prevent a big retail mismatch
A proper sample should show the whole construction, not just the outer fabric. Front panel structure, brim board, sweatband, closure type, embroidery density, label placement, and trim choices all affect the final impression. Change one of them and the cap may still be technically correct while looking off in hand. That is how approvals drift.
The strongest sample checks three things at once. First, does the cap feel right? Second, does the artwork sit cleanly without puckering or distortion? Third, does the construction still make sense once the buyer sees it outside a photo setup? If the answer to any one of those is weak, the bulk order needs more work.
For toy-oriented designs, scale matters more than many teams expect. A logo that is legible at 3 feet can look dense or oversaturated once embroidered if the crown is too shallow or the stitch field is too tight. A cap that reads energetic in a digital mockup can feel heavy if the front panels are over-buckramed or the visor board is too rigid. Those details affect retail appeal, not just manufacturing quality.
A good approval sample should answer a short checklist:
- Does the shell fabric feel appropriate for the product position?
- Does the embroidery hold shape without pulling the panels?
- Does the closure suit the intended head size range and use case?
- Do label and trim placements match the approved artwork?
- Does the cap recover after light bending and handling?
The most useful sample is the one that reveals where the design is strongest and where it needs correction before production scales the mistake.
That is the practical value of a toy Embroidered Baseball Caps material sample guide. It gives buyers a concrete way to compare options and catch weak points before they become a run of 500 or 5,000 units that all carry the same flaw.
How fabric, embroidery, and trims work together
A cap is a system. The shell fabric influences drape and color depth, the front panel structure controls shape, the visor board sets stiffness, and the embroidery changes both surface tension and visual weight. Even the sweatband can alter how the cap feels in use. If one component changes, the others may need adjustment as well. That is why a sample that looks fine in parts can still fail the overall review.
Fabric is the first signal the buyer reads. Cotton twill is still the most common baseline because it is familiar, holds embroidery well, and has a predictable hand-feel. Brushed twill feels softer and often reads more premium, but it can show stitch tension differently than a firmer weave. Canvas gives a sturdier profile, while performance blends can improve moisture handling and cleaning resistance. For decorated caps, shell weights often fall around 180gsm to 240gsm, depending on whether the cap needs to feel light, structured, or premium.
Embroidery has its own rules. Thread sheen, underlay, stitch density, and digitizing all influence the final result. A front logo around 55mm wide will often need a different setup than the same art expanded to 80mm. Too much density on a softer fabric can cause puckering or a swollen look. Too little density can leave thin edges or patchy fill. Standard front logos often land in the 6,000 to 12,000 stitch range, while dense patches or multi-color artwork can go far beyond that. More stitches are not automatically better; they only help if the fabric can support them.
Trims deserve equal attention because they are often the parts buyers remember after the first handling. Woven labels, interior taping, patches, hangtags, and closure hardware all change the perceived quality. If the retail program depends on a polished presentation, the sample should include the final label and packaging plan, not just the cap body. A neat cap inside a generic mailer can still look underdeveloped.
Some practical material notes help narrow choices early. Standard cotton twill is widely available and usually easier to approve quickly. Softer brushed finishes can be attractive for character-led or gift-oriented products, but they may require tighter embroidery testing. If the cap needs stronger shape retention, a more structured front panel and firmer visor board often help. The trade-off is comfort versus silhouette. Buyers rarely get both at the absolute extreme.
Cost, pricing, and MOQ for sample approvals
Sample pricing reflects more than fabric cost. The bill usually includes base cap sourcing, embroidery setup or digitizing, trim labor, revision work, packaging, and shipping. If the design needs several logo placements, a custom closure, or interior branding, the total rises because each extra detail adds setup time and inspection time.
For buyers, the more useful question is not whether the sample is cheap. It is what the sample prevents. A low-cost sample that hides a bad brim curve or wrong crown depth can cost far more than a more complete approval sample. Once bulk production starts, the expense shifts from sample fees to correction, returns, delays, and damaged shelf performance.
| Sample type | Typical cost | Typical turnaround | Best for |
|---|---|---|---|
| Blank fit sample | $12-$25 | 5-10 business days | Checking crown depth, brim shape, and closure comfort |
| Decorated approval sample | $25-$60 | 7-14 business days | Reviewing embroidery, trim placement, and color accuracy |
| Pre-production sample | $35-$80 | 10-15 business days | Final sign-off before bulk production starts |
| Rush sample | Base fee plus $15-$35 rush charge | 3-7 business days | Time-sensitive launches with ready artwork and stock materials |
MOQ depends on what is being ordered. A factory may agree to a single blank sample if the shell is already in stock. Custom embroidery changes the equation because digitizing, setup, and sewing all take time. For bulk production, embroidered cap MOQs often sit around 300 to 500 units, though simple jobs can go lower if materials are on hand and the decoration is straightforward. Specialty closures, custom colors, or branded interior labels can push the minimum higher.
There are a few predictable add-ons. Digitizing a new logo file often runs around $15-$35, depending on complexity. Color corrections can add a small fee if the first thread choice misses the target. Extra placements on the back or side panels raise labor. Multiple sample rounds mean repeated freight and repeated sewing time. Rush freight can double the pain if the approval schedule is tight.
It also helps to separate visible cost from hidden cost. A sample that arrives quickly but does not reflect the real build may appear cheaper on paper. In practice, the wrong approval is far more expensive than the higher-priced sample that catches the issue early. The math is dull but decisive.
Process and turnaround: from first sample to approval
The sample process should move in a straight line: tech pack review, sample build, shipment, buyer review, revision if needed, then final sign-off. If any of those steps are vague, delay tends to multiply. A clear process is not bureaucratic; it is the only way to keep a decorated cap from turning into an open-ended project.
Lead time depends on material availability, embroidery complexity, and how many rounds of feedback are required. A simple stock-cap sample with one front logo can come back in about 7 to 10 business days. If the cap needs custom structure, special fabric, or several decoration points, 12 to 18 business days is more realistic. Rush samples are possible, but only when the base materials are already available and the artwork is ready to sew without cleanup.
Feedback timing matters more than many teams admit. A 24- to 48-hour review window keeps the sample moving and prevents the revisions from drifting into a long correspondence chain. Comments scattered across email, chat, and image markup can create contradictory instructions. One decision-maker on the buyer side usually produces a cleaner result than a committee that revisits the same detail three times.
There are three levels of sample detail, and it helps to ask for the right one up front:
- A flat mock-up for layout and artwork placement only.
- A decorated sample with actual embroidery and materials.
- A fully finished pre-production cap that mirrors bulk construction.
Not every project needs the most complete version first. Marketing teams sometimes only need visual confirmation. Retail buyers usually need more. They want to feel the brim, inspect stitch density, and compare the cap against the spec sheet line by line. The sample should match the decision being made.
Packaging affects timing too. A curved brim can flatten in weak transit packaging, and a heavily embroidered front panel can crease if the cap is tossed into a loose mailer. For transit expectations, reference standards from ISTA and ask for packaging that matches the journey the cap will actually take. Shipping conditions are rarely as gentle as a studio table.
Common mistakes that distort fit, color, and stitch quality
The most common mistake is approving from photos alone. Lighting can warm a white cap, flatten contrast, and hide puckering. Compression can smooth out loose stitches and make an uneven logo look cleaner than it is. A photo can support a decision, but it should never carry the decision by itself.
A second mistake is a brief that does not agree with itself. If the tech pack, Pantone target, and artwork files point in different directions, the sample may still look “close” to someone skimming it. That is how wrong approvals happen. The cap is not necessarily wrong. The instructions are.
Fit and structure are easy to overlook because they are less glamorous than the embroidery. They matter anyway. Crown depth changes how the cap sits on the head. Brim curve changes the side profile. Closure style changes both comfort and perceived value. A snapback may feel more forgiving for a wider head range, while a metal buckle or fabric strap can read more polished. Different use cases call for different trade-offs.
Color is another place where toy-branded projects get caught. Bright reds, yellows, and blues show variation quickly. Even a slight shift can make the cap feel off-brand. Dye lots, thread lots, and fabric finishing all influence the final tone. If the product relies on a precise character color, ask for the closest available thread reference and confirm it under the lighting the buyer will actually use.
Embroidery defects usually reveal themselves in hand inspection. Watch for:
- Puckering around dense fill areas.
- Loose threads at color-change points.
- Uneven density that makes one letter heavier than the next.
- Logo shrinkage that makes the artwork read smaller after sewing.
- Misalignment between the center seam and the logo centerline.
If the artwork uses fine type, narrow outlines, or small icons, inspect it in bright natural light and from a normal viewing distance. A logo that survives close-up but disappears from three feet away is not ready for sign-off. That is exactly why a toy Embroidered Baseball Caps material sample guide is useful: it makes the failure visible before production hardens it into inventory.
Expert tips for cleaner sample comparisons
The easiest way to compare samples is to track them in a simple matrix. Record fabric weight, shell composition, thread codes, brim board thickness, closure type, trim changes, and every revision from one round to the next. Without that record, teams start comparing a new sample against memory, and memory is a weak production tool.
Use the same lighting, distance, and background for every sample photo. Do not mix daylight, warehouse light, and phone flash if the goal is a fair comparison. A white table can make one sample feel brighter than another even when the thread color is the same. Context changes perception faster than most people expect.
Side-by-side comparison is especially useful when choosing between fabric directions. Cotton twill may feel more classic. Brushed twill can feel softer. A performance blend can feel more technical and practical. Seeing them together usually clarifies the decision faster than reviewing each sample on its own.
Mark comments in two buckets: must-fix and optional. Misalignment, wrong logo size, or the wrong closure are must-fix issues. Slightly brighter thread sheen or a marginally firmer hand-feel may be acceptable depending on the brand position. Mixing those categories creates revision churn that adds time without improving the product.
A practical review order keeps the inspection disciplined:
- Check cap shape and fit first.
- Confirm fabric hand-feel and structure.
- Review embroidery placement and density.
- Verify color against the approved reference.
- Inspect trims, labels, and packaging details last.
That order works because the wearer notices shape before they notice stitch counts. It also helps buyers avoid polishing a detail on a cap that is already wrong in the bigger construction choices.
One more note on proof quality: ask for the sample to be photographed straight on, from the side, and from a slight angle. Those three views catch a surprising amount of risk. Many flaws are invisible in only one view and obvious in another.
Next steps for a faster approval packet
The approval packet should remove uncertainty, not add to it. Gather the artwork files, Pantone references, measurements, size targets, closure preference, packaging notes, and any licensing or safety requirements before the sample request goes out. If the toy brand has age grading, labeling, or packaging rules, include them now. A supplier can work much faster with a complete brief than with scattered updates.
Decide which details are locked and which can still move. For many projects, the non-negotiables are shell color, embroidery size, logo placement, and final fit. Flex items might include hangtag style, carton labeling, or the exact packaging insert. That split keeps the review focused on the parts that most affect the finished cap.
Send a short approval checklist with the request so there is no confusion about scope. It should confirm sample type, sample fee, shipping method, turnaround, and the number of revision rounds included. If packaging is part of the quote, ask for the carton spec in writing. A corrugated cardboard shipper with kraft paper inserts is still common for cap samples, but the outer pack should be matched to the product’s shape and finish. If sustainability claims matter, confirm whether the carton or inserts use FSC certified paper, recycled materials, or post-consumer waste. Claims such as biodegradable packaging should be backed by documentation, not assumptions, and the pack-out still has to protect the brim and embroidery.
Packaging details are not separate from quality; they are part of it. A cap that arrives flattened, creased, or dusty can lose approval even if the construction is sound. For retail programs, the box and the product should survive the same scrutiny.
The best approval packets are concise, specific, and internally consistent. They make it easier to compare the sample against the intended product rather than against a moving target. That is the last practical value of a toy embroidered baseball Caps Material Sample guide: it turns a subjective approval into a controlled one, which is about as close as cap development gets to certainty.
What should a toy baseball cap material sample include before bulk order approval?
A useful sample should show the shell fabric, visor construction, sweatband, closure, embroidery, and any label or trim that changes the finished look. It should also include the key measurements and decoration references so the buyer can compare it with the spec sheet rather than relying on photos alone. If the project has multiple directions, a small sample set makes fabric hand, structure, and color much easier to evaluate side by side.
How much does an embroidered cap sample usually cost?
Pricing usually reflects the base cap, embroidery setup or digitizing, labor, trim changes, packaging, and shipping rather than fabric alone. Simple blank samples cost less, while decorated approval samples cost more because they require setup and finishing time. The better comparison is total risk: paying a little more for a sample that exposes problems early is usually cheaper than fixing a bulk order later.
How long does the sample and approval process take for toy cap projects?
Timeline depends on material availability, embroidery complexity, and how many revision rounds are needed before final approval. A straightforward sample can move quickly, but custom decoration, special trims, or back-and-forth artwork changes extend the schedule. The fastest path is complete artwork, clear feedback deadlines, and one decision-maker on the buyer side.
Which fabric is best for a toy embroidered baseball cap sample?
Cotton twill is often chosen when buyers want a classic hand-feel and a clean embroidery surface. Brushed twill or similar soft finishes can make the cap feel more premium, while performance blends may work better if durability and easy care matter. The right answer depends on how the cap should look, feel, and hold embroidery, so compare a few fabric options before locking the run.
How many revisions should buyers expect before approving a cap sample?
Most buyers should plan for at least one review round and one revision round if the product includes custom artwork or precise color matching. If the first sample is built from a weak brief, there may be more rounds, which is why a clear spec sheet saves time. Good approval notes should focus on must-fix items first, because that keeps revisions tight and prevents the process from drifting. Keeping the toy Embroidered Baseball Caps material sample guide beside the spec sheet makes the final decision easier to defend.


