Woven Label Beanies Sample Approval Checklist for Buyers
If you are using a woven label beanies Sample Approval Checklist, you are already doing the part that prevents most costly mistakes. A digital mockup can look perfect and still miss the real issues: the label sits high, the cuff pulls off-center, or the yarn shade changes under normal light. Those are small misses on paper and expensive misses in bulk.
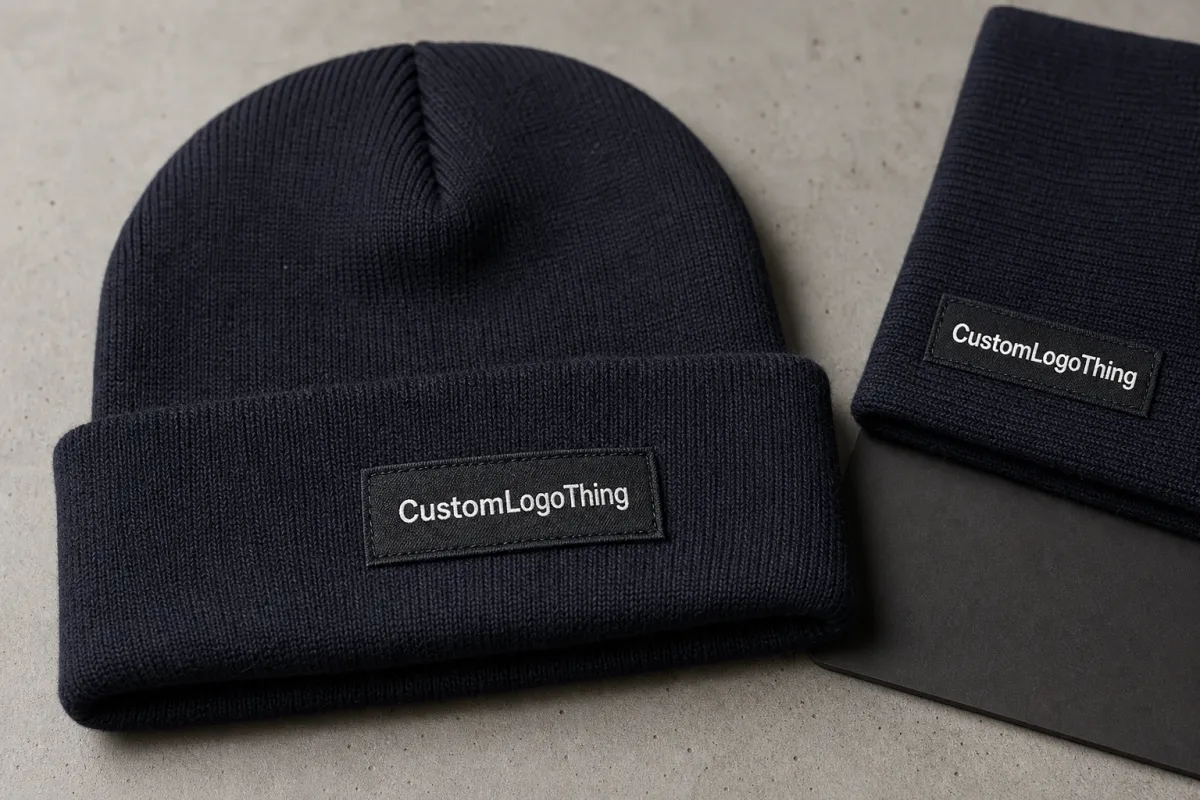
Sample approval is not about ceremony. It is the point where you decide whether the beanie should move into production as built, or whether the spec needs another round. The woven label is often the first detail customers notice, so size, placement, edge finish, and readability matter as much as the knit itself.
The sample should answer practical buyer questions: does the label sit where the spec says, does it still read clearly when worn, does the color match the approved reference, and is the finish acceptable at the planned MOQ and price point? If the answer is unclear, the sample is not ready.
What usually fails on woven label beanies
Most sample problems are not dramatic defects. They are small changes that become visible once the beanie is worn, folded, or packed. A label that looks centered flat can drift once the cuff is folded. A logo that looks balanced on screen can shrink too far once it is woven into a small patch. That is why physical review matters.
The label construction itself can create trouble. Thread density affects clarity, edge finish affects how clean the piece feels in hand, and stitch direction affects whether the label lies flat or curls after attachment. If the weave is too loose, fine text can blur. If the edge is too stiff, it can lift against the knit.
Common failure points are usually these:
- Placement drift - the label is centered on the spec but ends up high, low, or angled on the actual cuff.
- Color mismatch - the yarn matches a digital proof but looks cooler, duller, or darker in real light.
- Scale issues - the logo is legible in a mockup and too small on the finished beanie.
- Edge curling - the woven edge lifts after stitching, especially on thicker or stretchier knits.
- Fit interaction - cuff tension changes the label angle, which changes the front view more than people expect.
The last point gets missed often. A sample can look fine on a table and fail once it is stretched on a headform or worn by a person. If you only judge the beanie while it is still, you are approving a fabric object, not the product customers will actually wear.
Approval is a control point. If a label is “close enough” but the logo reads too small or too high, the bulk run will repeat that mistake exactly. The sample exists to stop that from happening.
Sample approval process and timeline from proof to sign-off
A clean process usually runs in this order: artwork review, digital proof, woven label development, sample knitting, physical review, revisions, and final sign-off. Real projects are slower when the art file is still changing or when different stakeholders give conflicting feedback. The machine is rarely the only bottleneck; approvals are.
Lead time depends on what changes. If the art is final and the fit is already known, a simple revision can move in a few business days. A new Pantone match, placement change, or second physical sample usually pushes the cycle into one or two weeks. More revisions add more time, especially if sample feedback is scattered across emails and chats.
The fastest approvals happen when the decision rules are clear. Keep comments in one place, name one final decision-maker, and separate artwork approval from fit approval and packaging approval. That avoids the common trap where a label note turns into a full restart because someone reopens a settled color discussion.
When the factory asks for confirmation, answer with specifics: approve the artwork, approve the placement, approve the fit, or list the exact correction. That level of clarity shortens lead time and makes the sample record usable later if the same style is reordered.
For label construction choices, the team at Custom Labels & Tags is a useful reference point if you need to align trim construction before sampling starts.
For shipping and presentation basics, standards and trade resources like ISTA and Packaging School / packaging.org are worth checking early. Beanies are soft goods, but they still get folded, compressed, and repacked.
Fit, stitch, and placement checks that change the finished beanie
Once the sample is in hand, start with the mechanics. Check label width and height, centering, edge finish, stitch density, and whether the knit pulls the label out of square. These details decide whether the beanie looks intentional or rushed.
Fit matters just as much as decoration. Test cuff stretch, crown depth, slouch balance, and the way the beanie sits when worn. A label that looks perfect on a shallow cuff may disappear on a taller one. A slouch style with the label too high can make the branding feel accidental.
From a buyer’s point of view, the question is simple: does the branding still read cleanly when the beanie is worn? Check it from about one meter away, then check it again on a headform or on a person. That distance exposes most placement and scale problems quickly.
A consistent photo checklist helps keep reviews fair and repeatable.
- Front shot - confirms centering and logo readability.
- Side shot - shows cuff height and label angle.
- Back shot - checks seam alignment and knit consistency.
- On-head shot - reveals real-world fit and scale.
Lighting matters too. Warm light can flatten or yellow the color, while cool light can make it look harsher. If color accuracy is critical, compare the sample against the approved reference under more than one light source before you sign off.
Practical rule: if a problem is obvious in the first 10 seconds, your customer will probably see it too. That is enough reason to request another revision.
If the beanie will be sold in retail packs or shipped in cartons, check how the finish survives handling. Soft goods still get squeezed, folded, and re-stacked, and that can change the final appearance.
Cost, pricing, MOQ, and quote variables to pin down early
Pricing moves because the variables are real. Label size, stitch complexity, yarn choice, Pantone matching, packaging, and revision count all affect sample cost. A simple sample with a standard woven label can be modest. A custom build with multiple revisions can climb quickly.
A sample-only order often lands around $40-$120, depending on the label structure, revision count, and development work involved. Bulk unit pricing for Custom Woven Label Beanies often sits around $2.50-$6.00 per unit at moderate quantities, but fiber content, knit gauge, decoration method, and finish can move that number a lot.
MOQ affects the math as well. Lower quantities usually mean higher unit cost because setup is spread across fewer pieces. More customization can also introduce minimums or tooling fees. If a quote does not explain those inputs, it is incomplete.
| Option | Typical sample cost | What changes it | Best for |
|---|---|---|---|
| Standard woven label sample | $40-$80 | Basic artwork, one revision, standard stitching | Simple logo placement checks |
| Custom color match sample | $70-$140 | Pantone matching, yarn swaps, extra proofing | Brand color accuracy |
| Fit-adjusted sample | $80-$180 | Cuff height, crown depth, knit density changes | Retail-ready silhouette testing |
| Multi-revision development sample | $120-$250+ | Repeated label rewrites, new trim, redesign rounds | Complex programs or premium launches |
When comparing quotes, break them into parts: sample fee, setup or tooling, shipping, revision charges, and production unit price. A cheap sample can still lead to an expensive bulk order if the production spec was never locked. Ask for the missing variables before approval so there are no fake surprises later.
If the project includes FSC-certified inserts, swing tags, or cartons, check FSC early. Packaging choices affect cost, lead time, and final presentation, so they belong in the same approval conversation as the beanie itself.
Step-by-step approval checklist before you sign off
Here is the practical version of a Woven Label Beanies sample approval checklist. It is built to catch the issues that cause rework, extra charges, and delayed production.
- Verify the artwork. Check spelling, font weight, color codes, label text, and any legal or care information. If the sample shows a different version than the file, stop there.
- Inspect construction. Look at seam quality, label attachment method, yarn feel, stitch density, and whether the edges lie flat. Strong artwork cannot rescue weak build quality.
- Check placement. Measure from the seam to the label edge and from the cuff fold to the logo center. A few millimeters can change the front view.
- Test fit in real conditions. Stretch the beanie, fold the cuff, wear it, and view it under warm and cool light. A sample that only works in one condition is not fully approved.
- Match the use case. Retail, promo, outdoor teams, and premium gift sets do not need the same finish. Label size and hand feel should fit the intended audience.
- Document the result. Save final photos, mark the sample, and write down exactly what is approved and what still needs correction.
Documented approval matters because memory is unreliable. If the final note does not say what was approved, someone will later treat an almost-correct sample as the standard. That is how bulk orders drift away from the original plan.
Separate “approved” from “approved with changes.” If the label placement is right but the cuff is too tight, note that clearly. Specific feedback is faster to act on and easier to defend later if there is a question about the production version.
Common mistakes that trigger rework, delays, and extra charges
The biggest mistake is approving from a screen only. A mockup cannot show thread thickness, knit texture, or edge behavior. Those details appear in the physical sample, and if they are wrong, the bulk run will repeat them exactly.
Conflicting feedback creates another problem. One stakeholder wants the label larger, another wants it smaller, and a third already approved placement. The factory ends up guessing. If more than one person is involved, decide who owns the final call before the sample arrives.
Vague notes are expensive too. “Make it better” is not useful. Neither is “make the logo pop.” Say whether the issue is size, color, contrast, placement, or stitch density. If the factory has to interpret the comment, you pay for that interpretation in time or another sample.
Blunt version: if the sample is “close enough” and the gap is not documented, production will treat it as approved. Then the result is yours, not the supplier’s.
Another mistake is forgetting the rest of the product line. A polished knit cap with mismatched trim or random tag placement can feel less premium than a simpler but more consistent product. Buyers notice consistency even when they do not call it out directly.
A written checklist keeps the discussion tied to measurable details and away from taste debates that never end well. The goal is not to make everyone love the sample. The goal is to make everyone agree on what is actually being produced.
Final next steps: lock specs, save evidence, and release production
Once the sample passes, convert everything into one clear spec sheet. Include size, placement, color codes, label construction, packaging notes, and any tolerance limits that matter. That sheet becomes the production reference and the reorder reference.
Save the proof trail in one place: sample photos, comments, revision notes, and the final approval message. That matters most when an order gets reordered months later and nobody remembers which version was approved.
Before release, confirm quantity, ship date, carton plan, and any special handling instructions. Once production starts, every unclear detail gets more expensive. This is the last clean moment to fix anything still open.
If the sample is not approved, send a numbered fix list with deadlines. Do not send a soft “please revise” and hope the issue resolves itself. Production moves faster when the instructions are specific.
Used properly, a woven label beanies sample approval checklist keeps the project grounded in facts: placement, fit, color, price, lead time, and documentation. That is how you avoid the expensive kind of surprise and move from sample to bulk order without guessing.
How long does woven label beanie sample approval usually take?
A simple approval can move in a few days if the artwork is final and the fit is already known. Expect longer cycles when the label needs color matching, placement changes, or a second physical sample. Clear comments save the most time.
What should I check first on a woven label beanie sample?
Check spelling, placement, and label size before anything else. Then inspect the fit, cuff shape, and how the beanie looks when stretched on a head. If the branding reads wrong in the first 10 seconds, the sample is not ready.
How many sample revisions are normal before approval?
One revision is common when the buyer gives precise notes the first time. Two revisions are still normal for custom colors, placement changes, or fit tweaks. More than that usually means the spec sheet is unclear or the decision-maker keeps changing.
Does MOQ affect woven label beanie sample approval?
Yes. Low-MOQ orders often carry higher setup costs and less room for custom changes. A higher MOQ can improve unit price, but it does not remove the need to inspect the sample carefully. Always confirm whether the sample spec matches the production MOQ.
What is the biggest mistake buyers make with woven label beanie samples?
Approving too fast from mockups or a single photo instead of checking the physical sample in hand. The other common mistake is vague feedback that cannot be turned into a production change. Both issues lead to avoidable rework.


