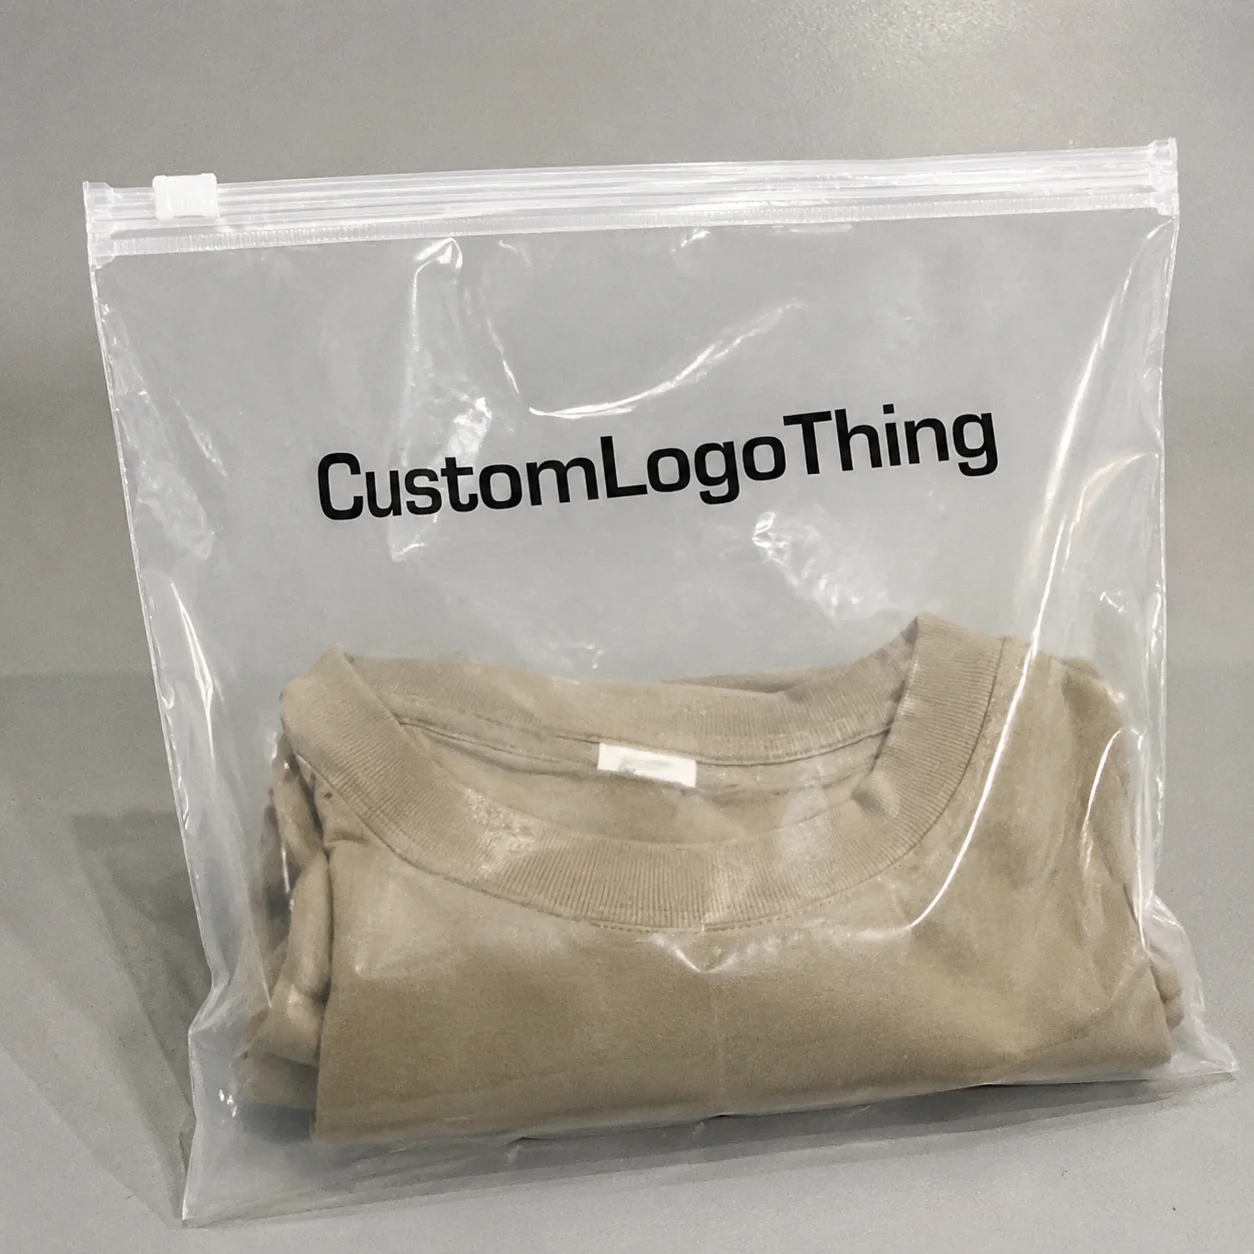
Embroidery changes packaging requirements in ways plain garments do not. Raised thread, dense stitching, appliqué, patches, and metallic accents all change how a garment folds, how it rubs during transit, and how it looks when the customer opens the package. That is why Custom Garment Bags for embroidered apparel are not just a finishing touch; they are a control point for protection, presentation, and cost.
From a packaging buyer’s perspective, the best bag is rarely the thickest one. It is the one that fits the garment, protects the decoration, and avoids unnecessary freight, storage, or labor costs. Overspecifying packaging happens more often than under-specifying it. Both waste money, but overspecifying is easier to miss because the excess cost hides inside the unit price.
The most common failure pattern is simple: the bag protects the base fabric but ignores the decoration. That mistake is expensive because embroidery damage often shows up after goods have already been packed, shipped, and received. Rework takes time. Returns take more. If the packaging spec is wrong, the garment can look used before it ever reaches the customer.
Why embroidered apparel needs better bag protection than plain garments
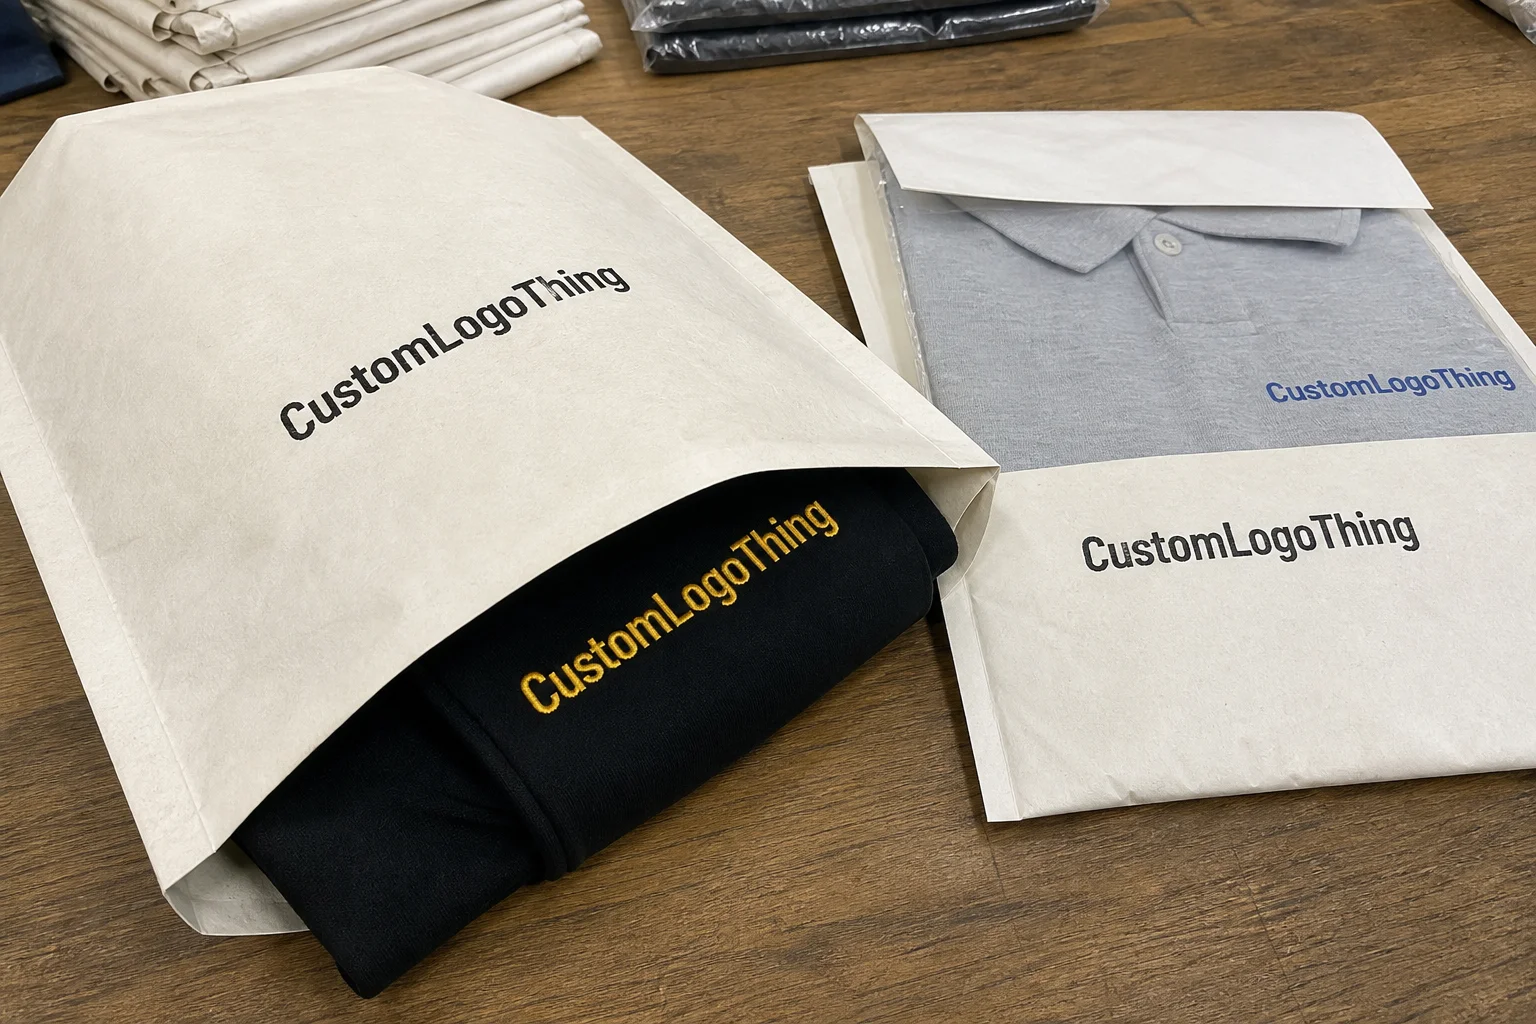
A plain tee can tolerate a lot. Embroidered apparel usually cannot. Raised stitching, chenille patches, beadwork, and thick logos create pressure points that snag against rough film or get flattened in a tight bag. Even a simple fold line can leave a visible imprint across a chest logo if the garment sits under stress for a week in a warehouse.
That is the core job of Custom Garment Bags for embroidered apparel: create enough clearance and surface protection so the decoration keeps its shape. Generic poly bags often work for undetailed basics, but they are sized for speed, not for decorated product. Dry-cleaning covers are a different category entirely. They are designed for hanging transport and dust protection, not for controlled branded packaging or retail presentation.
The first impression matters more than many brands admit. A premium embroidered hoodie stuffed into a cloudy, wrinkled sleeve bag sends one message. The same garment in a properly sized printed bag with a crisp fold sends another. Retail teams see the difference immediately, and so do buyers. Packaging influences perceived value before the garment is even unfolded.
There is also a practical cost angle. Small packaging improvements can reduce complaints tied to wrinkling, dust, and presentation damage. Not every return is caused by the bag, and packaging cannot fix a poor stitch line. Still, if the bag is too tight, too opaque, or too flimsy, it can contribute to dissatisfaction that looks like a product defect.
“The packaging doesn’t need to be luxurious. It does need to stop the decoration from being punished by the trip.”
That matters even more for premium programs where the embroidery is part of the product’s value proposition. If the decoration is the reason the garment costs more, the bag should be built to protect that value, not just surround it.
How custom garment bags work for storage, shipping, and retail display
Custom Garment Bags do four jobs at once: they block dust, reduce abrasion, buffer against light moisture exposure, and present the product neatly. That combination puts them at the intersection of product packaging and retail packaging. They are not just protective sleeves. They are part of the brand experience and part of the handling system.
Common formats vary by use case. Flat bags are the simplest and often the least expensive. zipper garment bags add repeated access and better reclosure for storage. Hanging bags work well for uniforms, coats, and showroom inventory. Gusseted bags allow extra width for bulkier pieces, while vented options help air move through stored inventory.
Closures matter more than most teams expect. A zipper that tracks poorly or a flap that opens under load defeats the purpose of the bag. Thickness matters too. A 1.5 mil film may be enough for lightweight folded shirts, while a 2.5 or 3 mil spec may be more appropriate for jackets or pieces with hard trims that could puncture thinner film during handling.
Real-world performance depends on the environment. E-commerce shipments get tossed, stacked, and compressed. Boutique display usually calls for clarity and a more premium finish. Bulk inventory storage prioritizes dust control, stackability, and access speed. One spec rarely wins every scenario, so the right choice depends on the path the garment actually travels.
For brands working across multiple channels, packaging often splits into three distinct roles:
- Shipping bag for transit protection and fulfillment speed
- Storage bag for warehouse dust and handling control
- Display bag for retail or wholesale presentation
That split sounds minor, but it changes the specification. A fulfillment bag may not need high clarity. A boutique display bag may need better print registration and cleaner seams. A storage bag may prioritize cost and moisture buffering over graphics altogether. Treating all three as one product is how packaging budgets get distorted.
There is also a difference between what looks neat on paper and what holds up on a packing line. If the bag is hard to open, slow to load, or prone to static cling, labor costs rise even if the unit price looks attractive. Packaging that saves a few cents but adds seconds per pack usually loses the arithmetic.
Key material and construction factors that affect performance
Most garment bags are built from LDPE, PP, or recycled-film variants. LDPE is flexible, soft, and common for protective sleeves. PP offers a clearer, crisper look, which helps presentation. Recycled-content options can make sense when a brand wants to reduce virgin plastic use, but the tradeoff should be tested rather than assumed. Recycled film is not automatically weaker, and it is not automatically better either.
Construction details often matter more than the base resin. Mil thickness, seam strength, hanger openings, venting, zipper quality, and fold dimensions all affect the bag’s actual performance. A clear film with poor seals fails faster than a slightly lighter film with sound sealing and the right geometry.
Raised embroidery changes the packaging spec in a concrete way. If the decoration stands proud of the fabric, the bag needs a little more internal room so the thread does not rub against the film. Beadwork and metallic threads can be more sensitive. Patches and appliqué create edges that can dig into tight folds. In those cases, a gusset or wider format is often smarter than simply increasing thickness.
Sustainability deserves an honest look. Thicker is not always greener. If a 2.5 mil film does the job, moving to 4 mil because it feels safer usually adds material, weight, and cost without much benefit. Packaging design should follow function first, then reduction. That approach lowers waste more reliably than choosing the most virtuous-sounding material on a spec sheet.
For buyers aligning packaging with broader sustainability goals, the EPA and FSC both publish useful guidance on material stewardship and responsible sourcing. See the EPA recycling guidance and FSC certification resources for context on material choices and end-of-life considerations.
A practical rule of thumb: choose the lightest bag that still survives the real handling sequence. If a sample pack test passes, that is better evidence than a generic spec sheet or a promise that “thicker is safer.”
| Bag type | Typical strength | Best for | Tradeoff |
|---|---|---|---|
| LDPE flat bag | 1.5-2.5 mil | Folded tees, light embroidered tops | Less premium feel |
| PP clear bag | 1.8-3 mil equivalent | Retail display, branded packaging | Can crease more sharply |
| Gusseted zipper bag | 2.5-4 mil | Jackets, uniforms, raised embroidery | Higher cost and longer lead time |
| Recycled-film bag | Varies by resin blend | Sustainability-led programs | Needs testing for clarity and sealing |
That table is only a starting point. A 2 mil flat bag can outperform a heavier option if the fold is correct and the decoration sits away from the seal line. The reverse is also true: a heavy film can still fail if the dimensions force the embroidery into a pressure point.
Custom garment bags for embroidered apparel: cost, pricing, and MOQ
Pricing is driven by five things: material, dimensions, print coverage, closure style, and volume. If any one of those moves, the quote moves with it. A simple unprinted LDPE sleeve at scale may be inexpensive, while a Custom Printed Zipper bag with a hanging hole and gusset can rise meaningfully in cost.
MOQ is often the real decision point. Higher minimums usually lower unit cost, but they also tie up cash and storage. Smaller brands pay more per unit because setup costs are spread across fewer pieces. That is not a penalty; it is the math of custom manufacturing. A buyer ordering 1,000 units should expect a different per-piece number than one ordering 20,000.
On many programs, a plain custom bag can land in the low tens of cents per unit at volume, while printed or feature-heavy versions can move into the higher cents range or more depending on size and complexity. That is a broad range, not a quote. Film choice, print colors, zipper type, and gusset depth can shift the final number as much as volume does.
When comparing quotes, ask what is actually included. Does the price cover printing plates or setup? Are samples extra? Is freight excluded? Is the quoted bag size finished size or flat size? Does the supplier allow overage for production spoilage? Those details can change a quote by a surprising margin.
Here is a realistic framework buyers can use:
- Basic custom bag: usually the lowest unit price, but limited in branding and closure options
- Mid-tier branded bag: often the best balance for most apparel lines
- Premium display bag: higher cost, better for retail packaging and presentation-heavy programs
If you are sourcing through broader packaging programs, it can help to compare the bag with other branded packaging elements like labels, tissue, or Custom Packaging Products that support the same brand story. The best cost structure often comes from coordinating packaging design, not buying each item in isolation.
Honest caution: the cheapest option is not always the low-cost option. If a bag fails and damages embroidery, the replacement garment, rework time, and customer service cost can erase savings very quickly. Packaging decisions should be measured against damage risk, not just purchase price.
For brands with frequent replenishment, reordering consistency matters too. If the same spec is interpreted differently across suppliers or across production runs, a bag that fit perfectly last season can become too tight or too loose on the next order. A few millimeters on paper can turn into real handling problems on the packing line.
Production steps, timeline, and lead time expectations
The production flow is straightforward, but each step can slow down. First comes spec selection: size, film type, closure, and print layout. Then artwork approval. Then a sample or proof. After that, production, quality inspection, and shipment. Even a clean order has friction at the approval stage if the logo placement or bag dimensions are not clearly defined.
Simple custom bags may move faster than zipper or gusseted styles, but timing still depends on factory load and freight mode. A realistic lead time often includes 12-15 business days from proof approval for simpler runs, then additional time for shipping. More complex builds can take longer. Seasonal congestion can add delays, especially around retail resets and peak apparel launch periods.
There is a difference between turnaround and true lead time. Turnaround is what the supplier quotes for production. True lead time includes artwork changes, proofing, sample review, and the time it takes for goods to move. Buyers who forget that gap often end up with finished packaging that arrives after the apparel does.
Lead time also depends on whether the order requires a new tooling step. Printed bags, custom zipper pulls, special venting patterns, and nonstandard dimensions can extend the schedule. If the packaging is tied to a product launch, the safe move is to build extra time into the calendar rather than hope the shortest estimate holds.
One practical planning tip: order packaging before your inventory lands, not after. If embroidered apparel is launching in waves, stagger the bag replenishment to match the production schedule. That keeps fulfillment from stalling because finished garments are sitting open without the right packaging.
For buyers building internal planning standards, ISTA testing protocols can also be a useful reference when packaging needs to survive transit and handling stress. See ISTA transport testing standards for context on how packages are evaluated under distribution conditions.
Step-by-step checklist for choosing the right bag spec
The best spec starts with the garment, not the bag. Measure the apparel after folding or hanging, depending on how it will be packed. A folded embroidered polo needs different dimensions than a structured jacket. If the piece includes heavy stitching, decorative sleeves, or a bulky collar, add room so the decoration is not compressed.
- Measure the finished garment in its packed state.
- Identify decoration zones that need clearance.
- Decide how the item ships: flat, hanging, or boxed.
- Choose material and thickness based on handling risk.
- Test with a sample garment before approving production.
That sample test matters more than the spec sheet alone. Insert the real garment, close the bag, and inspect for pressure points, snag risk, and whether the logo sits flat or gets rubbed by the film. Then check shelf presentation. A good package should protect the piece and make it easy to handle, not just pass a dimension check.
It also pays to document the final spec sheet carefully. Record finished dimensions, film thickness, closure type, venting, print placement, and approved artwork files. Reorders are where inconsistency creeps in. One supplier interprets the size one way, another interprets it another way, and suddenly the same garment bag no longer fits the same product.
That level of discipline is especially useful if your line includes multiple categories: lightweight tees, uniforms, premium outerwear, or embellished apparel. Different product types may need different bag families, even if the brand graphics stay the same.
A useful internal check is to treat the bag like part of the product spec, not a generic consumable. If the garment changes, the packaging should be reviewed again. Fabric weight, decoration height, folding method, and channel mix can all affect the final bag selection.
Common mistakes that damage embroidered apparel or inflate packaging costs
The first mistake is choosing a bag that is too small. Tight packaging crushes raised embroidery, presses decorative trims into hard folds, and can leave visible imprints that customers interpret as product defects. If the bag looks neat but the garment arrives flattened, the packaging failed.
The second mistake is over-specifying film thickness. A heavier bag feels safer, but that feeling is not always supported by need. If a lighter film already protects the garment through shipping and storage, extra thickness only adds cost, weight, and material usage. That is especially relevant when brands are trying to improve the sustainability profile of product packaging.
The third mistake is ignoring ventilation or moisture control. Stored inventory can trap humidity, especially in long transit lanes or crowded warehouses. Vented bags are not mandatory for every item, but they can reduce condensation risk and odor buildup when garments are packed soon after finishing.
The fourth mistake is skipping a final check on branding details. Logo placement, bag clarity, and hanger compatibility all affect the finished result. A beautiful embroidered shirt inside a cloudy bag with a misaligned print still looks off. Packaging design should support the garment, not distract from it.
Here is a short list of red flags:
- Bag width leaves the embroidery pressed against the seam
- Closure opens under light handling
- Film clouds the view of the garment
- Printed logo sits off-center
- Hanger hole does not match your hanger style
Another common miss is ordering a “one size fits all” solution for a line that clearly is not one size. A lightweight polo, a structured uniform shirt, and an embroidered jacket behave differently in packaging. Treating them as the same product can create either excess material or insufficient clearance, and both outcomes are avoidable.
These mistakes are easy to prevent once you treat packaging as part of the product, not an afterthought. That is the difference between generic supply buying and actual branded packaging management.
Next steps: request samples, compare quotes, and lock the final spec
Start with two or three candidate specs, not ten. Too many options slow decisions and blur the tradeoffs. Request physical samples or proofs, then test them with the actual embroidered garments they are meant to hold. A packaging sample without the garment tells you very little.
When comparing suppliers, look at total landed cost, not only unit price. Add setup, sampling, freight, customs if relevant, and any extra charges for artwork revisions or special closures. The cheapest quote can become the most expensive if it omits half the real cost.
Once you have a winner, freeze the spec sheet. Lock in finished dimensions, material, film thickness, print file, and closure style. Then set a reorder trigger so you are not scrambling when stock gets low. That kind of discipline keeps retail packaging consistent across seasons and prevents small supplier changes from creating large surprises.
If you are sourcing Custom Garment Bags for embroidered apparel for the first time, the smartest approach is simple: test, compare, then commit. Not because packaging should be complicated, but because decorated apparel has less tolerance for guesswork than plain basics do. The right bag protects the stitching, supports the brand, and keeps the product looking like it should from warehouse shelf to customer hands.
There is a final practical point worth keeping in mind. Packaging is easiest to standardize after a few rounds of feedback, not on day one. The first spec is a draft, even if it performs well. Inspect returned samples, ask fulfillment teams where the process slows down, and watch for repeated damage patterns. Those signals are often more useful than a supplier’s generic recommendation.
Frequently asked questions
What are the best custom garment bags for embroidered apparel with raised stitching?
Choose a bag with enough depth and width to avoid compressing textured embroidery or appliqué. A smooth interior, appropriate thickness, and a size that lets the garment lie flat without pressure points usually matter more than added material weight. If the decoration is bulky, test with a real sample before approving production.
How much do custom garment bags for embroidered apparel usually cost?
Price depends on material, size, print coverage, closure style, and order quantity. Higher MOQ usually lowers unit cost, while specialty features raise it. For many programs, simple bags may cost only a few cents to the low tens of cents each at volume, while printed zipper or gusseted styles run higher. Ask for a full quote that includes setup, sampling, and freight so you can compare suppliers accurately.
What is a realistic turnaround for custom garment bags?
Simple custom bags may move faster than zipper, gusseted, or heavily printed versions. Lead time usually includes artwork approval, sampling, production, quality checks, and shipping. A common production window is about 12-15 business days after proof approval for straightforward runs, but complex specs and peak seasons can extend that. Build in extra time when the packaging is tied to a launch date.
Do embroidered garments need vented garment bags?
Vented bags can help reduce moisture buildup during storage or shipping. They are especially useful for bulk inventory, warehouse storage, or garments packed soon after finishing. If the apparel is traveling long distances, airflow can be a practical safeguard against odor and condensation.
How do I choose the right size custom garment bag for embroidered apparel?
Measure the garment after folding or hanging, depending on how it will be packed. Add room for raised stitching, bulky collars, or decorated sleeves so nothing gets crushed. Confirm the final fit with a sample pack test before placing a full order.